
Climb milling, also called down milling, is a CNC milling method where the cutter rotates in the same direction as the feed. The chip is thickest at entry and gets thinner as the tooth leaves the cut. This chip shape keeps rubbing low, improves surface finish, and cuts cooler. Shops report longer tool life (often up to 50%), lower power draw, and more stable forces that push the work down into the fixture. With modern CNC milling machines that control backlash, climb milling is the first choice for finish passes and many roughing toolpaths.
If you’re looking for precision CNC machining services or high-quality custom parts, visit U-Need — a trusted supplier offering advanced CNC solutions and part manufacturing for industries worldwide.
If you came here for the short answer: on a modern CNC with tight ballscrews and good fixturing, choose down milling for most operations. Use conventional milling (also called up milling) for rough scale, cast iron skin, and older machines with noticeable backlash. The rest of this guide gives you a clear comparison, the physics behind the cut, tested setup steps, material-specific advice, case studies, and fixes for common problems—so you can confidently improve surface finish, tool life, and throughput.
Climb vs Conventional Milling: At‑a‑Glance Comparison
Understanding different milling processes, including climb milling and conventional milling, makes it easier to see why conventional and climb milling behave differently in finish, tool life, and machine forces.
Definition, Motion, and Chip Formation
People often ask about the differences between climb and conventional milling and how the cutting tool’s teeth climb onto the workpiece surface. In down milling, the cutter rotates with the direction of the cut, producing a thick-to-thin chip that reduces rubbing and improves control over the cutting process. The downward force of climb milling is generally enough to press the workpiece into the machine table, helping reduce chatter and vibration. This is why climb milling can lead to a smoother surface finish compared with conventional milling. The chip forms and then peels away behind the cutter, so it does not get dragged back under the next tooth. In conventional milling, the cutter rotates against the feed. Each tooth starts rubbing with a thin chip and leaves with a thick chip. Those thin chips and rubbing at entry raise heat and wear the edge, and chips are more likely to get re-cut.
A simple way to picture it: in climb milling, the teeth “climb” onto the workpiece surface and push down into the table; in conventional milling, the teeth “pull up” from the table side and lift the workpiece if the hold-down is weak. The difference between these two milling methods shows up in finish, tool life, and the forces your machine must control.
Pros and Cons by Outcome (Surface Finish, Tool Life, Power, Fixturing)
Here’s a compact comparison that reflects common shop results on modern CNCs.
Surface finish
- Climb milling: Climb milling is often preferred for a smoother surface finish due to the teeth climbing onto the workpiece and thick-to-thin chip formation, resulting in fewer re-cut chips.
- Conventional milling: Always conventional milling initially on rough or scaled surfaces, producing a rougher surface on clean stock due to thin entry chips that rub the material.
Tool life
- Climb milling: Often +40–60% tool life; up to +50% is a common rule of thumb
- Conventional milling: Baseline; more wear from rubbing and heat
Power draw
- Climb milling: Lower cutting forces and power for the same material removal
- Conventional milling: Higher force and heat
Workholding forces
- Climb milling: Downward resultant forces aid workholding and reduce chatter
- Conventional milling: Upward forces can lift the work; needs stronger clamps
Stock condition sensitivity
- Climb milling: Best for clean or machined stock; can chip on hard skin
- Conventional milling: Safer on scale, cast iron skin, and very rough surfaces
Machine requirements
- Climb milling: Needs minimal backlash and good axis control
- Conventional milling: More forgiving of older or manual machines
When to Choose Each (Decision Rules)
For finishing passes, milling starts with a climb cut to achieve smoother surfaces and reduced tool wear on modern CNC machines. Choosing conventional or climb milling depends on stock condition, material, and machine rigidity. It shines on finish passes, thin floors, thin walls, and stable roughing toolpaths with light radial engagement. It is especially effective in aluminum and stainless, and it helps with heat control in titanium. On a manual mill or older CNC with looseness, conventional milling often keeps you safer. For materials like cast iron, conventional milling is safer initially to avoid chipping the tool edge. For interrupted cuts and weld seams, test conventional first or remove the skin before switching to climb.
A simple decision flow you can follow:
- Machine condition: If the machine has noticeable backlash or sticky ways, lean conventional. If backlash is minimal and servos are tight, climb.
- Material: Clean steels, aluminum, titanium, and most plastics favor climb. Cast iron and hot-rolled scale favor conventional until the skin is removed.
- Stock condition: If the surface is rough or has hard skin, conventional until you create a clean surface. Then climb.
- Operation: For finishing, use climb. For roughing, use climb with light radial and deep axial (adaptive/HEM), unless stock is very rough.
Is climb milling better than conventional milling?
- The advantages of climb milling include improved surface finish, extended tool life, and lower power consumption on modern CNC machines.
- Exceptions: Depending on the machine and material, you might choose milling or conventional milling approaches, but modern setups often favor climb passes.

How Climb Milling Works: Forces, Chips, Heat (Down Milling)
Understanding the forces, chip formation, and heat during the milling process helps explain why milling a part using climb milling often improves finish and reduces wear. Differences between climb milling and conventional milling appear in chip thickness, heat, and tool deflection. Grasping these basics helps explain why it improves finish, reduces wear, and demands careful machine setup.
Force Vectors, Backlash Sensitivity, and Stability
In down milling, the main force vector points down into the table with a slight pull in the feed direction. This stabilizes the work and helps thin floors and walls resist chatter. That downward force is a big reason why climb milling often gives a better finish on thin sections. However, machines prone to backlash may need conventional milling to avoid tool grab or deflections during the cutting process. But this same pull can “grab” slack in a worn leadscrew. On a loose axis, the tool can jump ahead, dig in, and snap or gouge the part. That is why climb milling requires low backlash and a well-tuned servo loop. Modern CNCs handle this well, which is why climb is the default today.
Chip Evacuation, Heat Generation, and Work Hardening
Climb milling throws chips behind the cutter, away from the cutting edge. Less re-cutting means less friction and less heat. Because the tooth starts with a thick chip, it cuts rather than rubs. This lowers work hardening in tough materials like austenitic stainless. In conventional milling, the tooth rubs before it cuts, keeping heat near the edge and potentially hardening the work surface. Operators should monitor thermal exposure and use proper coolant. WHO says that prolonged exposure to heat and contaminated cutting fluids can increase occupational health risks, emphasizing the importance of proper fluid management. One caveat: hot-rolled steel and cast surfaces often have a hard skin. Climb milling hits that hard layer at maximum chip thickness, which can chip the edge. In those cases, conventional at first is safer.
Tool Wear, Edge Integrity, and Deflection
Because down milling avoids rubbing at entry, edge wear is slower and more uniform. Many shops see tool life gains in the 40–60% range when they switch finishing from conventional to climb. Wear is still tied to heat, chips, and tool material, but the thick-to-thin chip shape is friendly to carbide edges. Tool deflection in climb is mostly perpendicular to the cut and can push the tool slightly into the wall or floor. That’s good for finish if stock is left for a final pass, but it can shift size if you don’t plan for it. Leave a small finish allowance and measure mid-process when tolerances are tight.
Does climb milling reduce tool wear?
Yes. Less rubbing at entry, cooler chips, and fewer re-cut chips reduce abrasive and thermal wear, which extends tool life.
Machine, Tooling, and Setup Requirements for Climb Milling
A successful climb milling process requires a rigid machine, minimal backlash, and properly chosen tooling and workholding. Understanding key requirements for rigidity, backlash, tool choice, and fixturing sets the stage for safe, efficient, and precise cutting.
Backlash, Rigidity, and Servo/Leadscrew Considerations
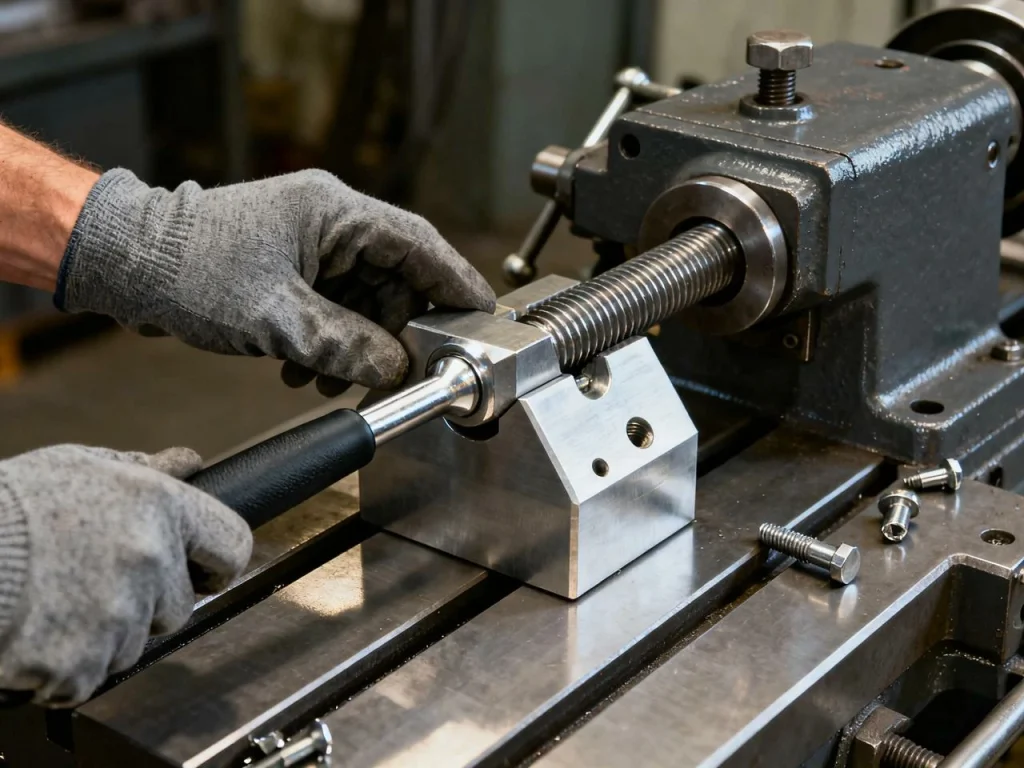
Down milling demands a tight machine. Backlash should be minimal. Ballscrews should be in good shape, and a backlash eliminator or compensation in the control helps safely perform climb milling. Ways, linear guides, and spindle bearings must be healthy. If the table moves when you push it by hand, or if you can feel play reversing axis motion, address that first. A short checklist helps:
- Verify backlash on each axis with an indicator.
- Inspect ballscrews and couplings; adjust or replace if loose.
- Check spindle runout and bearings; listen for noise and heat.
- Confirm axis tuning and look-ahead functions in the control.
- Lock or snug gibs on manual mills; test backlash before climb passes.
Tool Geometry, Coatings, and Holder Choices
Climb milling works best with a sharp cutting edge. Positive rake and polished flutes help in aluminum. Edge-prepped or honed corners and a small corner radius help in steels to resist micro-chipping. Coatings should match the material: high-heat coatings for steels and superalloys; low-adhesion coatings for aluminum. Good holders matter because runout kills edges. Shrink-fit, hydraulic, or well-maintained collets keep runout low and the path stable.
Workholding, Fixturing, and Thin-Wall Support
The downward force of down milling helps workholding, but you still need smart support. Thin walls need backing. Thin floors need material under them until the last pass. For plates, use a vise with parallels or a vacuum setup with a sacrificial layer. For thin webs, leave tabs or ribs and remove them later. When a feature is delicate, plan step-downs and rest machining so you only remove what the tool can handle without flexing the part.
Safety and Risk Mitigation (Pull-in, Kickback, Chatter)
The main risks in down milling are tool pull-in on a loose axis, chatter in a flexible setup, and broken tools on harsh entries. Lower radial engagement reduces force spikes. Gentle entries like ramps or helixes spread the load. Avoid full-width slotting when possible. If you must slot, consider a pilot slot with conventional milling to clean the skin, then climb mill the finish size. Coolant choice matters: air or MQL helps aluminum and plastics; high-pressure coolant can help steels but avoid blasting chips back into the cut. According to OSHA’s metalworking fluids exposure evaluation guidance, metalworking fluid mist is considered an airborne hazard, and shops must use exhaust ventilation or local exhaust systems, along with PPE, to control mist exposures. Always dry-run a complex toolpath above the part.
Parameters & How‑To: Feeds, Speeds, Toolpaths
Before dialing in feeds, speeds, and toolpaths, it helps to follow a clear setup sequence. Checking machine, tooling, and workholding first ensures your climb milling cuts are safe, efficient, and consistent.
Setup Checklist and Order of Operations
This step-by-step checklist will help you make safe and efficient climb milling cuts on any rigid CNC.
- Verify machine backlash and basic rigidity.
- Select a sharp tool and a low-runout holder suited to the material.
- Choose a toolpath that keeps radial engagement light and chip load constant (adaptive, trochoidal, or other HEM-style paths).
- Plan workholding and test clamping force on a scrap or test block.
- Program conservative entry moves (ramp/helix) and avoid burying the tool.
- Run a trial cut with a safe step-over and measure chips and cut sound.
- Adjust feed per tooth to achieve target chip thickness, not a “feel-based” feed.
- Leave a small finish allowance and use a dedicated climb finish pass.
Feeds, Speeds, and Engagement Targets
Climb milling works best when chip thickness is controlled. As radial engagement (step-over) gets smaller, you must raise feed per tooth to keep chip thickness from falling into the rubbing zone. Use a chip thinning calculator when you can, or apply your CAM’s built-in feature. A good starting pattern for high-efficiency milling is deeper axial engagement (often 2–3× diameter for suitable tools and machines) and light radial (often 10–20% of diameter). This spreads heat along more of the flute, cuts forces, and suits climb milling very well.
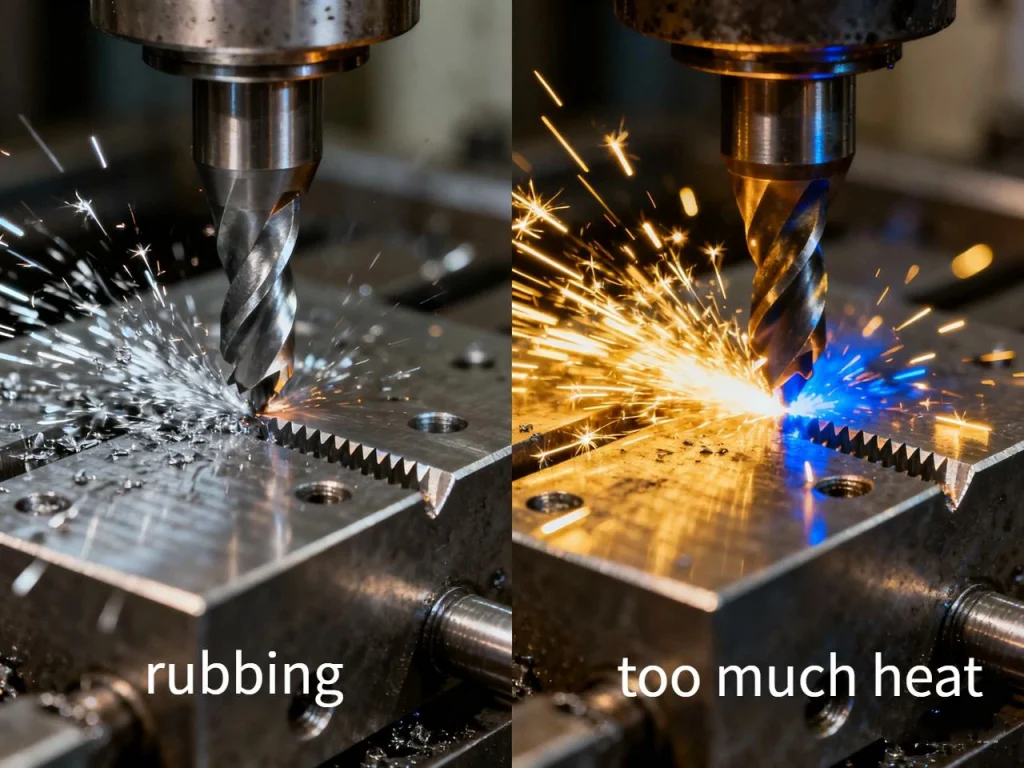
If you notice a shiny wall with no visible feed marks, you may be rubbing. Increase feed per tooth slightly, lower step-over, or add a spring pass if size drifts. Watch spindle load and chip color. Dry gray chips in steel can mean rubbing. Straw or blue can mean too much heat. In aluminum, long stringy chips suggest poor chip evacuation or too low feed.
Entry/Exit, Lead-in, and Step-over Tactics
How the process starts matters: always use ramp or helical entries to avoid sudden tool grab at the beginning of a climb pass. Use lead-ins and lead-outs that avoid rubbing across the finish wall. Keep some stock on walls and floors for a final climb finish pass. That pass should use low radial engagement and high spindle speed with a steady feed to get the best surface finish. If your CAM allows, set a one-way, climb-only finish on thin walls to reduce deflection marks.
Can you climb mill on a manual mill?
You can, but it is risky if the machine has backlash. Keep gibs tight, use very light cuts, and be ready to stop. For many manual setups, use conventional milling for roughing and leave only a very light climb finish if the machine is tight.
Material‑Specific Playbook (Aluminum, Steels, Cast Iron, Plastics)
Different materials behave differently under climb milling. Understanding each material’s quirks—softness, hardness, heat sensitivity, or chip behavior—helps you choose feeds, speeds, and strategies that protect the tool and deliver the best finish.
Aluminum & Titanium Alloys
Aluminum loves climb milling. Sharp, high-rake tools with polished flutes and a low-adhesion coating cut clean and bright. High spindle speeds with air blast or MQL keep chips out of the cut. Keep radial low and feed to maintain chip thickness. In titanium, heat control is key. Climb milling helps because the chip carries heat away. Use modest surface speed, high rigidity, and generous coolant. Avoid dwelling. Light radial and consistent chip load reduce tool fatigue and help tool life.
Carbon/Alloy Steels & Stainless
In steels, climb milling improves edge life and lowers burrs. Use heat-resistant coatings and consider a small corner radius to protect the edge. Keep radial engagement modest and plan deep axial passes when possible. Stainless, especially austenitic grades, work hardens if you rub. That makes climb milling valuable, but only if you guard against rubbing. Keep feed per tooth up to your tool’s recommended range, and do not baby the tool on entry. Aim for a firm, clean cut at the start of the tooth path.
Cast Iron & Hot‑Rolled Steel
Cast iron often has a hard, abrasive skin. Hot-rolled steel has a hard outer layer from the mill. In both cases, conventional milling is safer at first because the thin-to-thick chip eases into the hard layer and protects the edge from a sudden hit. Once you machine past the skin and expose consistent material, switch to climb milling for better finish and longer life. Cast iron usually runs dry because chips crumble to dust; keep your machine protected and extract dust well.
Plastics & Composites
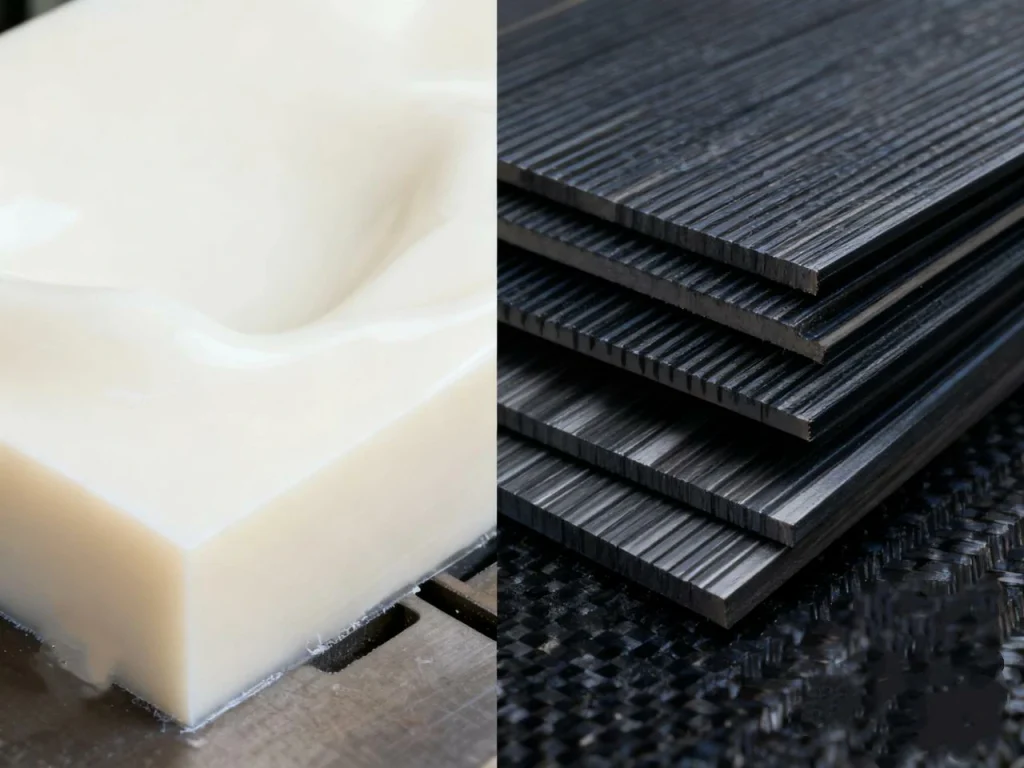
Plastics need sharp, high-rake tools and careful heat control. Climb milling helps reduce burrs because the cutting action is clean and chips are carried away. Use air for chip clear-out, avoid rubbing, and keep feeds high enough to form a chip. In composites, support the part well and consider special geometries to avoid delamination. Climb often gives a cleaner edge when the setup is stable.
Case Studies, Metrics, and ROI from Industry
Real-world results show how climb milling impacts surface finish, tool life, and overall productivity. Looking at case studies across aerospace, automotive, and modern CNC operations highlights measurable gains and the ROI you can expect.
Aerospace & Automotive Wins (Surface Finish, Tool Life)
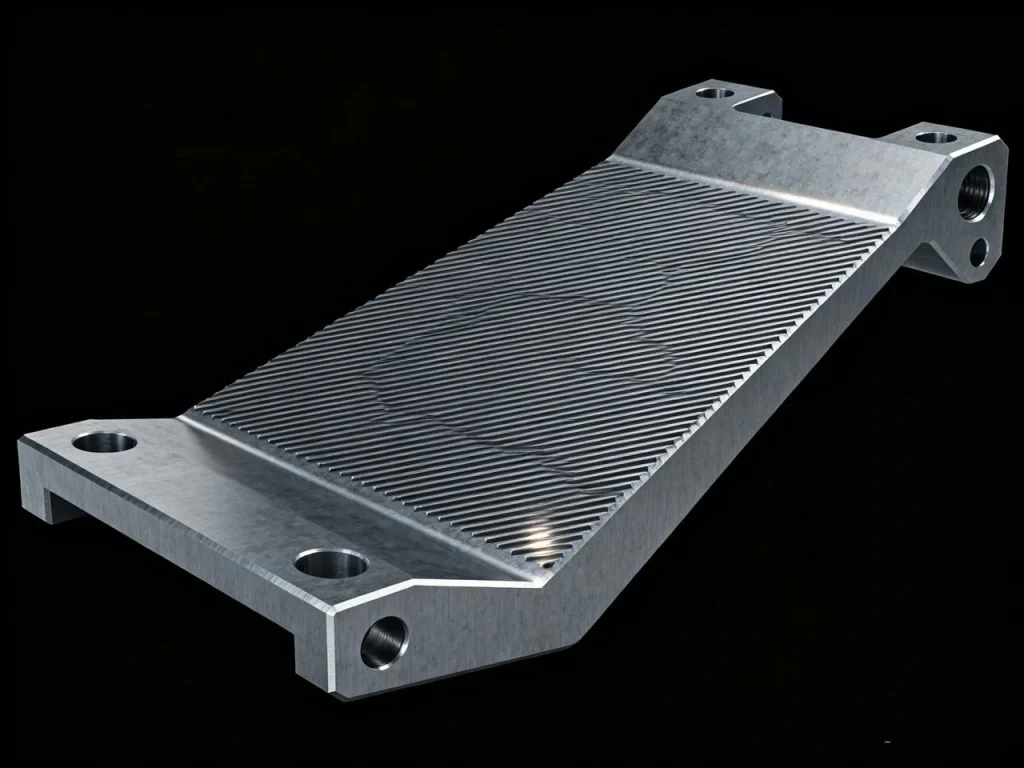
In aerospace finishing of aluminum and titanium parts, moving from conventional milling to climb finish passes often cuts surface roughness by about a third, with many teams reporting around a 30% Ra improvement. Tool life gains of 40–60% are common in these finishing cuts, consistent with the idea that less rubbing and less re-cutting preserve the edge. In automotive machining of steel housings and brackets, climb milling in adaptive roughing reduces load spikes and keeps spindle power steadier, which keeps cutters alive longer.
Throughput and MRR Gains on Modern CNCs
On machines with tight ballscrews and modern controls, shops often see up to 25% faster material removal rates when they switch to climb milling with optimized toolpaths. The secret is not just the direction—it’s the whole recipe: lighter radial, deeper axial, proper feed per tooth, and steady engagement. Because the tool is not hammered by thick chips at exit, it stays sharp and cycles can run faster for longer periods.
Before/After Benchmarks and What Changed
Table: Example benchmark snapshots
| Part / Material | Method Change | Result | What Changed |
| 6061 aluminum plate, finishing walls | Conventional finish → Climb finish | Ra improved from 1.2 µm to 0.8 µm; tool life +50%; cycle time –10% | Climb-only finish pass, higher RPM, light axial engagement (ae), ramped entry |
| 4140 steel pocket roughing | Slotting conventional → Adaptive climb | Cycle time –22%; tool life +45% | 15% radial engagement, 2×D axial depth, constant chip load, air + coolant |
| Ti-6Al-4V flange finish | Mixed → Climb-only with rest finishing | Tighter size control; tool life +35%; fewer burrs | Climb finish, reduced stepover, controlled heat, probe checks |
How much productivity can climb milling add?
Expect 10–25% cycle time gains in roughing with the right toolpath and machine control, plus sizable tool life improvements that cut tool cost and changeovers. Results depend on rigidity, fixturing, and CAM strategy.
Troubleshooting
When things go wrong in climb milling, issues usually show up as chatter, tool grab, or poor surface finish. Understanding common symptoms and their causes helps you troubleshoot efficiently and get consistent results.
Chatter, Vibration, and Poor Finish
If your climb pass chatters or leaves washboard marks, first look at rigidity and engagement. A high step-over pounds the tool. Reduce radial engagement to 10–20% of diameter, raise feed per tooth to keep chip thickness, and consider a deeper axial cut if your tool allows it. Check that chips are not falling back into the cutter; an air blast often fixes smear marks in aluminum. Change lead-in and lead-out to avoid loading the tool on thin walls. Shorter stick-out and a stiffer holder can make a night-and-day difference.

Tool Pull-in, Breakage, and Dimensional Drift
Sudden tool grab points to backlash or an aggressive entry. Verify axis backlash with an indicator and use ramp or helix entries instead of straight plunges. If the tool chips, it may be dull or your chip load is too low at engagement. Sharpen or replace the tool, and ensure a proper feed so the tool cuts and does not rub. Dimensional drift can come from deflection. Leave finish stock, use a light climb finish pass, and measure mid-process on tight parts.
Advanced Strategies & Trends in Climb Milling
Advanced climb milling combines smarter toolpaths, machine tech, and process monitoring. Understanding these strategies helps you boost efficiency, protect tools, and maintain precision on modern CNCs.
High‑Efficiency Milling (HEM) vs Traditional Climb Passes
High-efficiency milling is not just “climb passes.” It uses light radial engagement, deep axial engagement, and constant chip load. The goal is steady heat and force on the cutter. Climb milling fits this idea because the thick-to-thin chip reduces rubbing and heat at the edge. If you are still roughing with heavy step-overs, test HEM-style toolpaths. You often get faster cycles, smaller force spikes, and longer tool life.
CAM Features and Toolpath Optimization
Modern CAM tools include trochoidal paths, adaptive clearing, smoothing filters, and corner rounding. These features keep the cutter’s engagement consistent and avoid sudden force jumps. For example, an adaptive toolpath that limits maximum step-over at corners keeps the chip load constant. Pair that with climb milling and your spindle load graph becomes smooth, which is good for edges and bearings.
Machine Tech: Backlash Compensation, Servo Stiffness, Control Features
Controls with good look-ahead, jerk control, and dynamic offsets help the machine follow climb toolpaths without overshoot. Backlash compensation, tight servo tuning, and healthy ballscrews prevent pull-in. If your control offers engagement limits or feed-smoothing options, use them to keep forces predictable on thin walls and floors.
Measurement and Verification
Inline probing can measure features between roughing and finishing, so you can update tool wear or work offsets before a critical climb finish pass. Force and vibration sensors give early warnings of chatter, and thermal compensation keeps dimensions tight on long runs. These checks help you push climb milling speeds without losing accuracy.
Quick Parameter Reference
The numbers below are generic starting points to test on a rigid CNC with a sharp tool. Always adjust for your specific tool, holder, and machine.
Table: Typical starting targets (climb milling)
| Operation | Radial Engagement (ae) | Axial Engagement (ap) | Entry | Coolant |
| HEM roughing, steels | 10–20% of tool diameter | 1.5–3× tool diameter (tool and holder permitting) | Helix or ramp; avoid straight plunges | Flood or high-pressure; keep chips out |
| HEM roughing, aluminum | 10–20% of tool diameter | 2–3× tool diameter (tool dependent) | Helix; air or MQL for chip evacuation | Air/MQL; avoid chip re-cut |
| Finish pass, most metals | 2–8% of tool diameter | Full feature height or as needed | Lead-in/out; climb-only finishing | As material requires; target clean chips |
Practical Scenarios to Guide Your Choice
- In horizontal milling processes, the choice between conventional vs climb milling affects chip evacuation, direction of feed, and table forces, e.g., when milling a part such as a clean 6061 plate with a modern CNC. Finish pass would make a big difference if the radial engagement is too high. Program an adaptive roughing toolpath with light radial and deep axial. Finish with a climb-only pass and a light step-over.
- You are facing hot-rolled steel with visible scale on an older knee mill: start conventional. Take a light skim to remove the skin. If the finish needs to improve and the machine allows, follow with a very light climb finish.
- You are pocketing 304 stainless: use climb with a steady chip load to prevent work hardening. Keep the tool sharp and avoid slow entries.
- You are finishing a thin wall in titanium: climb pass only, low radial, high rpm, and good coolant. Use probe checks if size is tight.
Common Myths and Useful Rules
- “Always use conventional milling on steels.” Not true on modern CNCs. Climb milling is often better once the skin is gone because the teeth climb onto the workpiece surface in the correct direction as the feed, which milling can improve in surface finish.
- “Climb milling always pulls the table.” Only if you have backlash. Tight machines handle it well.
- “Slotting is fine at full width if rpm is high.” Not always. Even with high rpm, full-width slotting raises force spikes. Use pilot slots or adaptive paths instead.
- “If the finish is shiny, the cut is good.” Shiny can mean rubbing. Check chip shape and thickness; aim for a clear, consistent chip.
60-Second Troubleshooting Flow
- Finish looks rough? Check chip re-cutting. Improve chip evacuation and reduce radial engagement.
- Tool life is short? Raise feed per tooth to avoid rubbing, switch to climb, improve coolant, and verify runout.
- Part size is off? Leave finish stock, reduce step-over, measure mid-process, and consider a spring pass.
- Chatter near corners? Use toolpath smoothing, reduce engagement in corners, and shorten stick-out.
FAQs
Climb milling, also called down milling, is basically when the milling cutter spins in the same direction as the feed. Think of it like the cutter “climbing” up the material. The chip starts thicker at the beginning and gets thinner as it leaves the cut, which is kind of the opposite of conventional milling. Why does that matter? Well, this approach generally gives a smoother surface finish, helps your tool last longer, and puts less load on the CNC, which is especially nice if you’re working with a tight or precise setup. It’s kind of like letting the cutter do the work naturally instead of fighting against it.
Climb milling sounds great, but it’s not all sunshine. On machines that have backlash—basically a little “slack” in the motion—it can pull the machine into the cut, which is tricky and can be dangerous. If you’re working on really rough or hard material surfaces, the cutter edge might chip. Also, starting a cut requires more careful entry, because you don’t want the tool to grab too aggressively. On older machines or if the cut is interrupted, climb milling can be hard to control and maybe unsafe. So it’s a tool you want to use when conditions are right.
Climb milling is perfect for modern CNC machines. It’s often used for finish passes, but you can also use it for many roughing cuts, as long as your stock is clean and consistent. It works well on materials like aluminum, steels, titanium, and plastics. A cool benefit is that for thin walls or floors, the cutting force pushes down into the table, helping to stabilize the part and reduce vibration. Basically, if your machine is up to date and your stock is nice and smooth, climb milling is your friend.
There’s actually no difference at all. “Down milling” is just another term for climb milling. People use the terms interchangeably, so don’t get confused if you see both in manuals or shop talk.
If you’re running a modern CNC with low backlash, climb milling usually wins. It gives a better surface finish, extends tool life, and is more efficient. Conventional milling (also called up milling) is better when you’re dealing with hard outer layers, very rough stock, or older machines where backlash could be an issue. So it really depends on your machine and material, but on a clean, modern setup, climb milling is typically the way to go.
Conventional milling has its own advantages. It’s safer when you’re cutting rough or scaled surfaces, and it’s usually better for cast iron skin at the very start of a cut. On older machines, it’s more forgiving because it doesn’t pull the table into the cutter like climb milling can. So even though it’s not as flashy as climb milling, it’s reliable, especially in challenging conditions.
Up milling (conventional milling) starts by rubbing the surface, which produces more heat and often leads to a rougher finish. It can shorten tool life because the chip is thinned at the start and thickened at the exit, meaning the cutter may re-cut material it just cut. So while it’s safer for some situations, it’s less efficient and gentler on the surface finish.
Here’s the key rule: always try to keep a real chip at the cutter edge. You want a consistent, healthy chip thickness from the start to the end of your cut. On modern machines, this usually means favoring climb milling, avoiding rubbing, and using toolpaths that maintain steady engagement. If you follow this principle, your cuts will be cleaner, your tools will last longer, and your CNC won’t be fighting against the material.
References
https://www.osha.gov/metalworking-fluids/exposure-evaluation


 English
  German
  French
  Italian
  Spanish
  Polish
  Czech
Czech  Japanese