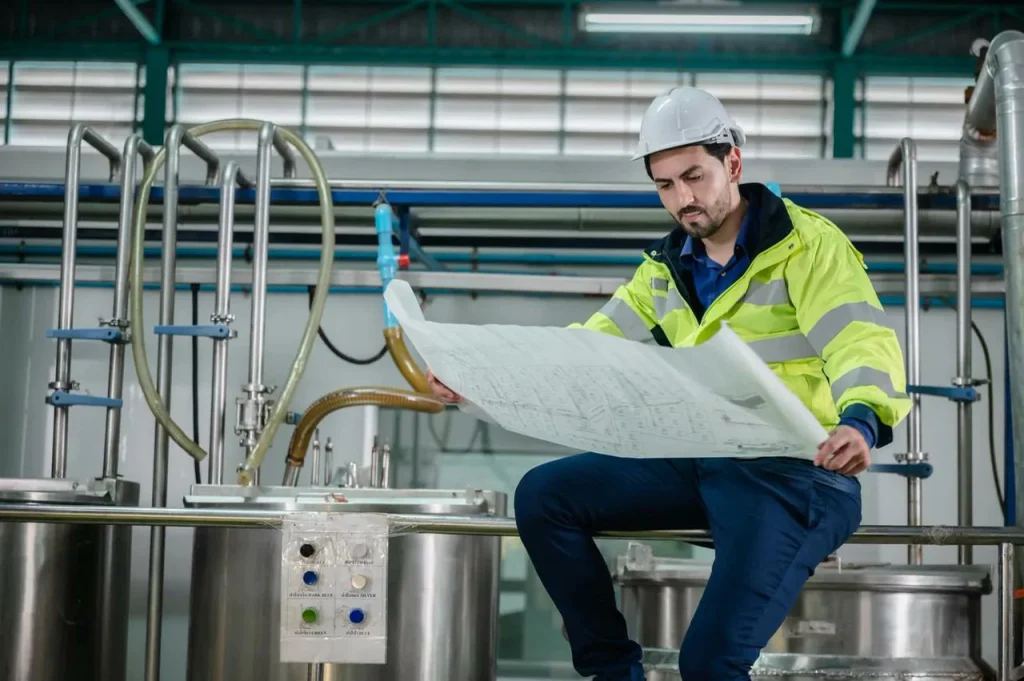
In modern metalworking, mastering burr removal methods is essential for both precision and safety. Burrs—those unwanted raised edges left after cutting, drilling, or milling—can compromise assembly, damage seals, and affect surface finishes. Understanding how to select the right burr removal methods for different materials and part geometries ensures cleaner edges, reduces rework, and improves overall production efficiency. From manual deburring to advanced electrochemical and thermal techniques, this guide explores practical strategies to achieve burr-free, high-quality metal parts.
What burr removal methods are and why they matter
Understanding burr characteristics and their impact is essential for selecting appropriate removal processes. Below we clarify what constitutes a burr across different manufacturing scenarios, why proper deburring is critical, and how process parameters influence burr formation.
What counts as a burr in machining, sheet metal, and forming operations
Burr removal methods are the processes used to remove burrs from metal, specifically the unwanted raised material left on metal workpiece’s edges after a cutting process like cutting, drilling, milling, turning, punching, trimming, or forming. In simple terms, a burr is excess metal attached to an edge or feature. It may be thin and sharp, rolled over at the edge, or pushed into an internal passage.
In machining, burrs often appear at tool exit points, around drilled holes, on milled edges, and at intersections between features. In sheet metal work, they often show up after laser cutting, punching, blanking, or trimming. In forming operations, local material flow can leave rough edges or small projections that are burrs from forming and still need secondary edge treatment.
Not every rough edge is the same, as the type of burr varies based on the machining process and material of the metal pieces. A light feather edge, a common type of burr, may be easy to remove with brushing, sandpaper, or a quick manual pass, which is similar to manual deburring in its simplicity. A thick burr at an intersecting hole may be much harder to reach and may need a selective process such as electrochemical deburring for intersecting holes. The key point is that burr shape, thickness, attachment strength, and location drive method choice more than the word “burr” alone.
Why burr removal methods matter for assembly, safety, sealing, and downstream finishing
Deburring is not only a cosmetic step. Burrs can stop a part from fitting, scratch mating parts, damage seals, trap contamination, and create handling risk. A burr is unintended raised material left by cutting, drilling, milling, turning, or shearing. It is not the same as an intentional edge break, chamfer, or radius, and it is also different from dross on thermally cut edges or recast material formed by thermal processes. Drawings should define the required edge condition and any allowable residual burr, because “deburr” alone does not reliably control the final edge geometry. This is why deburring is important for precision parts. A small burr on a sealing face or at a cross hole can cause a leak path or release particles into a fluid system later in service.
Assembly is one of the first places burr problems appear. A sharp edge can interfere with press fits, thread starts, or pin insertion. Safety is another direct issue, especially for sheet metal edges handled by operators. Downstream finishing is also affected. Burrs can disturb coating coverage, cause poor edge appearance after plating or painting, and break off during use, ruining the finish for your metal.
For buyers and engineers, the right question is not only “Can the burr be removed?” but also “What happens if some burr remains, and what happens if too much base material is removed?” That trade-off often decides the process.
Factors affecting burr formation in CNC turning and milling
Burr formation depends on feed, speed, tool wear, tool nose radius, cutter geometry, helix, and how the cut exits the material. Burrs increase when cutting shifts from clean shearing toward plowing or smearing, which is more likely with worn tools, unstable support, poor exit conditions, and unfavorable drilling backing or milling direction. Climb versus conventional milling, exit support, and backing at drilled holes are practical upstream controls that can reduce deburring load before secondary processing. For high-precision CNC turning and CNC milling services, specialized manufacturers like Uneed provide professional solutions for part accuracy, ensuring superior surface finish and dimensional control.
Setup stability also plays a part. Vibration, chatter, and poor fixturing can produce rougher edges and irregular burrs. Tool path strategy matters as well. If the final pass leaves a weak edge unsupported, that edge may bend, fold, or tear instead of cutting cleanly, creating an unwanted imperfection. In short, deburring starts with burr prevention. If the process creates large, attached burrs in hidden locations, removal becomes slower, less consistent, and more expensive.
How cutting speed influences burr formation and edge condition
How cutting speed influences burr formation depends on the material and the whole cutting condition, not speed alone. Industry sources and machining handbooks commonly treat speed as one variable in a larger balance that includes feed, depth of cut, tool geometry, and tool wear. In general, poor cutting conditions can shift the process from clean shearing toward plowing, smearing, or tearing at the edge, which raises burr risk.
For engineering decisions, the practical point is this: if burr removal is already difficult, process tuning upstream may be more effective than adding a more aggressive deburring step later. A cleaner edge from machining can reduce manual labor, lower tolerance risk, and improve consistency across batches.

Can the part be deburred effectively in the first place?
Not all components respond equally to standard deburring processes. Before evaluating specific techniques, it is critical to assess whether reliable, consistent burr removal is practical for the given part design and features.
Feasibility factors: burr size, location, access, material, and batch volume
Before comparing methods, ask a basic feasibility question: poor candidates for common deburring methods include very small or deep blind features, long narrow passages, intersections with limited tool approach, and pockets where media or residue can be trapped. Feasibility depends on passage size, aspect ratio, line-of-sight or tool-entry access, and whether the burr can be inspected after removal. If the burr location cannot be reached, cleaned, or validated without damaging adjacent surfaces, redesign is often more realistic than specifying a more aggressive deburring process. can the part be deburred effectively in the first place? This depends on burr size, burr location, feature access, material behavior, and batch volume.
Large external burrs on accessible edges are usually the easiest case. Machine tools and manual methods can often address them. Small burrs inside cross holes, blind features, deep slots, or thin channels are harder. Material also changes feasibility. Ductile materials may smear instead of breaking cleanly. Harder alloys may resist some mechanical methods but respond better to others. Batch volume matters because a method that works for ten parts may fail economically for ten thousand.
Tolerance sensitivity is just as important. If the burr sits on a feature with tight edge requirements, a broad mechanical method may remove too much parent material. If cleanliness matters, a method that leaves abrasive residue or broken media may not be acceptable.
Deburring tools for hard-to-reach internal edges and intersecting features
Deburring tools for hard-to-reach internal edges include flexible abrasive tools, brushes, in-machine tools, and specialty cutters that pass through holes and sweep a reverse edge. These are often used where direct line-of-sight access is poor, but the feature can still be reached physically.
Their limits are clear. Tool-based access still depends on passage size, feature layout, and the ability to control contact at the burr without damaging nearby surfaces. Intersecting passages are a common trouble spot because the burr may sit at a hidden edge where standard tools do not contact evenly. In these cases, process choice becomes less about “best tool” and more about whether selective internal removal is possible at all.
Electrochemical deburring for intersecting holes: when geometry favors selective removal
Electrochemical deburring is used mainly for conductive materials and feature-specific burrs such as cross-hole intersections that are difficult to reach mechanically. Its success depends on shaped tooling, fixturing, masking, electrolyte control, and post-process cleaning, so it is not a universal solution for complex internal burrs. Buyers should confirm material suitability, residue control, and how hidden features are inspected after processing.
This method is especially useful when mechanical access is poor or when hand tools would be inconsistent. The advantage is selectivity at the burr location. The limitation is that it is a specialty process with setup needs and is not the default choice for open external edges. It is usually justified when hidden internal burrs create functional risk and conventional access is weak.
How to remove burrs from laser cut sheet metal versus machined edges
How to remove burrs from laser cut sheet metal is not always the same problem as removing burrs from machined edges. Laser-cut parts may have dross, oxide, or sharp edge remnants that need edge conditioning. Machined parts may have rollover burrs, tool-exit burrs, or feather edges tied to cutting mechanics.
For sheet metal, common options include using hand tools for manual edge work, brushing, grinding, and batch finishing if part geometry allows it. For machined edges, in-machine tools, hand deburring, brushing, or selective advanced methods may fit better. The difference is driven by edge type and feature geometry. A flat external contour in sheet metal is often easier to access than a drilled intersection in a machined block.
A useful feasibility check is:
- Geometry: Is the burr on an open edge, in a hole, or at a hidden intersection?
- Material: Is the metal ductile, hard, or prone to smearing?
- Access: Can a tool or media reach the burr directly?
- Cleanliness: Can the process leave residue, media, or recast debris?
- Tolerance sensitivity: Can the edge accept rounding, or must removal be selective?
How the main burr removal methods work
Each manufacturing scenario and part geometry calls for a different deburring approach. Below is an overview of the most widely used burr removal methods, their working principles, ideal applications, and key limitations.
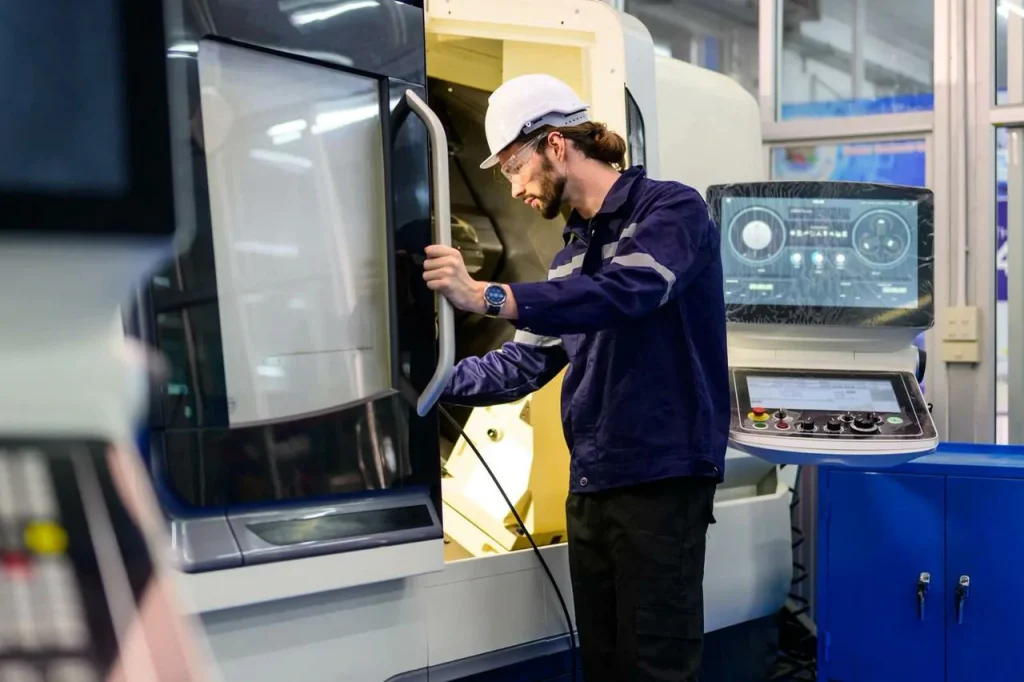
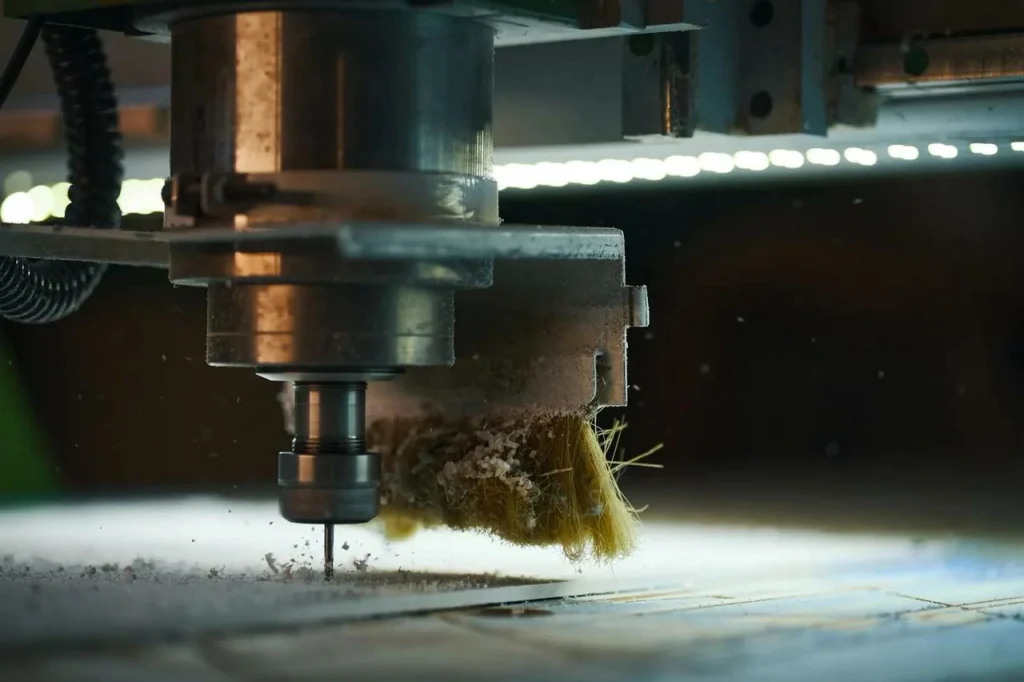
Manual and mechanical deburring by grinding, filing, brushing, and in-machine tools
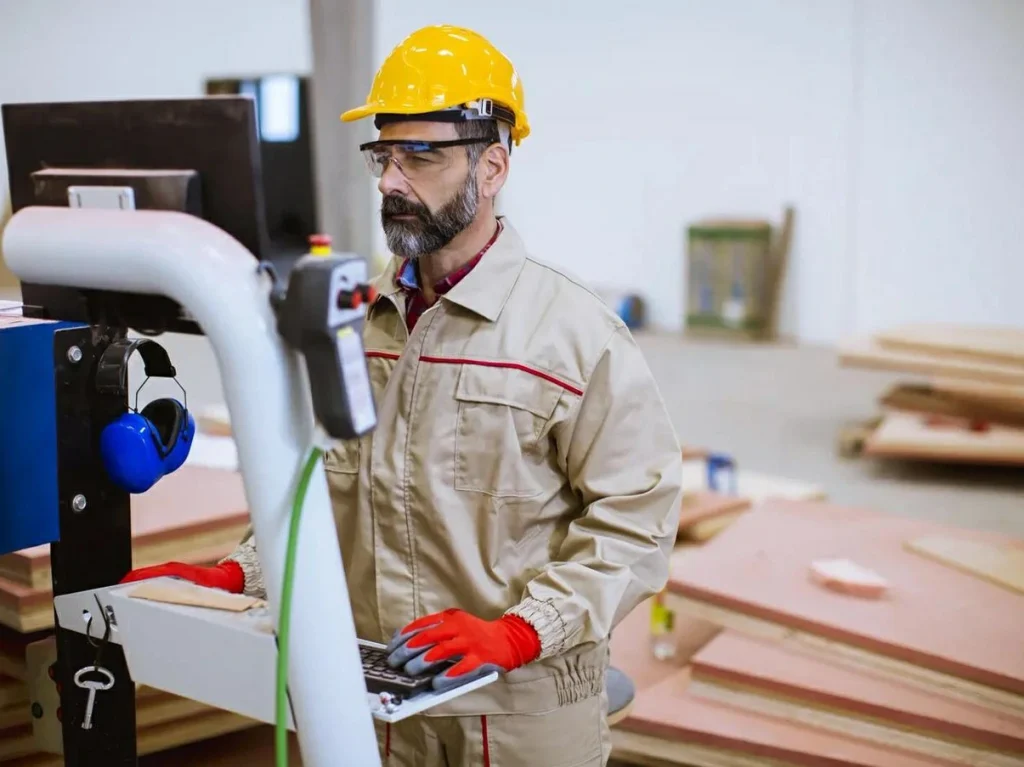
Common deburring techniques start with manual and mechanical methods. Manual deburring uses files, scrapers, abrasive stones, and hand-held grinders. It works well for low-volume parts, prototypes, and mixed geometry where flexibility matters more than speed. The problem is variability. Edge break size depends on the operator, part handling, and time spent per feature.
Deburring by grinding or rolling, along with filing, brushing, and in-machine tools, adds more control and repeatability when the burr is accessible. Brush deburring is often used for lighter burrs and edge conditioning. In-machine tools can remove burrs before the part leaves the machine, which may reduce handling and improve process flow. Still, these methods need line-of-access and may struggle with deep internal features.
Mass finishing and vibratory processes for small parts and batch processing
Mass finishing includes vibratory and similar batch processes where parts and media rotate together to wear down burrs and soften edges. This is often the best deburring method for small metal parts when throughput matters more than exact edge-by-edge control, according to manufacturing resources from the Society of Manufacturing Engineers. It is well suited to batches of small parts with accessible external edges and a tolerance for general edge breaking.
The trade-off is process selectivity. Media acts broadly, so all exposed areas may be affected to some degree. This is why engineers often ask how vibratory deburring affects part tolerances. The answer is that it can change edge condition and, if not controlled, can alter small features or reduce edge definition. For precision parts, this needs careful review.
Abrasive blasting, high-pressure waterjet, and cryogenic deburring
Abrasive blasting removes burrs and conditions surfaces by directing abrasive media at the part. It is useful for accessible surfaces and can help with light burrs and edge cleanup. Like other broad-area methods, it may be less selective on tight-tolerance edges.
High-pressure waterjet deburring, reported in the provided material at 150–300 MPa, removes burrs without mechanical contact. That makes it useful where part integrity matters and where deep channels or internal passages also need cleaning. Even so, risks of sharp edges after waterjet cutting or deburring can remain if the process does not fully address all edge conditions. Secondary deburring may still be needed on some parts.
Cryogenic deburring is not a primary metal-part deburring method in most machining workflows and should be treated cautiously in this context. Its burr-removal effect is limited for many ductile metals, and applicability depends on the actual fracture behavior of the burr and the follow-on removal mechanism. Do not describe it as one of the safest or most accurate methods for metal parts without process-specific evidence.
Thermal and electrochemical burr removal methods for internal or precision features
Thermal and electrochemical methods are the advanced end of burr remthods. Thermal deburring removes thin thermal burrs by exposing the part to a brief high-energy event that preferentially affects small projections with high surface-area-to-mass ratio. It is typically considered for multiple small burrs in hard-to-reach internal features, but oxidation, residue, enclosed-volume effects, and post-cleaning requirements must be checked carefully. It should not be presented as suitable for every geometry or surface requirement.
Electrochemical deburring uses electrical current and electrolyte to dissolve burrs selectively. As noted earlier, this makes it attractive for internal intersections and precision features where only the burr should be removed.
These methods are not universal. They tend to make sense when burr location is inaccessible, when internal consistency is critical, or when manual access is poor. Their setup and process controls are more specialized than basic mechanical methods.
| Method family | Principle | Typical fit | Key limitation |
|---|---|---|---|
| Manual deburring | Operator removes burr with hand tools or portable abrasives | Low volume, mixed geometry, rework | Operator dependent |
| Mechanical / in-machine | Tool, brush, grinder, or cutter removes burr by contact | Accessible edges, repeat work, CNC integration | Access limits |
| Mass finishing / vibratory | Media and motion wear down burrs in batch | Small parts, batch processing, broad edge break | Limited selectivity |
| Abrasive blasting | Abrasive stream removes light burrs and conditions surface | Open surfaces, cleanup, surface prep | Surface-wide effect |
| High-pressure waterjet | High-pressure fluid removes burrs without mechanical contact | Deep channels, fragile areas, cleaning plus deburring | May need secondary edge work |
| Cryogenic deburring | Cooling makes burr brittle for removal | Niche applications where burr embrittlement is practical | Limited evidence for metal fit |
| Thermal deburring | High-temperature event burns off burrs | Complex internal burr patterns | Material and process suitability limits |
| Electrochemical deburring | Electrical dissolution removes burr selectively | Intersecting holes, internal precision features | Specialty setup |
Advantages and limitations of each burr removal method
Each deburring approach carries distinct strengths and constraints. This section breaks down the practical advantages, limitations, and ideal use cases for common burr removal methods across production scenarios.
Manual vs automated deburring for low-volume production
Manual vs automated deburring for low-volume production is usually a question of flexibility against consistency. Manual methods suit short runs, prototypes, engineering changes, and parts with variable burr patterns. The setup burden is low, and the process can adapt quickly.
Automation makes more sense when burr location is predictable and part volumes justify fixtures, tooling, or robotic paths. The provided research notes robotic deburring precision of ±0.02 mm, though this is from a single source. Even with that figure, buyers should treat automation as a consistency tool rather than a universal answer. For low-volume work, setup time can outweigh the gain.
Best deburring method for small metal parts: throughput versus edge control
The best deburring method for small metal parts often depends on whether throughput or edge control matters more. For large batches of simple small parts, vibratory or other mass finishing processes may offer good throughput. If the edge condition must stay tightly controlled, a more selective process may be needed.
Small parts create handling issues too. Manual deburring can become slow and inconsistent. Batch methods solve handling efficiency but may soften edges more broadly than desired. So the decision is rarely about speed alone. It is about acceptable edge break variation, part-on-part contact, and the risk of tolerance loss.
Mechanical deburring by grinding for hardened steel: where it works and where it does not
Mechanical deburring by grinding for hardened steel can work on accessible burrs where the burr is strong enough to be removed by abrasive contact and where local heating or edge damage can be controlled. It is often useful on external edges and larger burrs.
Where it becomes risky is on small precision features, internal edges, or surfaces that cannot tolerate material loss. Hardened steel may also reduce process speed and increase tool wear. If the part needs a very controlled edge, grinding may remove too much base material or create uneven edge breaks unless the process is tightly managed.
Comparison between thermal deburring and electrochemical deburring
A comparison between thermal deburring and electrochemical deburring is most useful for internal burr problems. Both methods address hidden burrs better than many hand tools. Their fit depends on whether the burrs are widespread and accessible to a thermal event, or localized in a geometry that favors selective dissolution.
| Factor | Thermal deburring | Electrochemical deburring |
|---|---|---|
| Precision | Broader burr removal event | More selective at burr location |
| Accessibility | Good for complex internal burr patterns | Strong for intersecting holes and hidden localized burrs |
| Consistency | Useful where burr pattern is repeatable | Useful where burr geometry is well defined |
| Internal features | Strong candidate | Strong candidate |
| Operator dependence | Lower than hand deburring | Lower than hand deburring, but setup dependent |
Common failure modes, quality risks, and when methods break down
Every deburring approach carries inherent limitations. Understanding these failure modes, quality risks, and process boundaries helps avoid unexpected part variation, performance issues, and costly rework.
When hand deburring creates inconsistent edge quality
When hand deburring creates inconsistent edge quality, the root cause is usually operator variability. One operator may break the edge lightly. Another may remove more parent material. Time pressure also matters. As lot size grows, consistency often drops unless inspection and work instructions are strict.
This affects precision parts first. Edge radius, chamfer feel, and residual burr presence can vary from part to part. If a buyer needs stable edge condition across a production run, hand deburring may become a quality risk rather than a low-cost solution.
How vibratory deburring affects part tolerances and edge break consistency
How vibratory deburring affects part tolerances depends on part geometry, media choice, cycle time, and how exposed the critical features are. Because media acts on all reachable surfaces, it tends to create a general edge break rather than a tightly localized correction.
This can be useful when all edges simply need to be made safe or smooth. It can be a problem when only one edge needs treatment and nearby surfaces must stay unchanged. This is also where the impact of abrasive media selection on surface finish becomes important. More aggressive media may remove burrs faster but may also change finish or round edges more than the design allows.
Risks of sharp edges after waterjet cutting and secondary deburring needs
The risks of sharp edges after waterjet cutting should not be ignored. Even when waterjet is used for cutting or deburring, a part may still leave the process with edge conditions that are not safe for handling or not suitable for sealing or assembly. The process can reduce burrs without direct contact, but it does not guarantee a final edge state for every geometry.
This is why secondary inspection matters. If the part goes into a manual assembly cell, edge safety may be the main concern. If it goes into a hydraulic or sealing application, residual sharpness or loose particles may be the bigger issue.
When thermal deburring is not suitable for metal parts
When thermal deburring is not suitable for metal parts, the reason is usually one of four issues: tolerance risk, masking needs, residual burr concern in protected areas, or unwanted surface change. The provided research also states that thermal methods are limited by material type.
A simple screening checklist is useful:
- Tolerance risk: Can the feature tolerate a non-contact but broad burr removal event?
- Masking needs: Are there surfaces that must not be affected?
- Residual burr risk: Could geometry shield burrs from full removal?
- Surface change concerns: Could the process alter the condition of sensitive surfaces?
If these questions raise concern, a more selective method may be safer.
Cost, tolerance, and lead time factors in process selection
Selecting a deburring process requires balancing practical business and quality constraints. This section breaks down the key factors that shape cost, tolerance risk, and lead time for every burr removal strategy.
Cost drivers for outsourced deburring services
Cost drivers for outsourced deburring services usually include burr size, burr accessibility, method type, fixturing needs, inspection burden, cleanliness requirements, and batch volume. A part with visible external burrs is usually simpler to quote than a part with hidden burrs in intersecting passages that need validation.
Material and part mix also affect cost. Harder materials may increase tool wear or cycle time. Mixed-part batches can reduce efficiency if each part needs a different setup or media. If edge quality must be checked closely, inspection time rises too.
Labor intensity, automation level, and setup burden across burr removal methods
Labor intensity is highest in hand deburring and other operator-led processes. Automation lowers direct labor per part but raises setup burden. This is the core trade-off. For high repeat work, setup can be spread across many parts. For low repeat work, setup can dominate.
Batch processes such as vibratory finishing reduce labor on a per-part basis, but they may add loading, separation, cleaning, and validation steps. Specialty methods such as electrochemical or thermal deburring often shift cost from labor into setup, tooling, and process control.
Tolerance sensitivity, cleanliness requirements, and rework risk
Tolerance sensitivity should be checked early because many burr removal methods remove some amount of parent material, not just the burr. If the edge is functional, broad methods may create rework risk. Cleanliness is just as important in internal features. Burr fragments, media residue, or process byproducts can become a failure source later.
Rework risk rises when burrs are hidden, when visual inspection is weak, or when the method is not selective enough. In those cases, the cheapest process at first pass may become expensive after sorting or failure analysis.
Lead time trade-offs for manual, batch, robotic, and specialty deburring processes
Lead time depends on process readiness more than method name alone. Manual deburring can start quickly with little setup, so it may help urgent low-volume work. Batch processes can be efficient once parts are queued together. Robotic systems need programming and fixtures but can support repeat schedules well. Specialty processes may add external routing, tooling, or qualification steps.
This means the fastest method for one part of the family may be the slowest for another. Buyers should ask whether the process is already established for that geometry or whether the supplier is still developing it.
| Method type | Main cost drivers |
|---|---|
| Manual | Labor time, inspection, part handling |
| Mechanical / in-machine | Tooling, machine time, access complexity |
| Mass finishing / vibratory | Media, cycle time, sorting, risk to critical features |
| Abrasive blasting | Media use, masking, cleanup, surface finish control |
| Waterjet | Equipment intensity, pressure process control, secondary finishing |
| Robotic deburring | Programming, fixtures, capital use, repeat volume |
| Thermal / electrochemical | Setup, tooling, validation, specialty processing |
Applications by part type, burr type, and manufacturing route
Different part types, burr morphologies, and manufacturing processes require tailored deburring solutions. This section breaks down common burr types across CNC machining, sheet metal fabrication, and forming operations, along with practical removal strategies for each scenario.
Causes of rollover burr in CNC milling and suitable removal approaches
Causes of rollover burr in CNC milling often include tool exit behavior, tool wear, ductile material response, and weak edge support. The metal deforms and folds instead of shearing cleanly, so a lip remains at the edge.
Suitable removal approaches depend on size and access. Light rollover burrs may respond well to brushing or light manual work. Larger rollover burrs on open edges may need grinding or other mechanical removal. If rollover is recurring, process adjustment upstream may be more effective than repeated secondary work.
What causes breakout burrs in sheet metal fabrication and how removal differs
What causes breakout burrs in sheet metal fabrication is usually the way material separates as the cut, punch, or trim exits the sheet. Edge support, material ductility, and process condition all affect how many material tears or projects at the exit side.
Removal differs from machined burr removal because the part is often thin and the edge is fully exposed. This makes brushing, grinding, or batch finishing more practical in many cases. On the other hand, thin parts can distort more easily, so aggressive contact methods may create flatness or appearance problems.
Deburring methods for burrs after forming, punching, and trimming
Deburring methods for burrs after forming, punching, and trimming often focus on safe edge conditioning across many similar parts. Manual work may fit prototypes or mixed lots. Mass finishing may fit small batch parts. Brushing or grinding may fit larger exposed edges.
The method should match the burr type. A thin sharp edge may only need an edge break. A heavy punched burr may require more stock removal. If formed features create hidden corners, access may become the limiting factor.
How to achieve burr-free edges on precision machined parts
How to achieve burr-free edges on precision machined parts is partly a deburring question and partly a machining strategy question. Burr-free in strict terms is hard to guarantee across all features, so many drawings instead define a controlled edge break or maximum allowable burr.
For precision parts, the best path is usually to reduce burr formation first, then use the least aggressive deburring method that still reaches the feature. This lowers tolerance risk and improves consistency. Hidden internal burrs may justify electrochemical deburring or another selective process. Open accessible edges may be better handled by controlled mechanical means.
| Burr type / access / tolerance class | Likely method shortlist |
|---|---|
| Light external burr / easy access / moderate tolerance | Manual, brushing, light mechanical |
| Repeating external burr / easy access / stable production | In-machine, robotic, mechanical |
| Small parts / many exposed edges / moderate tolerance | Vibratory or mass finishing |
| Internal intersecting burr / poor access / precision feature | Electrochemical deburring |
| Complex internal burr pattern / poor access / lower sensitivity to broad event | Thermal deburring |
| Mixed edge cleanup plus cleaning / channels or passages | High-pressure waterjet |
How to choose the right burr removal method
Selecting the optimal deburring approach requires a structured assessment of part features, process constraints, and quality requirements.
What should buyers check before selecting a deburring process?
Buyers should check burr type, feature access, edge function, tolerance sensitivity, cleanliness needs, lot size, and whether the process removes only the burr or also changes the parent edge. This is more useful than asking for a “best” method in the abstract.
They should also ask how residual burrs will be verified, especially for internal features. If the burr cannot be seen easily, process validation matters more than operator confidence.
Which burr removal methods are best for internal passages, cross holes, and blind features?
For internal passages, cross holes, and blind features, the best options are usually the ones that do not rely on direct manual access. Electrochemical deburring for intersecting holes is one of the clearest examples from the research provided. Thermal deburring may also fit when there are many internal burrs in complex patterns.
Waterjet may help where deep channels need burr removal and cleaning together. Tool-based internal methods can work if the feature can actually be reached and controlled. The key point is access first, method second.
Impact of abrasive media selection on surface finish and edge condition
The impact of abrasive media selection on surface finish and edge condition is often underestimated. More aggressive media can remove burrs faster, but it can also round edges more, change finish more, and raise the risk of losing detail on small features.
For batch finishing, media shape and aggressiveness affect whether the process lightly breaks edges or broadly smooths the part. For blasting, media choice influences both burr knockdown and final surface texture. This should be matched to the drawing requirement, not just burr size.
Step-by-step evaluation: burr type, material, tolerance, cleanliness, volume, and budget
A practical evaluation sequence looks like this:
- Burr type: Is it rollover, feather, breakout, or internal intersection burr?
- Material: Is the metal ductile, hard, or hard to machine?
- Tolerance: Can the edge accept general rounding, or does it need selective removal?
- Cleanliness: Are loose particles, residue, or media entrapment a risk?
- Volume: Is this prototype, low volume, or repeat production?
- Budget: Is labor acceptable, or is automation needed for consistency?
A simple flow works well:
- Identify whether the burr is external or internal.
- Check whether the burr is reachable by a tool or media.
- If reachable and low volume, consider manual or mechanical methods.
- If reachable and high volume, consider in-machine, robotic, or batch methods depending on edge sensitivity.
- If not reachable and located at hidden intersections, evaluate electrochemical or thermal methods.
- If burr removal and cleaning must happen together, review high-pressure waterjet fit.
- Reject any method that creates too much tolerance, cleanliness, or surface-condition risk.
Practical comparison scenarios for engineering decisions
To help you select the most practical deburring approach for your application, we compare common real‑world scenarios that engineers and buyers evaluate daily.
Small precision parts versus large structural parts
Small precision parts often favor selective control or batch finishing, depending on tolerance. Handling is a major issue, so manual work may become inefficient fast. Large structural parts are easier to access manually or mechanically, but they may still need edge consistency over long contours.
The difference is that small parts are limited by feature sensitivity and handling efficiency, while large parts are limited more by access, labor time, and edge length.
Low-volume manual workflows versus automated robotic deburring cells
Low-volume manual workflows are flexible and easy to start. They fit engineering changes and varied parts. Automated robotic deburring cells are better when edge locations repeat and consistency matters more than flexibility. The research pack notes robotic deburring precision of ±0.02 mm, but that single-source number should be treated as directional, not universal.
So the decision is usually about repeatability and setup spread. If the same burr appears in the same place every time, automation becomes easier to justify.
Internal burr removal versus external edge finishing
Internal burr removal is usually access-limited. External edge finishing is usually throughput-limited. That is why internal burrs often push the process toward electrochemical, thermal, or waterjet options, while external edges often stay in the manual, mechanical, or batch-finishing range.
A buyer should separate these two problems early. One process may not solve both well.
Burr removal methods for aluminum, steel, hardened alloys, and mixed-part batches
Aluminum often forms smeared or rolled burrs, so light brushing or controlled mechanical work may be enough for accessible edges. Steel parts may fit a wide range of methods depending on burr size and geometry. Hardened alloys can make mechanical removal slower and less forgiving, especially on precision features. Mixed-part batches are difficult because one medium or cycle may not suit all materials and edge conditions.
| Scenario | Method shortlist |
|---|---|
| Small precision metal parts, moderate edge break allowed | Vibratory, selective mechanical |
| Small precision parts, tight edge control | Controlled manual, in-machine, electrochemical for internal features |
| Large structural parts with open edges | Manual grinding, brushing, mechanical tools |
| Low-volume mixed geometry | Manual deburring |
| High-volume repeat geometry | Robotic, in-machine, batch finishing where suitable |
| Internal passages and cross holes | Electrochemical, thermal, waterjet depending on geometry and risk |
| Hardened alloy with accessible external burrs | Mechanical deburring by grinding, with caution on edge loss |
| Mixed-part batches | Separate by geometry and material before choosing shared process |
In short, burr removal methods should be chosen from the burr outward. Start with burr type, edge function, and access. Then check whether the method creates a new problem in tolerance, cleanliness, or consistency. Manual methods are flexible but variable. Batch methods are efficient but broad. Thermal and electrochemical methods solve some hidden burr problems well, but they are not general-purpose fixes.
The right process is the one that removes the burr without creating a worse edge, surface, or inspection problem later. Before release, define the maximum allowable burr, required edge break or radius, whether the edge is functional or cosmetic, how hidden features will be inspected, and what cleanliness condition must be met after deburring. Confirm whether the process is selective or broad-area, whether masking or fixturing is required, and how over-deburring is prevented on sealing faces, threads, and critical datums. The drawing or purchase specification should state the required edge condition rather than relying on “deburr” as a standalone note.
FAQs
Popular options include manual, mechanical, and in-machine tools widely used in CNC milling and CNC turning applications. You can also use mass finishing, abrasive blasting, and high-pressure waterjet for versatile edge conditioning. Specialized solutions include thermal energy deburring for internal burrs and electrolytic deburring (ECD) for precision cross-hole features. Cryogenic deburring services are available for niche material applications but are less common for general metal parts. The balance between manual vs automated deburring will depend on your volume, consistency needs, and part complexity.
Even small burrs can disrupt assembly, damage seals, and create safety hazards for operators. Uncontrolled edges can also ruin plating, painting, and other downstream finishing processes. Internal burrs left after machining may break loose and cause failures in hydraulic or fluid systems. Processes like electrolytic deburring (ECD) and thermal energy deburring help eliminate hidden burrs that manual work cannot reach. Choosing between manual vs automated deburring directly impacts part reliability, tolerance control, and long-term performance.
Thermal energy deburring is one of the most efficient specialized burr removal methods for complex metal parts. It uses a brief, high-energy reaction to target thin burrs with a high surface-area-to-mass ratio. This process is ideal for small, hidden burrs in internal passages created by CNC milling and CNC turning. It can treat multiple burrs at once without direct mechanical contact. However, it may require post-cleaning to remove oxidation and residue. It is often compared with electrolytic deburring (ECD) and cryogenic deburring services for difficult internal features.
When evaluating manual vs automated deburring, manual processes are rarely cost-effective for high-volume production. While simple burr removal methods like hand filing work for prototypes and small batches, they lack consistency in CNC milling and CNC turning environments. Operator variability increases defects and rework as batch size grows. Automated systems deliver better repeatability for parts needing consistent edge conditions. For complex geometries, thermal energy deburring or electrolytic deburring (ECD) often provide better value than extended manual labor. Cryogenic deburring services may also be more efficient for high-volume, specialized applications.
Designing for effective burr removal methods starts with improving conditions for CNC milling and CNC turning. Reduce deep, hidden intersections that trap burrs and block tool access. Support thin edges to avoid deformation during cutting and reduce reliance on electrolytic deburring (ECD) or thermal energy deburring. Optimize tool exit paths to reduce rollover and feather burrs at the source. Consider whether manual vs automated deburring will be used early in design to simplify access. Avoid features that trap media from processes like cryogenic deburring services to lower cleaning and rejection rates.