Face milling is one of the most common CNC milling jobs you’ll run when you need a flat, smooth surface you can trust. Milling is a machining process, and face milling is primarily used to create flat reference surfaces efficiently. It uses a rotating face mill cutter (or sometimes a fly cutter or large end mill) with the tool axis perpendicular to the workpiece. That setup makes it ideal for creating clean reference planes, also called datums, before you cut pockets, drill holes, or finish critical sealing faces. But if you’ve ever seen chatter marks, “washboard” waves, or a surface that looks fine but won’t measure flat, you already know the catch: small choices in tooling, setup, and spindle speed and feed rate can make or break the result. This guide gives you a practical framework you can use right away.
Face milling fundamentals (what it is + when to use it)
Face milling is a fundamental machining technique widely used whenever a flat, smooth surface is needed. Understanding its basics—what it is, how it works, and when to apply it—sets the stage for making accurate, high-quality parts. In the sections below, we’ll break down the definition of face milling, how it differs from other milling methods, and why it’s often the go-to choice for creating reference surfaces.
Face milling definition
So, what does face milling mean in plain terms? Face milling is a machining operation that removes material from the top “face” of a part to create a flat surface. It is a machining process used to create flat surfaces, and milling is used to remove excess material efficiently. Face milling is a machining method commonly used for wide, flat areas. The key identifier is that the cutter’s axis points straight “down” toward the surface, so it is perpendicular to the workpiece. That’s the big difference you can see even before you start cutting.
In a typical face milling operation, cutting happens with the cutting edges on the face of the tool and also along part of the periphery. On many indexable face mills, several inserts share the work, so you can remove a lot of material while still keeping the surface controlled.
People often use face milling as the first step on rough stock. Why? Because once you create one clean, flat reference plane, everything else—pocket depths, hole depths, and parallel faces—becomes easier to control.
Face milling vs peripheral milling
Face milling vs peripheral milling are easy to mix up because both are “milling,” but the tool orientation changes the whole cut. Face milling and peripheral milling are different types of milling operations. Peripheral milling uses mainly the cutter’s edge, whereas face milling uses the face and some periphery. Peripheral milling (often called plain or slab milling) typically has the cutter axis parallel to the surface, and the tool cuts mainly with its outside edges.
Here’s a direct comparison that clears it up:
| Feature | Face milling | Peripheral (plain/slab) milling |
|---|---|---|
| Cutter axis vs surface | Perpendicular | Parallel |
| Main cutting area | Tool face + periphery | Tool periphery |
| Common result | Broad, flat faces (datums) | Side walls, slabs, long surfaces |
| Typical tools | Face mills, shell mills, fly cutters, large end mills | Slab mills, side-and-face cutters, long cutters |
| Common uses | Flat reference faces, cleanup, finishing | Side milling, thickness sizing, long straight surfaces |
This is also where terms can overlap. You may hear shoulder milling, end milling, and even fly cutting in the same conversation. They are related milling processes, but they shine on different shapes and setups.
Typical applications by industry and part type
Face milling shows up anywhere flatness and finish matter. These are common face milling applications, and face milling is used for creating precise reference planes in automotive, aerospace, and fabrication industries.
In automotive work, face milling is common on parts where flatness affects sealing. If a surface is not flat, gaskets and seals can fail. In aerospace and medical machining, you often see facing on precision plates and housings where both finish and parallelism matter, not just “looks.” In fabrication, a facing milling machine setup can flatten weldments and plates so parts fit up without rocking or gaps. If you’ve ever tried to bolt a warped plate to a base, you know why that matters.
What is face milling used for?
Face milling is used for a few very specific goals:
- Creating flat datum surfaces for later operations
- Cleaning up rough stock, cast surfaces, or saw-cut faces
- Improving surface finish before assembly, sealing, or measurement
- Preparing stock thickness before pockets, bores, and drilled features
If you’re asking “What type of milling is best for making a flat plane fast?” face milling is often the answer.
Face Milling vs Fly Cutting vs Surface Grinding
In some applications the choice isn’t between types of mills, but between technologies.
Fly cutting offers superior wide-surface finishes at slower speeds. It’s common in mold shops for plate finishing before EDM work. The downside is productivity—fly cutters can take multiple passes and require rigid machines.
Surface grinding can achieve far tighter tolerances on flatness, parallelism, and roughness than face milling. When sealing reliability is critical—for example in hydraulic manifolds—shops often face mill for bulk removal, then grind for precision.
Face milling wins when you need:
- stock removal
- speed
- acceptable flatness/finish
- repeatability across quantities
Grinding wins when tolerances demand it. In a test, grinding may hit Ra 0.2–0.4 μm reliably, while face milling typically holds Ra 0.8–3.2 μm depending on geometry and feeds.
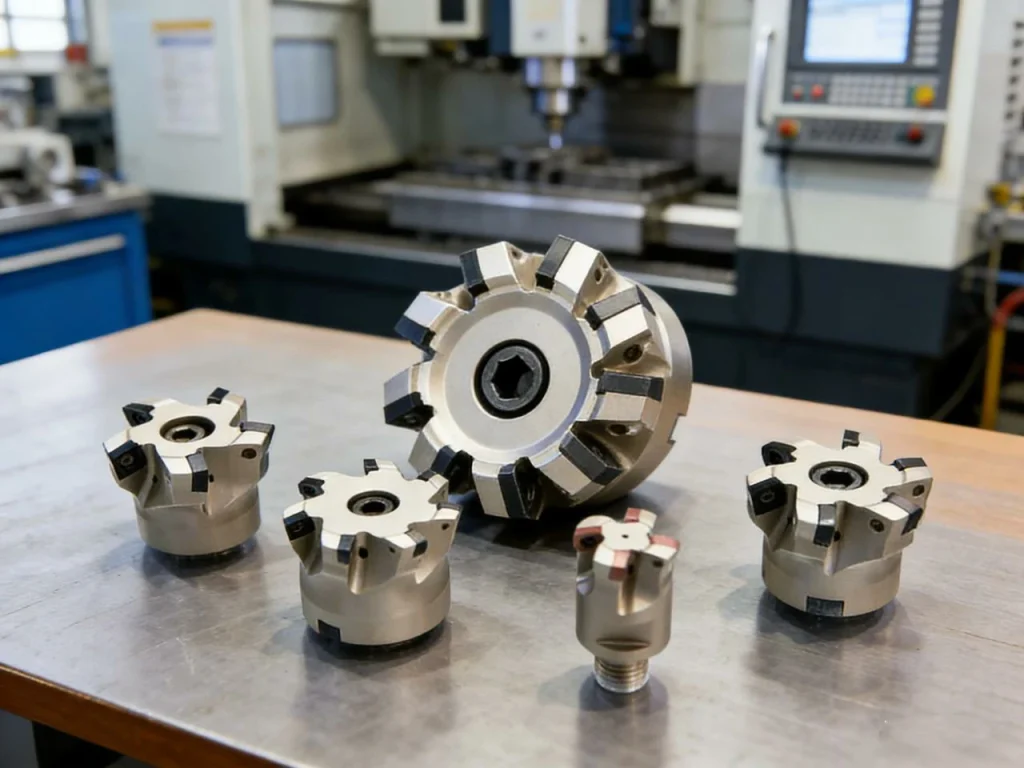
Face milling cutters and insert geometry
Selecting the right cutter and insert geometry is what keeps a face milling operation stable, efficient, and chatter-free. Different tools excel at different goals—whether it’s ripping material fast, hitting a tight surface finish, or accessing cramped features. Before diving into specific cutter types and edge geometries, it helps to understand when each option wins and how it affects force, finish, and tool life.
Cutter types and when each wins
Choosing the right cutting tool for face milling is half the battle. The choice for face milling depends on the material and desired finish. Using the best face milling cutter ensures optimal cutting performance. Tools used in face milling include multi-insert face mills, fly cutters, and large end mills. The same surface can be faced in more than one way, and each tool choice pushes you toward either speed, finish, or access.
A multi-insert face mill (often also called a shell mill when it mounts on an arbor/shell mill holder) is the normal choice for production work. It spreads the cut over several edges, which is great for metal removal rate and predictable tool wear.
A fly cutter is different: it often has a single cutting edge that sweeps a big circle. That can leave an excellent finish on wide surfaces, but it’s usually slower and less forgiving if your setup is not rigid.
A large end mill can also do facing, especially on small parts or when walls and clamps limit where a big face mill can reach. This is where many people ask about end mill vs face mill. An end mill can face, but it usually takes more passes to cover the same area and it may not match the same productivity on broad faces.
If you’re deciding between face mill vs fly cutter, ask yourself a simple question: do you need cycle time or the best possible finish with a slower cut? On a rigid machine, either can work well, but they “feel” different in the cut.
Entering angle (lead angle) and force direction: 45° vs 60° vs 90°
One of the most important specs on a face mill is the entering angle (also called lead angle). Choosing the right face milling lead angle can reduce vibration and optimize cutting. Heavy-duty face milling is used with 60° or higher angles for rough stock removal. It changes how cutting forces push into the part and spindle.
A 45° cutter is a strong general choice because it balances forces well. It tends to be smooth, and it’s often a good starting point for both roughing and finishing.
A 60° cutter pushes more load in the axial direction (into the spindle) and less sideways. On a rigid setup, that can reduce vibration and let you feed harder, which is why it’s often used for heavy-duty face milling.
A 90° cutter is useful when you also need to cut a shoulder close to a wall, but it can create higher radial load. That extra sideways force is one reason 90° tools can chatter more easily on thin parts or long stickout setups.
If you’ve ever wondered why two cutters “sound” different at the same feed, lead angle is often the reason.
Insert geometry choices that control finish and tool life
Insert geometry can feel like a deep topic, but you can simplify it by focusing on what you need the edge to do.
A more positive rake geometry tends to cut with less force, which can help on lower-power machines or when you’re fighting chatter. The trade-off is edge strength. A more negative geometry often has a stronger edge and handles shock better, but it may need more power and rigidity.
For finish, wiper inserts matter. A wiper is shaped to “wipe” the peaks left by normal feed marks, which can improve surface finish without slowing feed as much. If your surface finish is just barely missing the target, wipers are often the cleanest fix.
Nose radius also affects finish and edge strength. A larger radius can improve finish and support the edge, but it also increases cutting forces and may push a flexible part around.
Quick “cutter picker” (simple decision helper)
If you want a fast way to choose a face milling tool, use this short process. It’s not fancy, but it works.
- Start with the material group (aluminum, steel, stainless, cast iron, high-temp alloys).
- Decide your real goal: stock removal, finish, or both.
- Be honest about rigidity: is the setup stiff, or does it ring when you tap it?
- Match the tool:
- If you need fast removal on a rigid setup, choose an indexable face mill, often with a 45° or 60° lead.
- If you need a very smooth wide finish and can accept slower cutting, consider a fly cutter.
- If the area is small or access is tight, use a large end mill and face in multiple passes.
- If surface finish is tight, add wiper geometry or plan a finishing pass.
This “picker” is also a good way to explain your choice to a coworker without getting stuck in jargon.
Face milling setup and workholding
Face milling results depend heavily on how the part is supported and how rigid the overall setup is. Even the best cutter and perfect parameters won’t save a weak or distorted workholding strategy. Before looking at specific methods, it helps to understand how stability, parallels, and clamp placement influence flatness, finish, and repeatability.
Workholding fundamentals (rigidity, parallels, exposure)
Great facing starts before the spindle turns. If you want a flat face, the part must sit stable and supported.
Raising the workpiece on parallels is common because it gives tool clearance and helps you avoid cutting into the vise or table. It also makes chip cleanup easier, which matters more than people think. Chips trapped under a part can ruin flatness fast.
Clamping strategy matters too. If you clamp too hard in the wrong spots, you can bend a thin plate, face it “flat,” then watch it spring when you release it. That’s one of the most frustrating ways to fail a flatness check because the surface looked perfect in the machine.
Machine readiness checks that affect facing quality
Face milling is sensitive to small machine issues. If you’re chasing a finish problem that won’t go away, check the basics that quietly ruin facing:
Runout in the toolholder or at the cutter can cause one insert to do most of the work. That creates uneven wear and can leave repeating lines. Insert seating matters too. A tiny chip trapped under an insert can change its height enough to show up on the surface.
Tram (spindle squareness to the table) is another big one. If the spindle is not square, you can get a surface that looks smooth but is slightly tilted or shows steps between passes.
Managing vibration and chatter at the source
When face milling chatters, your first instinct might be to slow down. Sometimes that helps, but chatter is usually a system problem: tool, holder, spindle, setup, and part stiffness all acting together.
Shorter stickout helps right away. A smaller cutter diameter can help too if your machine is light, but be careful: too small a cutter can increase the number of passes and create more chances for visible blend lines. If you can, choose a cutter diameter that covers the surface efficiently while staying within your machine’s comfort zone.
Rigidity is a hard limit. Even perfect parameters won’t save a weak setup. That’s why many shops treat facing as a “setup test.” If a setup can’t face smoothly, it probably won’t handle heavy pocketing either.
Why does my face milling chatter?
Chatter has a sound you can’t forget. If you hear it, treat it like a warning, not just an annoyance.
Common causes are poor rigidity, too much stickout, a lead angle that pushes too much radial force, or running at a spindle speed that lands in a bad vibration zone. Feed per tooth can also be part of it. Too light a chip can rub instead of cut, which can make vibration worse.
A simple fix that often works is to shift RPM up or down by a noticeable amount, not just 2% or 3%. The goal is to move away from the unstable speed band. Changing the tool engagement—like reducing stepover or changing the path so entry is smoother—can also calm the cut.
Face milling parameters: speeds, feeds, depth of cut
Face milling performance ultimately comes down to how you set the cut. Following proper milling procedures and understanding the CNC machining process used helps optimize face milling for both speed and surface finish. Speeds, feeds, and depth of cut control heat, chip formation, finish, and tool life, which is why a repeatable parameter framework matters more than “magic numbers.” Before looking at starting ranges and examples, it helps to define what each parameter actually does and how they interact in a real facing pass.
Parameter definitions and what they control
Face milling parameters sound technical, but they answer simple questions: how fast does the edge move, and how much material does each tooth remove?
Cutting speed is the surface speed at the cutter edge. It drives heat and tool wear. RPM is just how fast the spindle turns to reach that cutting speed at a given diameter.
Feed per tooth is how much the table advances for each tooth. It strongly affects surface finish and cutting forces. Table feed is the total feed rate as the machine moves.
Depth of cut has two parts. Axial depth (ap) is how deep you cut into the surface. Radial engagement (ae) is how much of the cutter is engaged sideways, often called stepover when you make multiple passes.
Metal removal rate (MRR) ties it all together. Higher MRR usually means higher spindle load and more heat, so it’s a good reality check when you push a job.
How to calculate RPM and feed for face milling
These are the core formulas many programmers use. Keep the units consistent and you’ll be fine.
| Item | Formula (metric) | Example |
|---|---|---|
| Spindle speed | n = (1000 × Vc) / (π × D) | Vc = 180 m/min, D = 80 mm → n ≈ 716 RPM |
| Table feed | Vf = n × z × fz | n = 716, z = 6 teeth, fz = 0.12 mm/tooth → Vf ≈ 516 mm/min |
Now picture a real setup. You mount an 80 mm indexable cutter with 6 inserts to face a steel block. You choose a moderate cutting speed and a safe chip load. You calculate RPM and feed, then you watch spindle load and surface finish. If the load is low and the sound is smooth, you can increase feed per tooth step by step. If the finish is poor, you may need to reduce fz, add a finishing pass, or address runout before you touch speeds.
Starting ranges by material group
These are starting points, not final answers. Your cutter geometry, machine rigidity, insert type, and coolant method will shift what works.
| Material group | Cutting speed Vc (m/min) | Feed per tooth fz (mm/tooth) | Typical finishing ap (mm) |
|---|---|---|---|
| Aluminum (wrought) | 300–900 | 0.08–0.30 | 0.2–0.8 |
| Steel (low/medium alloy) | 120–250 | 0.06–0.20 | 0.3–1.0 |
| Stainless steel | 80–180 | 0.05–0.16 | 0.3–0.8 |
| Cast iron | 150–300 | 0.06–0.25 | 0.3–1.0 |
| High-temp alloys | 30–90 | 0.04–0.12 | 0.2–0.6 |
If you’re new to this, a good habit is to start in the lower half of these ranges, then tune based on sound, spindle load, and the surface you get.
What are good feeds and speeds for face milling?
Good feeds and speeds depend on the whole setup, but a practical approach is to pick a safe cutting speed for the material, then set a moderate feed per tooth, then tune the feed first. In many cases, you can hold cutting speed steady and adjust fz to reach the best balance of finish and tool life.
If the tool is rubbing and making heat without producing chips, your feed may be too low for that edge geometry. If inserts chip at entry, your feed or engagement may be too high for the setup, or the entry is too aggressive.
Common Face Milling Tool Materials and Coatings
Tooling material and coating are often overlooked, yet they control durability, heat resistance, and surface quality—especially at higher cutting speeds.
Carbide inserts are the standard choice for most CNC face milling work because they combine hardness with wear resistance. They hold edge integrity even at high temperature, which makes carbide inserts ideal for steel, stainless steel, and cast iron.
High-Speed Steel (HSS) face mills are still used on manual machines or low-rigidity setups because they are more forgiving, but they allow lower cutting speeds and shorter tool life. On CNC machines, HSS tends to be more of a niche option today.
Coatings extend performance further. TiN coatings help reduce friction and improve wear on general steel jobs. TiAlN and AlTiN coatings shine in dry or high-speed applications because they build a heat-resistant oxide layer. For aluminum, uncoated polished carbide inserts often perform better because coatings can encourage built-up edge formation.
If you’ve ever noticed aluminum welding itself to the insert edge, switching to a polished uncoated geometry can instantly fix it.

Chip Control and Chip Formation Behavior
Chip shape in face milling is a real diagnostic tool for whether parameters are working. A healthy chip tends to curl and break into consistent segments. Long stringers often suggest low feed per tooth or too positive a geometry.
Built-up edge (BUE) appears when the chip welds to the cutting edge—common in ductile metals like aluminum and stainless. BUE degrades finish fast because it “reshapes” the tool edge into something unintended.
Increasing cutting speed, switching to a sharper geometry, or using coolant/air blast usually clears BUE. If chatter coincides with BUE, the chip is likely rubbing instead of cutting.
Cast iron and hardened materials tend to make small brittle chips that break easily. Chip evacuation becomes less about safety and more about protecting surface finish and tool seating.
Process Capability: Flatness, Parallelism, and Surface Roughness
Face milling is not just about “looking flat”—it controls measurable geometric features.
Flatness describes how much a surface deviates from a perfect plane. According to NIST, achieving and measuring tight flatness tolerances is critical for high-precision manufacturing and assembly of mechanical components. Achieving good flatness requires a rigid setup, consistent tool engagement, and a finishing pass that minimizes distortion. Thin plates often fail flatness because clamping pressure bends them during the cut and they spring back afterward.
Parallelism describes how the faced surface relates to another reference surface—often the bottom of a block or the machine table. Parallelism errors often trace back to spindle tram issues or uneven clamping.
Surface Roughness (Ra or Rz) depends strongly on feed per tooth and insert geometry, especially wipers. A typical production finish for sealing surfaces might target Ra 0.8–1.6 μm, while rough stock cleanup can be 3.2–6.3 μm without issue.
If you need a fast way to improve sealing surfaces without slowing RPM, adding wiper inserts or reducing stepover is usually more cost-effective than chasing “perfect” feed numbers.
Face milling toolpaths and strategies (CNC and manual best practices)
Toolpath strategy determines how the cutter meets the material and how repeatable the final surface will be. By using the cutting edges on the face and carefully planning passes, milling is better suited for specialized face milling operations that require a precise flat finish. Using the face effectively ensures consistent material removal. Whether you’re using a manual mill or CNC, the choices you make around feed direction, overlap, and pass sequence have a direct influence on finish, flatness, and cycle time. Before comparing specific methods, it helps to understand how consistency and toolpath planning shape the outcome of a face milling operation.
Manual vs CNC face milling: consistency and finish outcomes
Manual milling can make great faces, but it depends a lot on the operator. Small pauses and uneven hand feed show up as visible marks. If you’ve ever looked at a faced surface and seen a “dark stripe” where the feed hesitated, you’ve seen this effect.
With a CNC machine, the feed is consistent and repeatable. That’s why CNC facing is often easier to control for both finish and flatness, especially when you need the same result across many parts.
Climb vs conventional milling for facing
On most CNC machines with low backlash and good rigidity, climb milling is the go-to choice. It often gives better finish and tool life because the chip starts thick and ends thin, reducing rubbing.
On older machines or any setup with backlash risk, conventional milling can be safer because it tends to pull less into the screw play. If you’ve ever felt the table “jump” on a manual machine, you understand why this matters.
Pass planning: roughing + finishing vs single-pass facing
A single-pass face cut sounds nice, but it doesn’t always give the best result. When you have extra stock, a roughing pass can remove the bulk with a heavier cut. Then a finishing pass can be light and controlled.
A finishing pass often uses a small ap and a stable stepover so you get even tool marks and fewer edge problems. Many machinists like a finishing depth in the range of about 0.5–1 mm on common materials, but the best value depends on rigidity and insert geometry. Too light and you may rub. Too heavy and you may distort thin parts or create more burr.
How much should a face mill overlap (stepover)?
Stepover is a quiet driver of finish. If stepover is too large, you can leave visible ridges between passes. If it’s too small, you waste time without real benefit.
A common starting point is to use a stepover that leaves enough overlap for the inserts—especially any wiper edges—to blend the passes. If you need a cleaner finish, reduce stepover and keep the feed steady. If you are roughing, increase stepover to raise MRR, but watch for chatter and load spikes.
Surface finish, flatness, and surface integrity (how to hit Ra and datums)
Surface finish and flatness are where face milling gets judged. Even if the setup, tool, and parameters are correct, the final surface has to meet Ra targets and serve as a functional datum. Before we look at the specific factors that drive roughness and flatness, it helps to understand how the cutting action translates into measurable surface quality and surface integrity.
What drives surface roughness in face milling
Surface roughness in face milling usually comes down to a few big causes: feed per tooth, insert nose radius, wiper geometry, tool runout, and vibration.
If one insert sticks out more than the rest, it will “scribe” the surface and leave repeating lines. If feed is high without a wiper, the scallops between tool marks get taller and Ra rises. Lead angle also plays a role because it changes the effective chip thickness and how the tool “sweeps” the surface.
A simple way to think about it is this: the surface is a record of motion. Any wobble, runout, or vibration becomes a pattern.
Achieving flatness and parallelism on CNC-machined faces
Flatness is not only about cutting a smooth surface. It’s also about machine geometry and repeatable insert height.
If the spindle isn’t trammed, you can face a large plate and still measure a slope. If your tool has uneven insert protrusion, you can get a surface that looks fine but has tiny steps.
Part distortion also matters. Thin plates can relax after you unclamp them. If flatness is critical, support the part well, avoid over-clamping, and use a finishing pass with stable cutting forces.
Edge conditions matter too. Face milling often leaves an exit burr, especially in ductile materials. A small chamfer pass or a controlled exit move can prevent edge breakout that ruins an otherwise good face.
Surface integrity concerns (when it matters)
For many general parts, finish and flatness are the focus. But on critical components, you may also care about surface integrity—heat effects, residual stress, and micro-tearing.
Hard-to-machine materials can build heat fast at the cutting edge. If cooling is inconsistent, thermal cycling can hurt tool life and can affect the top layer of the part. If you machine parts that see fatigue loading, it’s worth paying attention to how aggressive you are in the finishing pass.
Coolant, lubrication, and chip control (stable cutting and clean finish)
Coolant, lubrication, and chip control influence how cleanly a face mill cuts and how stable the finishing pass behaves. Different materials and insert grades respond differently to cooling and chip evacuation, which is why shops don’t treat coolant as an afterthought. Before comparing dry, flood, and MQL approaches, it helps to understand how cooling and chip flow affect finish, tool life, and surface protection.
Dry vs flood vs MQL: selection by material and insert grade
Coolant choice is not one-size-fits-all. For aluminum, the goal is often to prevent built-up edge (where material sticks to the edge) and to clear chips so they don’t scratch the face. Flood coolant or a strong air blast can help, depending on your shop rules and machine.
For cast iron, many shops run dry because cast iron chips can turn into messy slurry with coolant. Dust control becomes the bigger issue, so extraction and housekeeping matter.
For stainless and heat-resistant alloys, cooling can protect the edge, but sudden temperature swings can also harm some cutting edges. Consistency matters as much as “more coolant.”
Chip evacuation: preventing recutting and surface damage
A faced surface can be scratched by its own chips. That sounds silly until you see it happen: the cut looks smooth, then you find random gouges because chips got trapped under the cutter and dragged across the face.
Toolpath direction can help because it changes where chips fly. On a vertical milling machine, chips often fall back onto the part. Air blast, good coolant flow, and smart toolpath choices can keep the area clean.
Coolant delivery best practices
If you use coolant, aim it where the chips form, not where they land. Inconsistent coolant can cause inconsistent finish, especially on long facing passes where the tool heats up over time.
Also pay attention to nozzle position after setup changes. It’s easy to bump a nozzle and not notice until the finish goes bad.
Troubleshooting and optimization (symptom → cause → fix)
Troubleshooting face milling is easier when you treat symptoms as data. The surface finish, the sound of the cut, and the wear pattern on the inserts all point toward specific causes. Before we look at real failure modes and fixes, it helps to frame troubleshooting as a simple chain: symptom → cause → corrective action.

Insert wear and failure modes in face milling
Wear patterns tell a story. The surface and the inserts are giving you feedback, even if no alarm goes off.
Here’s a quick diagnostic table you can use at the machine:
| What you see | Likely cause | What to try next |
|---|---|---|
| Flank wear (edge looks rounded) | Speed too high, abrasive material, long cutting time | Reduce Vc, choose tougher edge, improve coolant/air |
| Chipping at entry | Impact from interrupted cut, feed too high, aggressive entry | Use smoother entry, reduce fz, use stronger edge prep |
| Notch wear near depth line | Work hardening, unstable engagement | Adjust ap, improve rigidity, avoid dwelling |
| Built-up edge (material stuck to insert) | Not enough lubrication, wrong geometry, speed too low/high for material | Improve lubrication, increase Vc slightly, sharper geometry |
| Thermal cracking | Temperature cycling, inconsistent coolant | Use consistent cooling or run dry (as appropriate), reduce heat |
Symptom-based fixes (fast diagnostics)
If the surface finish is poor, start with runout and insert seating. Those are quick to check and often the real cause. Then look at feed per tooth and stepover. If you’re already using a steady feed and good overlap, wiper inserts or a dedicated finishing pass may be the best move.
If you hear chatter, change something that shifts the vibration system. That can mean changing RPM by a larger step, reducing stickout, reducing engagement, or switching to a lead angle that pushes more load axially. Sometimes simply changing the toolpath to avoid slamming into the material fixes it.
If inserts are breaking, look at entry and exit first. Are you hitting a hard scale, a keyway, or a gap? Interrupted cuts can snap edges that survive fine in steady cutting. A tougher insert geometry, a different lead angle, or a softer entry move can save a lot of inserts.
Case studies: measurable improvements (real-world style examples)
I once helped on a job facing large steel plates where the surface looked “okay” but the cycle time was painful. The setup used a fly cutter because “it gives a nice finish.” It did, but the single edge meant we had to run slow.
Switching to an indexable face mill with a stable lead angle let us increase feed while keeping the finish acceptable. The biggest surprise was not the faster cutting—it was the consistency. With multiple inserts sharing the load, tool marks stayed more uniform from part to part.
On another job, a shop struggled with vibration during heavy-duty face milling of rough stock. The cutter was pushing too much radial force into a part with weak support. Moving to a higher lead angle cutter shifted more force into the spindle direction, and the chatter dropped without reducing throughput.
And if you’ve ever had a finish target you can almost hit but not quite, adding wiper geometry can be a clean fix. It often lets you keep feed up while improving Ra, instead of slowing down and losing time.
How do I improve surface finish in face milling?
To improve finish, focus on stability first, then geometry, then parameters. Make sure inserts sit clean, runout is controlled, chips are not recutting, and the feed is steady. After that, use a light finishing pass with controlled stepover, and consider wiper geometry if you need better Ra without slowing down too much.
Safety, checklists, and takeaways (actionable wrap-up)
Face milling may look straightforward, but the operation carries real safety considerations and benefits from repeatable process habits. Before you wrap up a job or build a standard for your shop, it’s worth thinking about how to protect operators, control risks, and make success easier to repeat.
Face milling safety essentials
Face milling throws chips hard and wide. Always think about chip direction and where your hands are when you start a cut. OSHA emphasizes that proper machine guarding and operator awareness are essential to prevent injuries during milling operations.
Respect maximum RPM limits for your cutter diameter and toolholding system. Insert retention matters too. A loose insert screw can turn into a dangerous projectile. Torque inserts correctly, and don’t ignore damaged pockets or clamps.
Use proper guarding, and don’t lean into the machine opening during a facing pass. If a chip hits you in the face shield, it’s a reminder of how much energy is in that cut.

Pre-run checklist for reliable face milling results
Use this before you hit cycle start, especially if you’re chasing flatness or finish.
- Verify workholding is solid, supported, and not bending the part.
- Confirm toolholder and cutter are clean, seated, and runout is acceptable.
- Check inserts: correct grade/geometry, clean seats, correct torque.
- Confirm program basics: correct tool, correct offsets, safe entry/exit moves.
- Dry run above the part if the setup is new or clamps are close.
- Start at baseline parameters, then tune using sound, load, and surface evidence.
Key takeaways
Face milling is the go-to machining process used to create flat reference surfaces because the cutter axis is perpendicular and the tool face sweeps a plane. When it goes wrong, it’s usually not one magic number—it’s rigidity, tool choice, and consistent feed working together.
If you remember only a few things, remember these: keep the setup stiff, pick a lead angle that fits the job, control runout and insert seating, and tune feeds and speeds with a clear plan. Do that, and face milling becomes one of the most reliable operations in your shop.
FAQs
Face milling is a common milling process where a facing milling machine or a CNC mill rotates the cutter perpendicular to the workpiece surface. Imagine the cutter spinning on top of a flat metal plate and removing material evenly to create a smooth, flat surface. It’s very efficient for producing large, flat areas quickly. Face mills usually have multiple teeth, which allows them to remove more material in one pass than other milling methods.
The difference between end mill vs face mill is mainly in how the cutter contacts the workpiece. End mills use the tip to cut, which makes them great for slots, pockets, and complex shapes. Face mills, on the other hand, use the cutter’s face and periphery to flatten large surfaces. Think of it like this: end milling draws lines and contours, while face milling flattens the tabletop. End mills are versatile and precise, while face mills are designed for faster material removal over wide areas.
The face milling process starts with clamping the workpiece on the table of a CNC milling machine or manual mill. A face mill rotates perpendicular to the surface and moves across the material, with its multiple cutting edges slicing off material to produce a smooth, flat finish. Key factors like feed rate, cutting speed, and depth of cut determine efficiency and surface quality. Face milling can be used for roughing or finishing operations and works well on metals like aluminum, steel, and cast iron.
Face milling vs plain milling (also called slab milling) mainly differs in cutter engagement. Face milling cuts mostly with the tool’s face and creates flat surfaces, while plain milling removes material along the workpiece’s length using the cutter’s edge. In short, face milling is for flat tops and smooth surfaces, while plain milling is better for long, straight cuts along the side of a part.
Face milling has several advantages:
It removes a lot of material quickly because of the multiple cutting edges.
Produces smooth, flat surfaces, reducing the need for extra finishing.
Works on various materials like steel, aluminum, and cast iron.
Can handle both roughing and finishing operations.
Because of these benefits, face milling machines are widely used in modern CNC milling and production setups.
Milling can be divided into three main types: face milling, end milling, and peripheral (plain) milling.
Face milling: cuts flat surfaces efficiently with the face of the cutter.
End milling: uses the cutter tip for slots, pockets, and contours.
Peripheral milling: removes material along the length of the workpiece using the cutter edge.
These categories help in selecting the right method depending on part geometry and material.
Face milling vs side milling depends on which part of the cutter does the cutting. Face milling uses the cutter’s face to produce flat surfaces, while side milling uses the cutter’s side to remove material from vertical edges. Face mills are larger with multiple teeth on the face, and side mills are designed to cut along edges or profiles. Basically, face milling flattens tops, and side milling shapes edges.
A shoulder mill is a type of end mill used for cutting 90-degree shoulders or steps. It can cut vertically and horizontally to make precise edges. A face mill, on the other hand, is designed to remove material over a wide surface efficiently. Think of it this way: shoulder mills are for edges and steps, while face mills are for flattening large surfaces quickly. Shell mill vs face mill is another common comparison, and while both remove material, face mills typically give faster surface finishes. Some machinists also compare face mill vs fly cutter, where the fly cutter is slower but can give very smooth finishes on smaller parts.
Reference
https://www.osha.gov/machine-guardinghttps://www.nist.gov/manufacturing