
Done right, countersinking your screws takes a basic joint and makes it look and perform like a pro build. If you’re looking for how to countersink screws properly, you create a conical recess so the screw head sits flush with the surface or a touch below. This keeps the surface of the wood smooth for finishing, prevents splitting, and helps the joint carry load without the head rocking or working loose. You’ll use it in woodworking, light metalwork, and plastics. If you’ve ever asked, “How do I countersink a screw?”—you’re in the right place.
This guide starts with a fast, reliable how to countersink screws method that you can use right now. Then we unpack countersink angles (82° vs 90°), head types, depth, and material-specific techniques. You’ll learn how to measure the diameter of the screw head with calipers, set depth so heads sit flush or slightly below, and avoid tear-out, chatter, and off-center holes. We’ll finish with fixes for common mistakes, advanced methods like plugs and counterbores, a simple depth calculator, and quick checks to verify fit and finish. The goal is simple: clean, consistent countersink holes that look great and hold strong—whether you’re new to the shop or building for clients.
Quick Start: How to Countersink Screws (Step-by-Step)
How do you countersink a screw? You can use a countersink with any standard drill. A drill/driver and a good countersink bit are all you need. If you’re wondering whether you should drill or countersink first, here’s the short answer: drill your pilot hole first to guide the countersink and prevent wandering. Then make the countersink, and finally drive the screw. Precision in pilot hole placement and countersink depth can significantly affect joint stability and screw seating, according to NASA research on mechanical assembly and fastener installation.
Choose the right countersink bit
- Match the countersink angle to the type of screw: use 82° for most inch-series screws (common in North America) and 90° for most metric screws. This match keeps the head of the screw stable under load.
- Measure the diameter of the screw head and its height with calipers. This helps you select the bit that matches the diameter needed for the recess and set depth correctly.
- If you’re not sure, test on scrap and adjust. A small mismatch can cause the head to rock or sit proud.
Drill the pilot hole (prevent splitting and guide the screw)
- Choose a drill bit that matches the core (shank) diameter—the solid shaft under the threads—not the outer thread diameter. This avoids over-tight threads and reduces splitting.
- In wood, always predrill near edges and ends. A proper pilot hole is the best way to avoid cracks and blowout when you countersink a screw in softwood or hardwood.
Countersink to target depth for a flush finish
- As a starting point, many pros sink about 4 mm deep, then test. That’s a reference, not a rule. Adjust to the actual height of the screw head and your finish plan (flush, slightly below the surface, or deeper for a wood plug).
- Use a depth stop if you have one, or wrap tape on the bit. Test on a scrap piece of wood first so your first visible hole is perfect.
Drive the screw and verify flushness
- Install the screw and check with a straightedge. The head should sit level with the surface, or be slightly below the surface if you plan to add wood filler or a plug.
- Think of the process as a simple path: pilot → countersink → install → inspect. That quick check saves sanding time and prevents rework.

Screw Heads, Angles, and Bit Selection
Angle matters more than most people think. The wrong angle can make a good joint feel loose even when the screw is tight. The angle of your screw and the angle of your countersink must match.
Angle matching explained (82° vs 90°)
Most inch-sized flat head screws use an 82° included angle. Most metric flat head screws use 90°. When the angles don’t match, the head seats on a line, not a surface. That causes rocking, micro-movement, and loosening over time. You’ll also see finish issues where the head edge digs in or sits proud. If you work on both US and metric jobs, keep a bit set with both angles and label them.
Head types and matching countersink styles
Flat or “flat head” screws use a conical seat. That’s what a standard countersink drill bit creates. For socket or hex screws that need a flat-bottom recess, you need a counterbore (cylindrical) rather than a countersink (conical). Oval head screws have a slight dome; you still use a conical countersink, then leave the dome proud or match a shallow profile if you want a near-flush look. Bugle-head screws (common in drywall and some decking) spread load with a softer flare; in wood, the material often self-forms around the head, but a light countersink prevents raised fibers and marring.
Measuring the screw head like a pro
A quick caliper check makes your work consistent. Measure:
- The shank (core) diameter for the pilot drill.
- The screw head’s diameter at the widest point to estimate the top of the countersink.
- The height of the screw head (base to top surface) so you can set depth close on the first try.
If you ever ask, “What angle countersink should I use with my screws?” remember this: match 82° for inch flat heads and 90° for metric flat heads. If you have specialty heads, check the packaging or standards sheet.
Screw head-to-countersink mapping table
| Screw head type | Standard angle (typical) | Typical materials/use | Matching tool/bit |
|---|---|---|---|
| Flat (countersunk) – inch | 82° | Wood, sheet metal, machinery | 82° conical countersink |
| Flat (countersunk) – metric | 90° | Wood, metal, plastics (metric builds) | 90° conical countersink |
| Oval head | 82° or 90° underhead cone | Wood trim, light hardware | Same as flat, match screw angle |
| Bugle head | Variable flare | Drywall, decking | Light countersink or none; test on scrap |
| Socket/hex cap (needs recess) | Flat-bottom recess | Furniture fittings, machinery | Counterbore (not a conical countersink) |
Tools, Materials, and Safety Essentials
The right tools keep holes clean and repeatable. You do not need fancy gear to get a professional finish, but a few basics will make your life easier.
Core toolkit checklist
- Drill/driver (variable speed). You can use a regular drill for countersinking in wood, metal, and plastic.
- Countersink bit(s) in 82° and/or 90°. A combined pilot + countersink bit saves time in wood.
- Pilot hole drill bits matched to core diameter.
- Depth stop or bit collar (or masking tape).
- Calipers, square, and a straightedge for checks.
- PPE: safety glasses, hearing protection, dust mask when needed. Always wear appropriate eye protection when drilling or countersinking to avoid flying chips or debris, based on CDC recommendations.
- Clamps to hold the workpiece steady and keep the tool perpendicular to the wood or metal.
No countersink bit? Effective alternatives
You can countersink a screw without a countersink bit in a pinch:
- Use a larger twist drill at a very shallow depth to create a light chamfer. It won’t match the angle perfectly, but it can allow the screw head to sit flush.
- Use a hand deburring tool for metal. It’s slower but gives control and clean edges.
- A step drill can create a controlled chamfer in sheet metal.
- A spade bit is not ideal for a true countersink. It’s made for flat-bottom holes. You can make a shallow counterbore for a plug, but it won’t match a flat head cone. If you try it, go slow and use only the tip to kiss the rim.
These “ways to countersink” work, but your best, most consistent results come from a proper countersink bit that matches the screw angle.
Safety, speed, and chip control
Secure the work, protect your eyes, and control heat:
- Clamp the part. Bits chatter when the workpiece moves.
- Use moderate RPM in metal to avoid heat and burrs; lighter pressure and a touch of cutting fluid help clean countersink holes.
- In plastics, slow down and “peck” to clear chips so you don’t melt the edge.
- Clear chips often. A packed fluted bit “burnishes” rather than cuts, causing tear-out and glazed rims.

Material-Specific Techniques (Wood, Metal, Plastics)
Countersinking looks simple, but each material behaves differently. A small tweak to speed, pressure, and sequence can be the difference between perfect rims and chewed edges.
Wood (softwood vs hardwood)
In softwood, you see fibrous tear-out around the hole if the bit is dull or you push too hard. In hardwood, you’ll see burn marks or small chips on the rim if you rush or use high RPM. Always drill the pilot hole before you countersink in wood. Near edges and ends, this is the best way to prevent splitting because the shaft of the screw displaces less material. Use a sharp bit, moderate speed, and light pressure. A backer board under the exit side keeps the rim clean. If the grain is delicate where you make the countersink hole, consider a quick kiss with the bit first, then finish to depth after drilling the pilot. That pre-chamfer can help guide fibers cleanly.
People often ask, “Do I need to predrill before countersinking in wood?” Yes—especially for hardwoods and near edges. Predrilling keeps the screw head from crushing fibers and reduces cracks.
Metal (steel, aluminum)
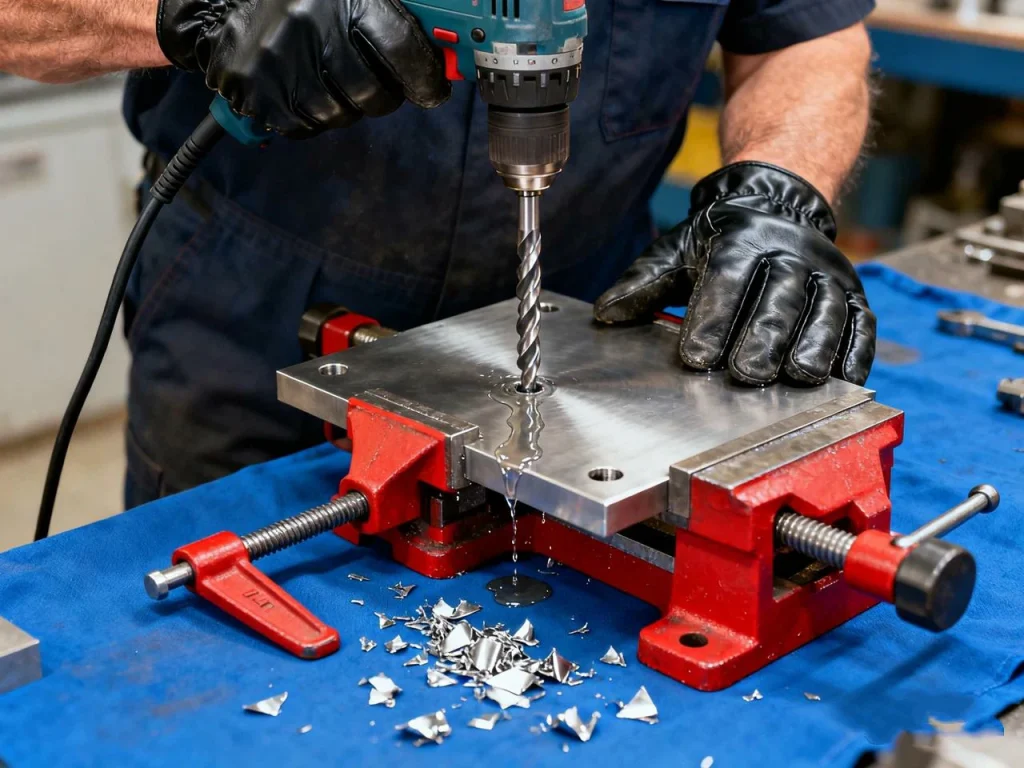
In metal, the main challenge is chatter (a bouncing bit that leaves rings) and burrs. Keep RPM lower than in wood and use light, steady pressure. For high-precision holes, countersinks, or threaded seats in metal components, professional CNC turning services can produce consistent, burr-free results. Companies like U-Need specialize in CNC machining of metal parts, offering precise countersinks, counterbores, and custom finishes for aluminum, steel, and other alloys. Let the edges cut; don’t lean on the tool. For steel, a drop of oil reduces heat and leaves a crisp conical seat. After countersinking, a quick deburr with a hand tool or light pass removes any raised edge. If the countersink a screw in metal needs high precision (machined parts), use a drill press or guide bushing to keep everything square and clean.
Plastics and composites
Plastics can melt or crack. Use lower RPM, “peck” to clear chips and heat, and apply almost no pressure—let the tool skim. Support the underside to avoid breakout. Brittle plastics, like acrylic, may benefit from a zero-rake countersink or even a light hand chamfer tool. Always test on offcuts because plastics vary a lot.
Material-specific speed/pressure quick chart
| Material | RPM (typical handheld range) | Feed/pressure | Notes |
|---|---|---|---|
| Softwood | 1,200–2,000 | Light to moderate | Sharp bit prevents fuzzing; use backer when needed |
| Hardwood | 800–1,500 | Light | Watch for burn; clear chips often |
| Aluminum | 400–1,000 | Light | Use cutting fluid for clean finish |
| Mild steel | 200–600 | Light | Steady hand to avoid chatter; oil helps |
| Plastics | 300–1,000 | Very light | Peck to avoid melting; support underside |
These ranges are starting points. Always test and adjust.
Troubleshooting, Mistakes, and Fixes
Even careful work can go off-track. Here’s how to spot problems early and fix them fast.
Over-sinking and loose joints
If the recess is too deep, the head to sit below the surface may feel good, but you’ve reduced clamping pressure. The head bottoms out in the cone before the joint is tight. Fix by using a small washer (in metal), adding a wood plug and re-drilling, or starting fresh on critical surfaces. In wood, if the material crushed, add glue and clamp, then re-cut the countersink once cured.
Tear-out, chipped rims, and surface marring
This usually comes from a dull bit, too much feed, no backer, or the wrong speed. Sharpen or replace the bit, slow down, support the back side, and take a brief “clean-up” pass. Minor chips can be sanded or filled. For visible furniture, match a plug rather than rely on wood putty.
Off-center or ovalized countersinks
When the pilot hole is off or the bit walks, the countersink goes oval. Use a center punch in metal or an awl in wood to start the pilot dead center. A drill press or a guide block keeps the bit square. If the pilot is already off, you may be able to plug and re-drill in wood or step up to a larger screw in shop fixtures (not in critical builds).
How deep should a countersink be for a flush finish?
A quick practical method: measure the height of the screw head, then start your countersink slightly shallower than that. Test with the actual screw. Aim for flush, then add a touch more depth if you plan to fill and finish. For many common flat heads, about 4 mm is a safe first cut, but always match to the head you’re using.
Troubleshooting quick table
| Symptom | Likely cause | Fast fix |
|---|---|---|
| Head sits proud | Too shallow; wrong angle | Deepen slightly; match 82°/90° |
| Head spins but joint is loose | Over-sunk; crushed fibers | Use washer (metal) or plug (wood); re-cut |
| Chatter rings in cone | Too high RPM; poor support | Lower RPM; clamp work; light feed |
| Ragged rim/tear-out | Dull bit; no backer | Sharpen/replace; add backer; clean pass |
| Off-center cone | Bit walk; misaligned pilot | Center punch; drill press or guide |
Advanced Methods, Counterbores, and Pro Finishes
Once you’re comfortable, you can hide screws completely or use precision tools to boost speed and repeatability. For more demanding applications, CNC milling or grinding can ensure perfectly matched counterbores and flat-bottomed recesses for screws.
Countersink + plug for invisible fasteners
This is a classic furniture move. Drill the pilot. Use a counterbore or a larger bit to make a shallow flat-bottom recess for the plug. Then make a matching countersink if your head is conical. Drive the screw, glue in a grain-matched plug, trim it flush, and sand. After finish, the fastener disappears.
Countersink vs counterbore (and when to choose each)
A countersink is conical; it fits a flat head screw. A counterbore is cylindrical; it fits socket cap or hex head screws and creates a fit and a recessed screw that sits below the surface for plugs or caps. If your design calls for a flat-bottom recess or you’re using hardware with a non-conical head, choose a counterbore. If you need the screw head to sit flush without a visible plug, use a countersink.
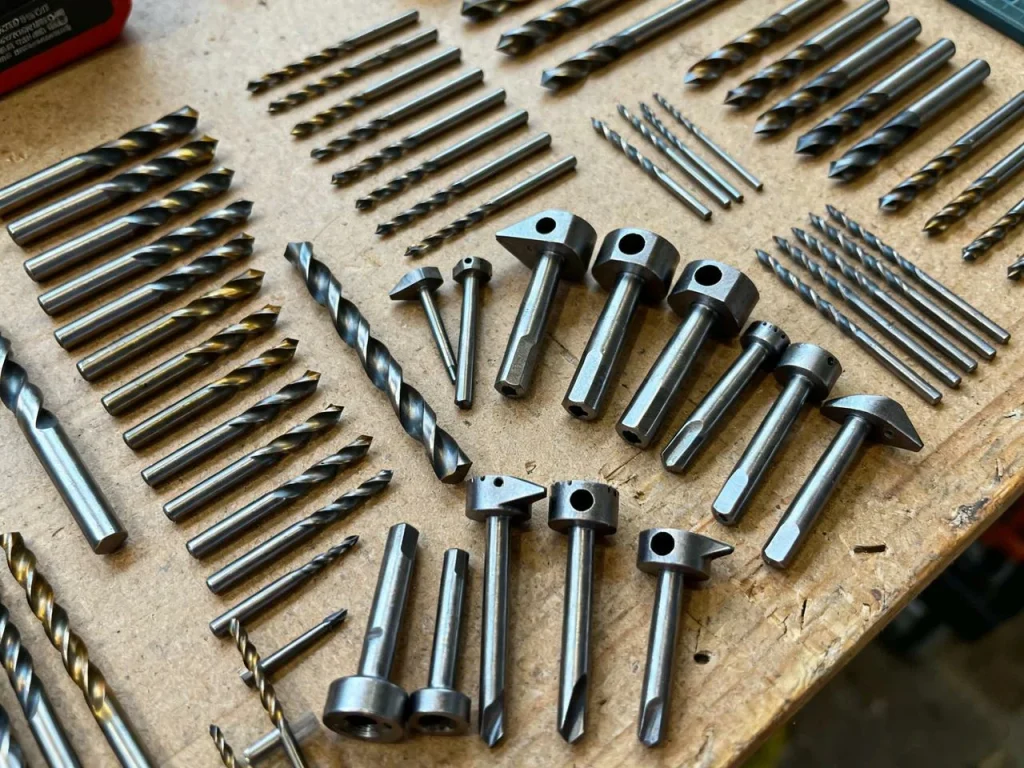
Precision controls: depth stops, combined pilot-countersink bits
When you need repeatable results—cabinet runs, production parts, CNC setups—use stop collars, drill press depth stops, or combination pilot/countersink bits. They help you choose a bit and lock in depth so every hole for the screw head matches. This saves sanding and avoids “one too deep” errors.
Can you countersink without a countersink bit?
Yes. As covered above, a larger twist bit at a shallow depth can make a chamfer that lets the head sit near flush. A step bit or deburring tool works in sheet metal. But if you want consistent angle, depth, and finish, get a special bit made for countersinking. It’s a small purchase with a big payoff.
Quality Checks, Fit Verification, and Maintenance
Great-looking countersinks are easy to verify. A short check now prevents long repairs later.
Verify angle and flushness
Use a metal straightedge or even a flat block of wood as a straight edge across the surface. Slide a thin feeler (paper works) over the head; if it catches, the head is proud. If you want “just below,” the straightedge should bridge the head cleanly and show a hairline gap in the finish plane. If you see daylight around parts of the rim, your angle may not match.
Torque and load considerations
A matched angle and clean cone help the head bear load over an even surface. This reduces head movement and keeps torque where it belongs—in the threads and joint faces. In brittle materials, avoid over-torque; use a clutch setting or hand finish. Remember that length as the screw and diameter affect pull-out strength, but the size of the countersink and angle affect seating and stability.
Bit care: cleaning and sharpening
Resin from wood builds on edges and causes burn or chatter. Clean bits with an approved resin remover or mild solvent, then dry and oil lightly to prevent rust. In metal, a dull edge chews instead of cuts. Some countersinks can be re-sharpened; otherwise, replace them when they start to chatter. Store by angle—keep 82° and 90° separate so you don’t mix them in a rush.
Visuals, Calculators, and Interactive Resources
Here’s a simple way to size your countersink by the numbers, plus quick-reference tools you can print and keep at your bench.
Interactive calculator: input screw head diameter/height + target finish
Use this simple approach to estimate countersink depth and rim diameter. It assumes a conical underside with included angle A.
- Inputs:
- ds = shank diameter (core)
- Dh = head diameter at the top
- A = included angle (82° or 90°)
- s = extra depth to set the head below surface (0 for flush; positive value for below-flush)
- Outputs:
- t = countersink depth to flush = ((Dh − ds) / 2) ÷ tan(A/2)
- t_final = t + s
- D_rim (rim diameter at final depth) = ds + 2 × t_final × tan(A/2)
Example: If ds = 4.0 mm, Dh = 8.0 mm, A = 90°, s = 0.5 mm
tan(45°) = 1, so t = ((8 − 4)/2) ÷ 1 = 2.0 mm; t_final = 2.5 mm
D_rim = 4 + 2 × 2.5 × 1 = 9.0 mm
This gives you a target depth and the finished rim diameter to check against your bit.
Tip: If you don’t have head dimensions handy, start with a 4 mm depth test and adjust. Always test on scrap.
Angle and head-type reference table
- Inch flat head screws: 82°
- Metric flat head screws: 90°
- Oval heads: match the underhead angle of the screw you bought
- Socket/hex heads: use a counterbore instead of a countersink
If you like printed charts, keep a tap drill chart PDF in your shop to match pilots to thread sizes and to pick the right tap and drill when you need threads. It’s not only for tapping—those charts help you pick a proper pilot drill for wood and metal so you don’t split stock or strip threads. Many official and university shops provide a free chart PDF for a quick reference you can print.
Troubleshooting flowchart
- Head proud → Deepen slightly → If angle mismatch, swap to 82°/90°
- Head below, joint loose → Fill/plug or washer → Re-cut to proper depth
- Rim ragged → Sharpen/replace bit → Add backer → Reduce RPM and feed
- Chatter rings → Clamp better → Lower RPM → Use cutting fluid in metal
- Off-center → Center punch/awl → Drill press or guide → Rework with plug if needed
Skill check: short quiz
- Do you countersink before or after the pilot hole? After the pilot hole.
- What angle for metric flat heads? 90°.
- Can you use a regular drill bit to create a light countersink? Yes, carefully and shallow.
- What’s the fastest way to check flushness? Straightedge across the head.
Why Countersink At All?
People often ask, “Why would you countersink a screw?” Three key reasons:
- To let the screw head sit flush with the wood (or metal/plastic) so the surface is smooth and safe.
- To reduce splitting and crushing in wood by shaping a seat for the head.
- To improve joint strength and stability by matching the head to a true conical seat at the correct angle.
If you plan to paint or fill, a slightly below the surface seat lets you hide the head with wood filler or a plug for a clean look.
Real-World Example: A Clean, Strong Wood Joint
You’re joining a hardwood face frame to a plywood cabinet. The frame will be painted. You select inch flat head wood screws and measure the diameter of the screw and head with calipers. You drill a pilot matched to the core. You switch to an 82° countersink and make a shallow recess—about 3.5 mm—then test with a screw. The head sits just proud, so you deepen 0.5 mm. You drive the screw and check with a straightedge: flush. You add a dab of filler, sand, and paint. The joint is tight and smooth. If you’d used a 90° bit here, the head would rock and the paint might crack at the rim over time.
Wood, Metal, and Plastics: Small Tweaks, Big Payoffs
- Wood first: In softwoods, a light touch prevents fuzzing. In hardwoods, a clean edge means sharp tools and easy feed.
- Metal next: Cut pressure, not force. If the bit squeals, slow down and add a drop of fluid.
- Plastics last: Keep the bit cool and the chips moving. Peck often, and stop at the first sign of melting.
Mistakes You’ll Avoid After Today
- Over-sinking to “make sure the screw is in.” It weakens the joint.
- Angle mismatch (82° vs 90°), the most common error behind loose heads.
- Skipping pilots in wood, which causes splits and poor seating.
- Rushing in metal, which makes rings and burrs you’ll have to clean anyway.
Key takeaways (recap)
Remember, the core of how to countersink screws is to match the countersink angle to your screw—82° for most inch flat heads, 90° for most metric. Drill your pilot hole first to guide the countersink and prevent splits. Start with about 4 mm depth, test, and adjust to your head of a screw. Use a set of countersink bits and depth stops for repeatable work. In wood, metal, and plastics, tweak speed and pressure to avoid tear-out and chatter. Check flushness with a straightedge, and don’t be afraid to plug or re-cut if it’s not right—the best builds value precision over speed.
FAQs
If you don’t have a dedicated countersink bit lying around, don’t worry! You can still do a decent job with a bit of creativity. One easy trick is to grab a slightly larger regular drill bit than your pilot hole and gently chamfer the top of the hole. The key word here is gently—you don’t want to drill too deep or too aggressively, or you’ll ruin the fit. For metal, a deburring tool works really well to shave off the edges and make a smooth recess for the screw head. Always go slow, and if possible, test on a scrap piece first to make sure the screw will sit flush without damaging the material.
Always drill the pilot hole first. That tiny initial hole guides your screw and prevents splitting or damaging your workpiece. Once the pilot is ready, you can countersink to the desired depth and angle. After that, drive the screw in. This sequence—pilot first, then countersink, then drive—helps everything sit flush and neat. Skipping or swapping the steps can lead to screws that stick out or tear the wood/metal around them.
Absolutely! A standard drill or drill/driver is usually perfect for the job. Just remember to keep it steady and avoid high-impact or hammer-drill modes, which can make the bit chatter and leave rough edges. The trick is a steady hand, moderate speed, and a little patience. For soft materials like wood, this works surprisingly well. For metal, take it even slower and maybe use a small amount of cutting oil if needed.
Well, you can, but with a big caveat: a spade bit won’t give you a true cone-shaped countersink. Instead, it will create more of a flat-bottom counterbore. So only use it if your goal is to recess a screw that can handle a flat seat, like if you’re planning to plug it later, or if the flat recess is fine for your project. For classic flat-head screws where the conical angle matters, stick to a proper countersink method.
This depends on the screw standard. Inch (imperial) flat-head machine screws are usually 82°, while metric flat-head machine screws are normally 90°. It’s important to match the countersink angle to your screw, or the screw head won’t sit perfectly flush. If you’re unsure, check the screw specs or test on scrap material first. A little trial can save a lot of headaches later.
Think of countersinking as a three-step dance:
1. Drill a pilot hole to guide the screw.
2. Countersink that hole to the right depth and angle for your screw head. Take your time, especially if it’s metal or hardwood.
3. Drive the screw in, then double-check that the head sits flush with the surface.
Always match the angles carefully, and don’t forget the scrap-test trick. It’s a small step that prevents big mistakes on your main project.
References
https://ntrs.nasa.gov/citations/19900009424
https://www.cdc.gov/niosh/ppe/eye-safety/?CDC_AAref_Val=https://www.cdc.gov/niosh/topics/eye/



 English
  German
  French
  Italian
  Spanish
  Polish
  Czech
Czech  Japanese