
Based on data from the World Steel Association, global steel production exceeds 1.8 billion tonnes annually, highlighting how essential proper heat treatment is for performance and reliability. Heat treating steel is not magic. It’s control. When you heat to the right austenitizing range, soak long enough, quench in the right medium, and temper on time, the steel’s microstructure shifts in your favor. Hardness, strength, and toughness all come from those choices. Miss the mark by even 25°F or a few minutes, and parts can crack, warp, or come out soft.
This guide gives you a repeatable plan. You’ll see a quick-start checklist, step-by-step instructions, practical “recipes,” safety essentials, and clear explanations of the metallurgical “why.” We’ll cover exact temperature ranges, soak times, quench choices, and tempering temperatures for common grades like D2, 1095, and 52100. You’ll also learn how to verify results with simple tests. Along the way, you’ll find what the heat treatment process does to the steel’s microstructure, how alloy content changes response, and how to heat treat steel at home with confidence and safety.
If you’ve ever wondered, “Can I heat treat steel at home?” or “What temperature do you heat treat steel at?” you’ll find clear answers below—plus the reasoning behind them.
Quick Start: Temperatures, Steps, and Safety
Here’s a short bridge before we dive into the step-by-step. If you’re new to heat treating or just need a quick refresher, the idea is simple: bring the steel to the right temperature, hold it long enough, cool it at the correct speed, and then temper to dial in toughness. The details—temperatures, soak times, and quench choices—are what make or break your results. The next section gives you the whole sequence in a quick, practical snapshot you can follow at the bench or in a small shop.
Core sequence at a glance: heat → soak → quench → temper
Here is the core of the heat treatment process for hardening steel. Use this when you want to raise strength and hardness and then balance toughness with tempering.
- Heat the steel to its austenitizing range (the critical temperature band where the structure becomes austenite).
- Soak at that specific temperature long enough to equalize heat through the part.
- Quench in the chosen medium (oil, water/brine, air, or gas) with proper agitation.
- Temper at a lower temperature to reduce brittleness and set final mechanical properties.
That’s the full loop: austenitize → quench → temper. Many types of heat treatment spin off from these steps (anneal, normalize, stress relieve), but most follow this same idea: controlled heating and cooling to achieve desired properties.
Critical temperature bands and soak times (1,450–1,800°F; ±25°F matters)
Most plain carbon and tool steels austenitize between about 1,450°F and 1,800°F (790–980°C). That range is wide because the right target depends on the type of steel (carbon content and alloy additions change how fast the steel transforms and how much martensite you can form on a given cooling rate).
- For high-carbon simple steels (like 1095), austenitizing is often near 1,475–1,500°F.
- For alloy steels (like 52100), it’s commonly around 1,500–1,550°F.
- For high-alloy tool steels (like D2), it’s higher—often 1,800–1,850°F.
Soak time depends on part size and grade. Common rules-of-thumb:
- Heat until the part is at temperature throughout (use a thermocouple for thick pieces).
- Then hold for a short, controlled period—often 10–30 minutes for small sections in simple and alloy steels, and up to 30 minutes (or as specified) for many tool steels once equalized.
- For high-temperature processes like annealing, longer holds are typical (up to 1 hour per inch of thickness).
Small changes matter. Drifting 25–50°F too high can grow grain and reduce toughness. Going low can leave you short on hardness after the quench.
Quench media selection: water vs oil vs air vs inert gas (risk vs hardness)
Choosing a quenching medium is a balance between cooling speed, risk, and your steel’s hardenability. Faster media raise hardness potential but increase cracking and warp risk.
Brine (Salt Water): Extremely Fast, Highest Risk
Brine is the most severe quench medium because salt collapses the vapor blanket around the hot steel, allowing extremely rapid cooling.
- Advantages: Maximizes hardness in simple steels that require fast cooling.
- Disadvantages: Highest risk of cracking, warpage, and internal stress.
- Best for: Certain plain-carbon, low-alloy steels designed for water quenching.
- Avoid for: High-alloy tool steels and complex or thin parts.
Water: Fast and Effective, but High Distortion Risk
Water quenches slightly slower than brine but is still very aggressive.
- Advantages: Adequate speed for plain-carbon steels that need rapid cooling.
- Disadvantages: High distortion and cracking risk.
- Best for: Simple geometries made from water-hardening steels.
- Avoid for: Tool steels, high-alloy steels, or intricate parts.
Polymer Quenchants: Tunable and Lower Risk Than Water
Polymer quenchants (PAG-based solutions) can be diluted to achieve a specific cooling profile.
- Advantages: Adjustable quench speed; less shock than straight water.
- Disadvantages: Requires concentration control and agitation management.
- Best for: Parts needing faster cooling than oil but lower risk than water.
Oil: Balanced Cooling for Most Steels
Oil is the most common quenching medium because it offers moderate, controllable cooling.
- Advantages: Good hardness potential with far lower cracking risk.
- Disadvantages: Slower than water; may not fully harden very low-hardenability steels.
- Best for: High-carbon steels, most alloy steels, O-series tool steels, general toolmaking and blades.

Still Air: Slow Cooling for Air-Hardening Steels
Air cooling allows high-hardenability steels to transform to martensite without the risks of liquid quenchants.
- Advantages: Very low distortion; clean; simple.
- Disadvantages: Too slow for most plain-carbon or low-alloy steels.
- Best for: A-series, D-series, and other air-hardening tool steels; thin or high-value precision parts.
Forced Air or Inert Gas: Controlled, Professional Quenching
Industrial furnaces and vacuum systems often use nitrogen or argon quenching.
- Advantages: Clean, repeatable, controllable cooling; low distortion.
- Disadvantages: Requires specialized equipment.
- Best for: High-alloy steels, precision components, vacuum-treated parts.
If you are unsure, start conservative. Many steels that “can” harden in water do fine in oil with less risk.
Summary Table: Quench Media and Relative Severity
| Quench Medium | Cooling Severity | Crack/Distortion Risk | Typical Use Cases |
|---|---|---|---|
| Brine (Salt Water) | Very fast | Very high | Certain simple steels requiring severe quench |
| Water | Fast | High | Plain-carbon steels designed for water quenching |
| Polymer | Medium–fast (tunable) | Medium–high | Controlled quenching with reduced shock |
| Oil (Quench Oil) | Moderate | Medium–low | Most high-carbon and alloy steels; general tools |
| Still Air | Slow | Low | Air-hardening tool steels; thin or precision parts |
| Forced Air / Inert Gas | Slow–moderate (controlled) | Very low | Vacuum furnace work; high-alloy steels; critical parts |
Safety essentials: PPE, ventilation, fire control, oil flash points, tongs
Heat treating involves high temperature, open flames, and flammable liquids. Treat it like what it is: a controlled hazard.
- Wear eye protection, heat-rated gloves, natural fiber clothing, and a face shield when quenching.
- Use good ventilation. Heating oil or scale can produce fumes.
- Never quench near clutter. Keep a Class B fire extinguisher nearby and know how to use it.
- Manage oil temperature. Many quench oils are run warm (around 120–150°F) for speed but must be kept well below their flash point. Use a lid or sliding cover on the tank to smother a flare.
- Use tongs that grip securely. Dropping a red-hot part into oil is a common accident.
- Cool tools and tongs between cycles so you don’t preheat the quench or burn yourself.
What Is Heat Treatment?
Heat treatment is a controlled process of heating and cooling metals—usually steel—to change their internal structure and improve performance. This controlled process is one of the most effective ways to strengthen metal with heat for better durability and hardness. By carefully choosing the temperature, soak time, and cooling speed, you can make steel harder, tougher, more wear-resistant, or easier to machine. In other words, heat treatment lets you “tune” the properties of a metal to match the job it needs to do.
All heat-treating methods follow the same basic idea:
- Heat the steel to a specific temperature where its microstructure transforms.
- Hold (soak) it long enough for the transformation to fully occur.
- Cool it at a controlled rate—fast or slow—depending on the desired properties.
Processes like annealing soften steel for machining, quenching and tempering create high hardness with usable toughness, and case hardening builds a hard shell over a tough core. No matter the method, heat treatment is about precision and predictability: right temperature, right time, right cooling.
How to Heat Treat Steel (Step-by-Step)
This section shows you how to heat treat steel start to finish, with the steps that control outcomes.
Identify your steel and verify austenitizing range (charts, spec sheets)
Before you heat the steel, you must know the type of steel. AISI/SAE numbers (like 1095 or 52100) or tool steels (like O1, A2, D2) each have specific ranges. If you don’t know the grade, treat it as unknown; do not guess. If in doubt, run test coupons first.
Check a reliable chart or datasheet for:
- Austenitizing temperature range
- Preheat recommendations (especially for tool steels)
- Quench media guidance
- Tempering range and any “no-go” bands (temper embrittlement zones)
Prepare the part: clean surfaces, protect from decarburization (foil, atmosphere)
Surface prep impacts final hardness and finish.
- Degrease and remove rust. Oil or scale can cause uneven heating and soft spots.
- If you want a clean finish, use stainless tool wrap (foil) or a controlled atmosphere to reduce decarburization and scale. Seal the wrap well. For oil quench, puncture the wrap just before quench to avoid a “balloon.”
- Consider applying a thin anti-scale coating. This helps maintain machinability and saves post-grind work.
- Round sharp inside corners. Sharp corners concentrate internal stresses and can crack in the quenching process.
Heat and soak: preheat stages, thermocouple placement, PID control
Good heating is about uniformity and control.
- For many tool steels, use a two-stage preheat (for example, ~1,200°F then ~1,450°F) to reduce thermal shock and keep parts straight. Then go to the final austenitizing temperature.
- Use a furnace or kiln with a reliable controller and a verified thermocouple. A handheld pyrometer is useful for cross-checking.
- Place a thermocouple on a dummy bar matching your part’s mass if you can. This tells you when the core is at temperature.
- Start timing your soak only after the part reaches the target. Overheating grows grain; underheating leaves austenite unformed.
Quench and temper: agitation, part orientation, immediate temper timing
The quench locks in the structure you formed. Tempering sets the final balance.
- Agitate the quench gently but consistently. Think steady “S” shapes rather than violent plunges. This avoids vapor jacket issues and improves cooling.
- Orient long parts vertical in the quenching medium to reduce bending. Support thin blades edge-down to limit warps.
- Quench to hand-warm or to a specified temperature (often about 100–150°F). Do not delay the next step.
- Temper immediately after quench. For most steels, temper within minutes. Waiting allows stresses to rise and cracks to start.
- Use a calibrated oven for tempering. Set your target based on the hardness-toughness you need. For very high-alloy steels, consider two or even three tempers.

Steel Basics: Composition, Grades, and Response
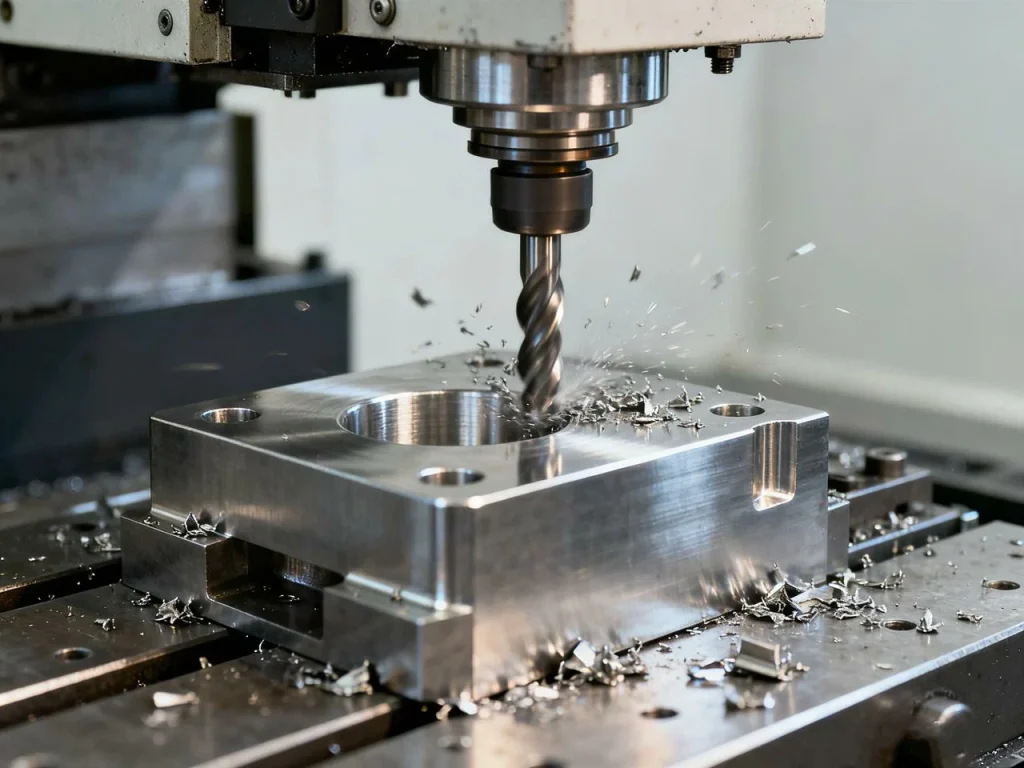
If you’re just getting started, the goal is to pick a steel that doesn’t fight you. Some grades are extremely sensitive to temperature control, quench speed, or soak times—great for experts, not so great for your first few projects. Before we look at specific recommendations, here’s the quick idea: choose steels that harden reliably in oil, tolerate small mistakes, and still give you strong, usable parts without needing pro-level equipment. To ensure uniform surfaces and precise dimensions before heat treatment, CNC milling and grinding can help you achieve parts that respond consistently to quenching and tempering.
Plain carbon vs alloy vs tool steels (1095, O1, D2, 52100) and hardenability
The properties of the steel are set by carbon content and alloy additions.
- Plain carbon steels (e.g., 1018, 1045, 1095) harden because of carbon alone. Higher carbon means higher potential hardness but a narrower margin for error in quench.
- Alloy steels (e.g., 4140, 52100) add elements like chromium or manganese to increase hardenability—the ability to harden through thicker sections with slower cooling.
- Tool steels (e.g., O1, A2, D2, M2) are built for wear resistance and hot strength. They often need specific preheats, exact temper cycles, and careful atmosphere control.
For example:
- 1095 (a high-carbon steel) needs a faster quench and careful temperature control to avoid grain growth and brittleness.
- 52100 (bearing steel) has chromium and carbon for high wear resistance and good hardenability; oil quench is common.
- D2 is a high-carbon, high-chromium tool steel with large carbides for wear resistance. It’s usually austenitized at a high temperature and air/gas quenched or plate quenched to avoid cracking.
Microstructure 101: austenite, martensite, pearlite, bainite, ferrite
Here is what happens inside when you heat treat:
- At the critical point, iron’s structure changes. With enough heat, ferrite and pearlite transform into austenite.
- Rapid cooling transforms austenite into martensite, a hard, needle-like structure that gives hardened steel its high hardness and strength—but also brittleness. NIST research (NBS Special Publication 424) says that the austenite-to-martensite transformation is governed by diffusionless shear, which is why quenching creates such high hardness.
- Slower cooling forms pearlite (layers of ferrite and cementite) or bainite, which are tougher but softer than martensite.
- Tempering at a lower temperature allows some carbon to move, reducing internal stresses and brittleness. This builds balanced toughness while holding most of the gained hardness.
Alloying effects (C, Cr, Mo, V, Mn) on grain growth and quench speed
- Carbon (C) sets the ceiling for hardness. Too little and you can’t form enough martensite; too much and the steel gets brittle if handled poorly.
- Chromium (Cr), molybdenum (Mo), and manganese (Mn) slow down transformations so the steel can harden at a slower cooling rate (like in oil or air).
- Vanadium (V) controls grain size and forms hard carbides that raise wear resistance. It also helps resist grain growth at high temperature.
In short, alloy steel is more forgiving in the quench. Simple steels often need a faster quench with more risk.
What steel is best for beginners to heat treat?
Choose a forgiving grade with good hardenability. Two popular choices are 1084 and 5160 because they harden well in warm oil, resist cracking, and don’t need an extreme quenching process. They respond well with standard tools and are less likely to punish small errors. If you use 1095, be precise with heat and watch soak time closely.
Process Playbook: Anneal, Normalize, Harden, Temper
Before we break these processes down, it helps to remember that heat treating isn’t just about getting steel hard—it’s about shaping its internal structure for the job you need. Each step in the playbook has a purpose: annealing for softness and stress relief, normalizing for grain refinement, hardening for strength, and tempering for balance. Think of this section as a roadmap that shows when and why to use each treatment so you can dial in the results you’re after.
Annealing and stress relief: softening, machinability, scale control
Anneal when you need machinability and a soft, uniform structure. Heat to a suitable range (often just above critical), hold to equalize, and cool slowly (in furnace or insulating media). This relieves residual stresses, refines the crystal structure, and improves ductility.
For stress relief after machining (without a full anneal), heat to a lower range (for many steels, 1,050–1,250°F), hold based on thickness, and let it cool the steel in still air. This reduces distortion in later hardening.

Normalizing 1095 case: 1,600°F, 15 min soak, air cool for stress relief
Normalizing is a heat treatment used to refine grain and even out the microstructure before hardening. For 1095, a practical schedule is:
- Heat to about 1,600°F
- Hold for about 15 minutes once at temperature
- Remove and let it air cool to room temperature
This step reduces stresses from forging or heavy grinding and gives a finer structure that hardens more evenly.
Hardening recipes: preheat, austenitize, quench (D2 at 1,800–1,850°F)
General hardening flow:
- Preheat (for tool steels, staged preheats help)
- Austenitize at the steel’s specified range
- Quench in the recommended medium
- Temper promptly, often twice
Examples:
- D2: Preheat in stages (e.g., ~1,200°F then ~1,450°F), austenitize around 1,800–1,850°F, hold per section thickness, then air/gas quench or plate quench. Temper immediately.
- 1095: Austenitize around 1,475–1,500°F with minimal soak after equalization, quench in warm fast oil, then temper promptly.
- 52100: Austenitize about 1,500–1,550°F with a short soak, quench in oil with good agitation, temper as needed for the service.
These are common ranges. Always confirm for your specific batch and part size.
Tempering strategies: 400–800°F targets, double temper, cryogenic options
Tempering eases brittleness and stabilizes structure. Typical tempering temperatures for many hardening jobs fall between 400–800°F. Lower tempers (around 350–450°F) hold more hardness for cutting edges, while higher tempers (500–600°F and up) are used when toughness matters more than peak hardness.
- Double tempering helps tool steels by reducing retained austenite and stabilizing martensite.
- For some high-alloy grades, a cryogenic step between tempers (e.g., cold treatment using dry ice and alcohol or liquid nitrogen by trained users) can convert retained austenite to martensite before the second temper. Follow safe procedures if you use cryogenics.
Avoid temper embrittlement ranges noted for your steel. Some alloy steels show a dip in toughness if held in certain temperature bands.
Equipment and Setup for Home and Pro Shops
Before you start dialing in temperatures and quench schedules, it helps to understand what your equipment can—and can’t—do. Good heat treatment is as much about control as it is about heat, and the tools you choose directly affect consistency, surface quality, and safety. Whether you’re working in a small home shop or a fully equipped professional setup, the next section breaks down the essentials so you know how to get reliable, repeatable results from your gear.
Heat sources: kiln, furnace, forge; controllers, thermocouples, pyrometers
- A kiln or furnace with a digital controller offers the best precise temperature control.
- A gas or coal forge can work if you know how to control hot spots and use a thermocouple to read temperature.
- A handheld pyrometer and a reliable thermocouple help you confirm what the steel “sees,” not just what the furnace screen says.
Atmospheres: foil wrap, vacuum furnaces, inert gas, salt baths
Atmosphere control reduces scale and decarburization:
- Stainless tool wrap (foil) is the simplest way in small shops to protect surfaces. Wrap during heat, open for quench.
- Vacuum and inert gas systems give the cleanest results and are common in professional settings.
- Salt baths offer fast, uniform heating and reduced scale but require strong safety practices and training.
Quench systems: oil tanks, water/brine, air/gas; agitation and tank sizing
- Size your quench tank to at least 10 times the mass of the hot metal for small work. More is safer; it keeps the medium from overheating.
- Use a fitted lid or cover the tank can slide shut if there’s a flare-up.
- Warm oil improves consistency. Keep it well below its flash point and within recommended operating range.
- Plan your motions so the path from furnace to quench is clear and short.
Can you heat treat steel in a home oven or forge?
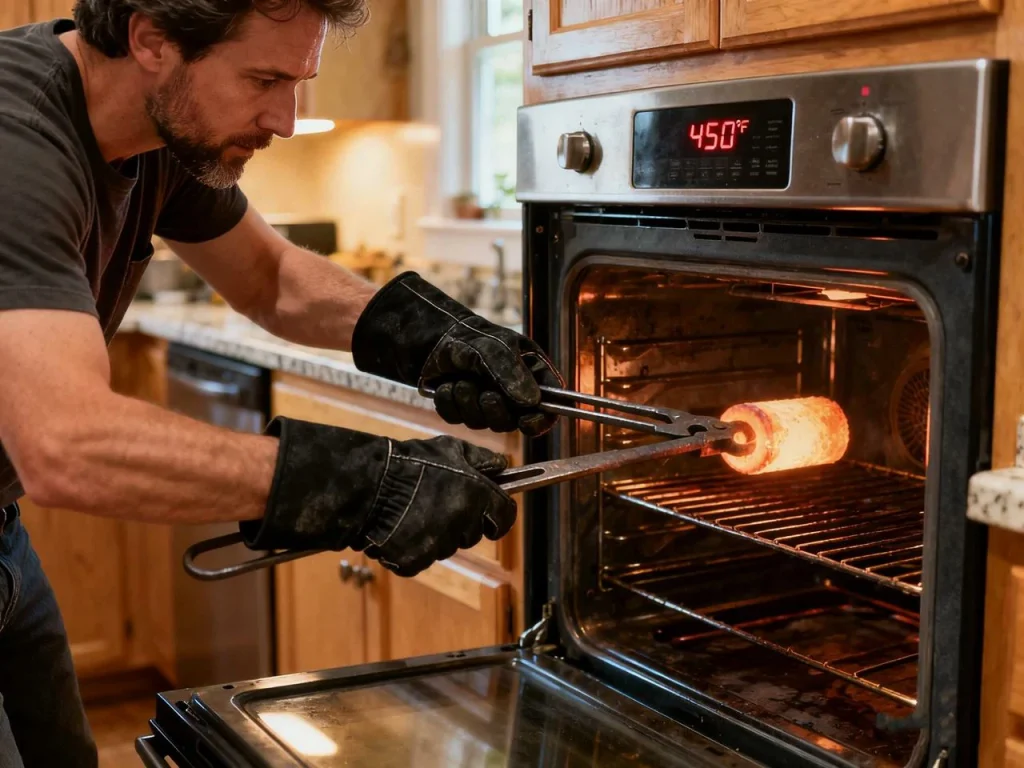
- Home oven: Yes for tempering. Most home ovens reach 400–500°F, which is perfect for many tempers. Use an oven thermometer to verify. But a home oven cannot reach austenitizing temperatures for hardening.
- Forge: Yes for hardening if you can control temperature. Use a thermocouple and learn to manage hot spots. Foil wrap and plates help improve consistency, but a controlled furnace is easier for beginners.
Quality Control, Testing, and Troubleshooting
Before you can trust any heat-treated part, you need to prove that your process actually delivered the hardness, toughness, and consistency you were aiming for. This section walks you through the simple checks, the more advanced tests, and the basic documentation habits that separate guesswork from repeatable results. Whether you’re heat treating at home or running a small shop, these tools help you confirm what happened inside the steel—and troubleshoot issues before they become failures.
Verify results: Rockwell HRC testing, file tests, coupons, microetching
You don’t know what you achieved until you measure.
- Hardness testing: A Rockwell C (HRC) test is the standard for hardened steel. Portable testers are available, and labs can test your parts.
- File test: A quick check. If a new file skates on the edge after quench, you likely formed martensite. After tempering, the file should still bite less than on annealed steel.
- Coupons: Heat treat a scrap piece with the job. Break it in a vise to see the fracture and check hardness and toughness.
- Microetch: A simple nital etch on a ground surface can reveal decarburization, grain size, and if a case formed.
Documentation: time–temperature logs, soak time by thickness
Keep a log—temperature, time in, time out, quench notes, and temper details. Note part thickness and any preheats. A simple notebook lets you repeat what worked and fix what didn’t.
Basic timing tips:
- Start soak timing after the part reaches the target.
- Use short soaks for simple high-carbon steels to avoid grain growth.
- Thicker sections and high-alloy steels often need longer equalization and controlled cooling.
Fix defects: warping, cracking, decarburization, scale, temper embrittlement
- Warping: Reduce grinding heat before hardening. Use plate quenching for flat parts. Fixture thin parts during temper. Straighten at temper temperature if needed (within the steel’s safe range).
- Cracking: Common causes are quenching too fast, quenching too cold or too hot, sharp corners, and delays before temper. Choose a gentler medium, add preheats, or reduce soak time for sensitive steels.
- Decarburization and scale: Use foil wrap or controlled atmosphere. Grind past the affected layer after hardening if needed.
- Temper embrittlement: Avoid holding in known risk bands for your steel. If it occurs, reheat to a higher safe temper and cool in still air.
How do I know if my heat treat worked?
Check hardness, try a file test, and, if possible, test a coupon to failure. If the part is hard after quench and holds a file poorly, and if after temper it resists chipping in real use, you likely nailed it. For precise work, get an HRC test and document your heat treating process for repeat runs.
Case Studies and Proven Recipes
These examples show how to turn data into action. Always confirm for your steel batch and section size.
D2 tool steel: preheat ~1,200°F; austenitize 1,800–1,850°F; gas/vacuum quench; temper immediately
D2 needs control to shine.
- Preheat in two steps (about 1,200°F then ~1,450°F).
- Austenitize around 1,800–1,850°F with a stable soak once the core is at temperature.
- Quench in still or forced air, inert gas, or between thick aluminum plates. The goal is steady cooling without shock.
- Temper right away. Many shops use double tempers to reduce retained austenite. Select temper based on the service. For example, a cutting die might favor lower temper for higher hardness; a press tool might go higher for toughness.
Key risks: overheating, poor atmosphere control (carbide coarsening and decarb), and delayed temper.
1095 schedule: normalize 1,600°F/15 min air cool; oil quench harden; temper for toughness
1095 is simple but sensitive.
- Normalize first at about 1,600°F for ~15 minutes; air cool.
- Austenitize around 1,475–1,500°F with minimal soak (just enough to equalize); avoid long holds to prevent grain growth.
- Quench in warm fast oil with good agitation.
- Temper based on use; lower tempers keep hardness for blades, higher tempers add toughness for springs.
Watch out for decarburization. Protect surfaces or plan post-grind.
52100 comparisons: air vs oil vs water quench (real-world outcomes)
52100 is a bearing steel designed for high wear resistance.
- Oil quench is the common choice, giving high hardness with reasonable risk.
- Water quench is risky and not recommended because cracking and distortion are likely in thicker sections.
- Thin sections can air harden to a degree because 52100 has good hardenability, but full cross-section hardness is more reliable with oil.
A typical plan is austenitize about 1,500–1,550°F with a short soak, quench in warm oil, and temper to target use.
Table: Typical Austenitize and Temper Ranges
| Steel Grade | Austenitize Temperature | Quench Medium | Temper Range | Notes |
|---|---|---|---|---|
| 1095 | ~1,475–1,500°F | Oil quench | 350–500°F for cutting edges; higher for toughness | High-carbon simple steel; responds well to shallow hardening. |
| 52100 | ~1,500–1,550°F | Oil quench | 350–500°F for high hardness; higher for impact resistance | Bearing steel; fine carbides; excellent wear resistance. |
| D2 | ~1,800–1,850°F | Air / gas / plate quench | 400–1,000°F depending on required hardness; often double temper | High-alloy tool steel; air-hardening; high wear resistance. |
Industry context: >80M U.S. tons treated; repeatable “recipes” and process capability
Steel is everywhere, from cars to cutting tools. The United States produces on the order of tens of millions of tons of steel each year, and steel heat treatment underpins a large slice of that value—hardening gears, tools, bearings, and structural parts to meet exact specs. Repeatable “recipes” and documented processes are why industries can trust the same results day after day.
Summary and Key Takeaways
If you remember one thing, remember control. When you control temperature, time, and quench speed, you control results.
Control the three pillars: austenitize, quench, temper—then verify
Each pillar affects the next. The best quench cannot fix a poor austenitize. The best temper cannot rescue a cracked part. Measure and test.
Temperature accuracy (±25°F), adequate soak, and quench choice drive outcomes
A small error at high temperature can cause big changes in grain size and hardness. Soak enough to equalize, then quench in the right medium for your steel and section size.
Measure hardness, document, and iterate with steel-specific schedules
Run a coupon, test hardness (HRC), and write down your process. Then refine until you get repeatable results.
Do I need a vacuum furnace for tool steels?
No, not always. A vacuum or controlled atmosphere furnace gives very clean results and is great for air-hardening tool steels, but you can achieve solid outcomes with a well-controlled furnace, foil wrap, and proper quenching methods. For high-alloy grades like D2, these advanced systems reduce scale and decarburization, but they are not mandatory for good performance in many small-shop jobs.
FAQs
Yes. Many makers harden and temper steel right at home using a small propane furnace, a DIY forge, or even a simple charcoal forge if it can reach high enough temperatures. You’ll usually need an oil tank for quenching and a regular kitchen oven for tempering afterward. The key is keeping things controlled: use a thermocouple or infrared thermometer to watch your temperatures, wear proper PPE, and make sure your setup is safe and ventilated. Plenty of hobbyists do it successfully—it just takes patience, prep, and attention to safety.
It depends entirely on the steel grade. Most plain-carbon and basic alloy steels austenitize somewhere in the 1,450°F to 1,800°F range, but some specialty steels need slightly higher or lower temperatures. Because every steel has its own sweet spot, it’s always best to check the manufacturer’s heat-treat chart or data sheet so you don’t overheat, underheat, or accidentally ruin your part. When in doubt, follow the spec—heat treat is very temperature-sensitive.
Start by identifying the exact steel grade—this matters a lot. Clean the surface, remove scale or oil, and prep the part so heat transfers evenly. Heat it up to the correct austenitizing temperature and let it soak long enough so the whole piece reaches uniform heat. Then quench in the proper medium—water, oil, air, or salt—while gently agitating to avoid vapor pockets. After that, temper right away to bring the hardness down to a usable level and reduce brittleness. If you want consistent results, record your times, temperatures, quench type, and final hardness so you can repeat the process later.
Heat treatment generally follows a predictable sequence: first, you heat the steel into the austenite phase at a controlled temperature. Then you hold it (or “soak” it) long enough for the transformation to fully take place. Next comes the controlled cooling step—usually quenching—which creates martensite or other microstructures depending on the steel and method. Finally, you temper at a lower temperature to remove brittleness, stabilize the structure, and fine-tune the balance of hardness and toughness. It’s essentially a thermal makeover for steel to give it the properties you want.
A regular home oven can’t get anywhere near the high temperatures needed for austenitizing, so you can’t do the hardening step in one. However, it is perfect for tempering after quenching, since most tempering happens around 400–500°F. Many makers rely on their kitchen or toaster oven to bring the steel to its final working hardness. Just keep in mind: oven = tempering only, not the main heat-hardening process.
References:
https://nvlpubs.nist.gov/nistpubs/Legacy/SP/nbsspecialpublication424.pdf
https://worldsteel.org/steel-topics/statistics/world-steel-in-figures/

 English
  German
  French
  Italian
  Spanish
  Polish
  Czech
Czech  Japanese