
Searching how to case harden steel? Here’s the short version first: clean the part, heat it in a carbon- or nitrogen-rich environment at the right temperature and time, quench if the method needs it, then temper. That sequence gives you a very hard, wear‑resistant outer layer (the “case”) while the core stays tough and shock‑resistant. That is why case hardened steel is used for gears, camshafts, pins, dies, and small tools that see heavy wear and tear.
In this guide, you’ll learn what case hardening is, when to choose carburizing, nitriding, carbonitriding, cyaniding, or induction/flame hardening, how to set temperature and soak time, how to pick a quenching medium, and how to test Rockwell hardness (HRC) and case depth. We’ll explain the heat treatment fundamentals in plain language, show DIY approaches you can try in a small shop, add safety notes, and close with a practical checklist so you can move from learning to doing with confidence.
Along the way, we’ll answer common questions: Can you case-harden any steel? What temperatures are used? Can 4140 be case hardened? How deep can the hardened layer go? And what are the downsides you need to watch?
How to case harden steel: quick-start steps
Before diving into the detailed steps of how to case harden steel, it helps to understand what is case hardening. Case hardening adds carbon, nitrogen, or both to the outer layer of low-carbon or medium-carbon steel. After heating and quenching, that outer layer becomes very hard martensite, while the inside stays softer and shock-absorbing. Below is a quick, practical roadmap that shows how the major stages connect—from prepping your steel to verifying depth and hardness—so you know exactly what to expect before you start.
Step-by-step overview (carburize, quench, temper)
- Prep and clean the part to bare metal. Remove oil, scale, rust. If your part requires high dimensional accuracy before case hardening, consider having it finish-machined with CNC milling for consistent flatness and geometry. U-Need offers tight-tolerance machining that prepares components for heat treatment with stable geometry and clean surfaces.
- Heat the steel in a carbon-rich environment (carburizing) at roughly 900–950°C (1700–1750°F). For nitriding, temperatures are much lower (up to about 620°C/1150°F) and no quench is used.
- Soak to reach your target case depth. For carburizing, this might be 0.5–2+ mm, which often means several hours of soak at temperature.
- Reheat to the hardening temperature (if required by process), then quench in oil or water to form a hard martensite case.
- Temper at a lower temperature to relieve stress and tune hardness to your target.
Minimum tools and materials
- Heat source: furnace, forge, or torch. For best control, use a furnace with a PID controller and thermocouple.
- Case hardening atmosphere or compound: carbon-rich media for carburizing; ammonia-based gas or salts for nitriding/carbonitriding in industrial settings.
- Quench media: oil, water, or polymer. Use tongs, fixtures, and safe PPE.
- Measuring basics: magnet (to check austenitizing point in simple steels), temperature crayons, or a basic digital thermometer with probe rated for high heat.
Key success metrics
- Target case depth matched to service load. A gear tooth usually needs a deeper case than a small latch.
- Surface hardness at or above about 60 HRC for many wear jobs (method and alloy dependent).
- Controlled distortion and cracking. Fixturing, quench choice, and temper all matter.

Choose the right surface hardening method (decision tree)
Before you heat anything, match the method to the steel, part shape, and the job. Ask yourself:
- What is the steel grade? Is it low carbon steel (~0.05–0.25%C), medium carbon, tool steel, or stainless?
- How big is the part and how complex is the geometry?
- How much distortion can you accept?
- What surface hardness and case depth do you need?
- Are there safety or environmental limits in your shop?
If you need a deep case on a mild steel gear and can handle a quench, carburizing is a strong fit. If you need very low distortion on an alloy shaft and cannot quench, nitriding is a better path. Need a shallow case fast at a lower temperature? Consider carbonitriding. Only need hard tracks or local zones on a large shaft or a specific tooth profile? Go with induction or flame hardening.
When to pick carburizing vs. nitriding vs. carbonitriding vs. induction
- Carburizing: Best for low-carbon and low-alloy steels when you want a deeper case and very high surface hardness. It does require a quench and a temper.
- Nitriding: Works at a lower temperature, needs no quench, and gives low distortion. It needs alloy elements like Cr, Mo, V, or Al for best results. Great for shafts, spindles, and parts that can’t move much during heat treatment.
- Carbonitriding: Adds both carbon and nitrogen at a lower temperature than carburizing. It’s fast and makes a shallower case—good for small parts.
- Induction/flame: Local surface hardening by fast heating then quenching. Depth is set by frequency and time (induction) and by flame size and dwell (flame). Useful for large or localized features.
Pros and cons by application
A gear often wants a deep, hard case (carburize) with controlled distortion. A crankshaft might prefer nitriding to keep dimensions stable. A small pin may do fine with carbonitriding for speed and appropriate hardness. A large roller might use induction hardening to toughen only the working surface without touching the core.
Method comparison (key numbers and trade-offs)
| Method | Typical temperature | Soak time trend | Case depth range | Quench needed | Distortion risk | Typical surface hardness | Notes |
|---|---|---|---|---|---|---|---|
| Carburizing (pack/gas/liquid) | 800–1,050°C | Hours to many hours | 0.5–2+ mm | Yes | Medium to high (manage with fixturing/quench choice) | 58–64 HRC | Deep cases for low carbon steels |
| Nitriding (gas/plasma/salt) | 480–620°C | Hours to tens of hours | ~0.1–0.7 mm | No | Very low | Up to ~60–70 HRC (alloy-dependent) | Needs Cr, Mo, V, Al in steel |
| Carbonitriding | ~700–900°C | Shorter cycles | ~0.1–0.75 mm | Yes | Medium | ~58–62 HRC | Shallow case, faster throughput |
| Cyaniding | ~900–980°C | Short cycles | ~0.1–0.3+ mm | Yes | Medium | ~58–62 HRC | Uses cyanide salts; strict safety rules |
| Induction/Flame | Localized | Seconds to minutes | ~0.5–6+ mm (induction) | Yes | Low to medium | ~55–62 HRC | Depth by frequency/time; great for shafts/teeth |
Numbers vary with steel grade, exact setup, and specs. Always verify with test coupons.
Methods explained: carburizing, nitriding, carbonitriding, cyaniding, induction
Before we break down each method of how to case harden steel, it’s useful to understand the role they play in shaping surface hardness and durability. Every technique—whether it relies on diffusion, controlled atmospheres, or targeted heating—creates a hardened outer layer in its own way. The summary below highlights what sets these processes apart so you can quickly see which approach fits your material, part size, and performance goals.
Carburizing (pack, gas, liquid)
In carburizing, you heat the steel in a carbon-rich environment so carbon atoms diffuse into the surface layer. Typical furnace temperatures range from about 800–1,050°C. For deeper cases (for example 0.8–1.2 mm on gears), you’ll often soak for 6–8 hours or more, then reheat to the proper austenitizing range and quench in oil or water to form a hard martensite case. After quenching, always temper to relieve stress and tune the hardness and strength. You can expect surface hardness around 60+ HRC, with the tough ductile core near 20–35 HRC depending on the base carbon content and tempering.
Pack carburizing, also commonly referred to as pack hardening, uses a sealed box and a solid carbon source to diffuse carbon into the surface layer. This method is still widely used for small stamped metal parts—if you produce such high-volume components, metal stamping plus carbonitriding offers high throughput and repeatable hardness. Gas carburizing uses a controlled atmosphere and gives much better control over carbon potential, temperature, and uniformity. Liquid carburizing uses a molten salt bath but has chemical hazards that require tight control and compliance.
Nitriding (gas, plasma, salt bath)
Nitriding diffuses nitrogen into the steel at a lower temperature (commonly 480–620°C). It does not need a quench, so distortion stays low. The best response comes from alloy steels with nitride-forming elements like chromium, molybdenum, vanadium, and aluminum. The result is a very hard, wear‑ and fatigue‑resistant case, though the case depth is usually shallower than carburizing. Because temperatures are lower, microstructure in the core changes less, making nitriding a good fit for precision parts.
Gas and plasma nitriding give excellent control of case depth and white layer. Salt bath nitriding (often called ferritic nitrocarburizing in modern practice) works fast but has chemicals that demand strict safety.
Carbonitriding and cyaniding
Carbonitriding adds both carbon and nitrogen into the steel surface at a temperature below carburizing. It builds case faster and is common for mass production of small parts like fasteners or pins. Case depth is usually shallow, and a quench follows to form a hardened layer.
Cyaniding is a variant using cyanide salts. It can be very fast but brings serious health and environmental hazards. In many shops, cyanide baths have been replaced by safer gas or salt recipes. If you do see cyaniding, it must run under strict controls and trained personnel.
Flame and induction hardening
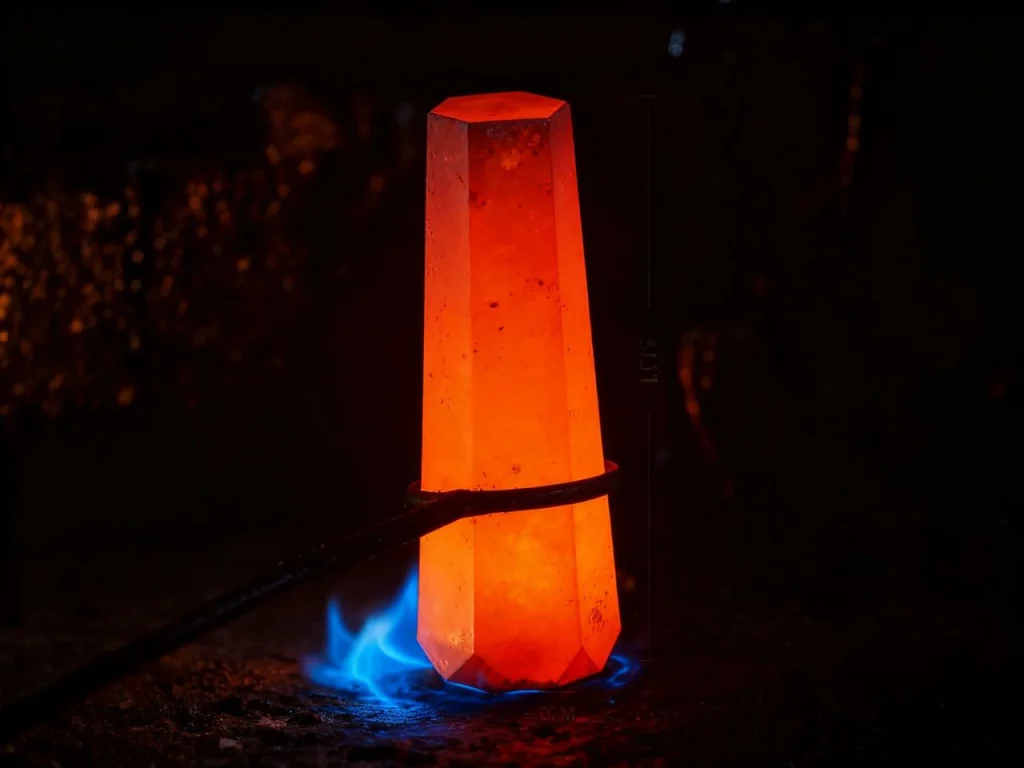
With flame or induction hardening, the part is heated locally above the critical temperature (where austenite forms) and then rapidly cooling by quenching creates martensite in only the zone you heated. This gives a hard track or ring while the core stays as‑is. It’s excellent for large shafts, rails, or gear teeth where you want specific wear tracks. Induction hardening is very repeatable because you can set frequency and dwell to control depth of the hardened zone.
Process parameters and controls (heat treatment fundamentals)
To get a consistent hardened case, you need to control heat, time, and cooling. The next section highlights the key parameters—diffusion, quench choice, and tempering—that determine depth, hardness, and distortion.
Time–temperature–depth (diffusion)
Diffusion drives case depth. Higher temperature and longer soak time mean deeper diffusion of carbon or nitrogen. But the steel grade and the atmosphere’s carbon or nitrogen “activity” also matter. Low‑alloy mild steels take carbon well during carburizing. Alloy steels with Cr, Mo, V respond best to nitriding. If you aim for 1.0 mm case in carburizing, think in terms of many hours at high temperature, not minutes. For nitriding, plan on long soaks at a lower temperature to grow a shallower but hard case.
Quench media selection and distortion control
Quenching locks in the hard martensite in processes that need a quench. But the cooling rate and fluid choice affect cracks and distortion. Water and brine quench very fast and can cause more warp and stress. Oil is slower and gentler. Polymers can be tuned for in‑between behavior. Agitation increases severity. Thin sections cool faster than thick ones, which can cause uneven hardness if you’re not careful. Fixtures help hold shape, but never clamp so hard that the part cannot move a little during phase change.
Short comparison:
| Quench medium | Severity (relative) | Distortion/crack risk | Notes |
|---|---|---|---|
| Brine/Water | High | Higher | Fastest cooling; often too harsh for complex parts |
| Polymer | Medium to high (tunable) | Medium | Adjustable concentration and temperature |
| Oil | Medium to low | Lower | Most common for carburized parts |
| Air | Very low | Lowest | Used when no martensite needed (e.g., nitriding), or for air-hardening tool steels |
Tempering strategy
After quenching, temper to reduce brittleness and internal stress. Lower temper temperatures keep higher surface hardness but less toughness. Higher temper temperatures trade some hardness for more toughness and stability. Avoid ranges linked to temper embrittlement for your steel grade. Many carburized cases temper in the 150–200°C (300–400°F) range to hold high HRC while relaxing stress, but follow your steel spec — based on SAE AMS 2759, proper tempering ranges and quench practices must match the steel grade and specified case-hardening procedure.

DIY and home workshop guide (pack carburizing and torch methods)
You can case harden small low-carbon steel parts at home with basic tools. Keep your goals realistic: shallow cases, modest uniformity, and careful safety.
Torch-based workflow (surface hardening at home)
- Clean the part to bright metal.
- Heat the steel to a solid red heat with a torch. If the steel stops being magnetic near that heat, you are in the ballpark for austenite in simple steels.
- Roll, dip, or bury the hot part in a carbon‑rich compound (commercial case compound or crushed charcoal mix). Keep it hot for about 5–15 minutes for a thin case.
- Reheat to red heat to equalize.
- Quench in oil or water (oil is usually safer for distortion).
- Lightly temper in a household oven if safe and allowed (for example, 175–200°C / 350–400°F for 30–60 minutes) to reduce brittleness.
This simple hardening procedure can increase surface hardness enough that a hand file “skates” over the outer surface. For thicker cases, repeat the heat/soak step. Results vary with steel grade, compound, and heat control.
Materials and setup
Use commercial case hardening compounds if you can, as they are consistent and safer than unknown mixes. Pick low-carbon steel for best response to carburizing. A small furnace or forge gives better temperature control than a torch. Use a thermocouple or temperature crayons to improve repeatability.
Practical tips for consistency
Cleanliness is critical. Oil or mill scale blocks diffusion. Preheat heavy parts to reduce thermal shock. Mask or shield edges you do not want to harden. Keep soak and reheat times consistent, and document each run. Use test coupons of the same type of steel to tune your process before touching a critical metal part.

Testing, inspection, and quality assurance
Before diving into specific test methods, it’s helpful to see how inspection ties the whole heat-treat process together. The next section outlines the basic checks—both quick and lab-grade—that confirm your case depth, hardness, and overall process consistency.
Simple checks (home methods)
A quick “file test” can show if the surface of the steel is hard. If the file skates and barely bites, the case is likely hard. You can also polish and lightly etch a cross‑section with safe shop acids to see a darker case line (macro‑etch). For spark testing, harder cases sometimes show shorter, more branching sparks, but this is a rough check.
Hardness testing and case depth verification
For production or critical work, use Rockwell C on the surface. For case depth, cut and polish a cross‑section and run a microhardness traverse (Vickers or Knoop) from the surface inward at small steps. Plot hardness vs. depth. Standards define “effective case depth” at a specific hardness threshold (often around 50 HRC for carburized cases per common specs). Pick the rule used in your drawing or spec. For nitrided cases, the definition can differ by spec; follow your standard.
Nondestructive options and production QA
Portable hardness testers can give quick checks on large parts. Eddy current can estimate case depth on some geometries after correlation. Replication microscopy can reveal microstructure without cutting, useful for routine monitoring. Keep tight process records for temperature, time, atmosphere settings, and quench details so you can control repeatability across lots.
Safety, environmental, and regulatory essentials
Case hardening deals with high temperature, heating and quenching, and sometimes hazardous chemicals. Set up with safety first.
Heat and equipment safety (PPE and practices)
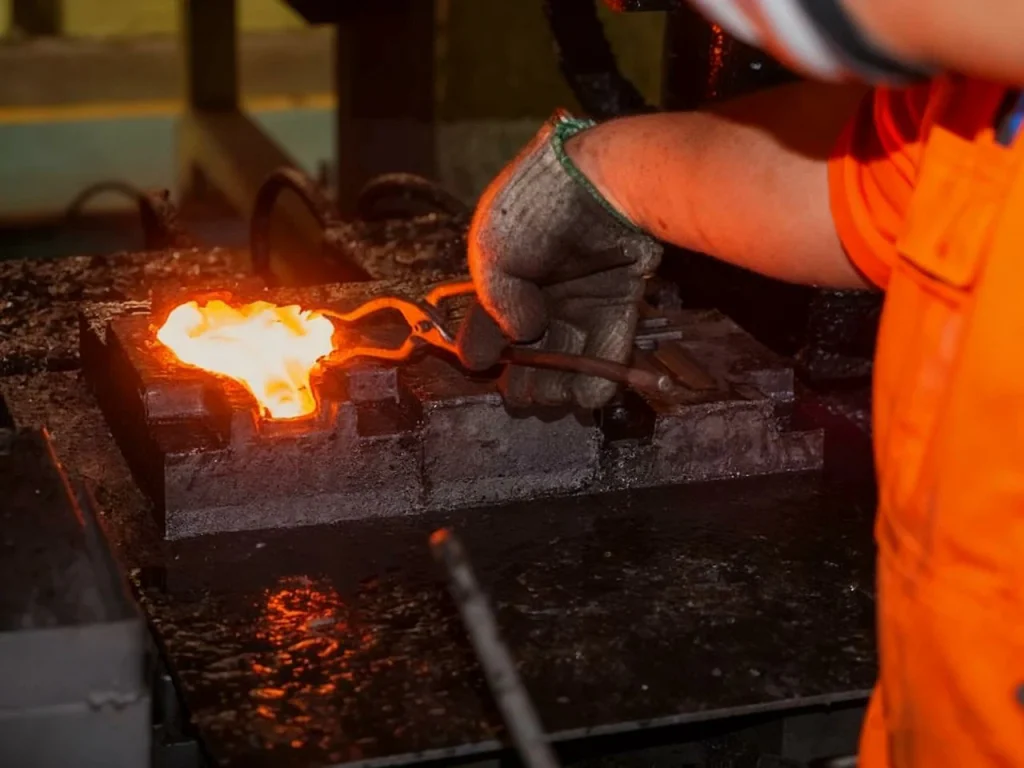
Wear eye and face protection, heat‑resistant gloves, and cotton or leather clothing without loose cuffs. Keep hair and sleeves secured. Have a Class B fire extinguisher ready. Check furnace and gas lines for leaks and integrity before each run. Use tongs and dry tools. Keep water away from hot oil. Train everyone on burn first‑aid and emergency steps. Lockout/tagout (LOTO) for maintenance.
Chemical hazards and safer alternatives
If you use any ammoniated or salt bath processes, review the safety data and ventilation needs. Cyanide-bearing salts require specialized training, spill kits, and strict procedures and are often replaced by safer processes. Ensure good ventilation when heating the metal, and avoid inhaling fumes from oils or compounds.
Compliance and disposal guidance
Used quench oils, salt residues, and metal fines often count as regulated waste, and according to the U.S. Environmental Protection Agency (EPA), such materials must be collected, labeled, and disposed of following hazardous-waste rules under the Resource Conservation and Recovery Act (RCRA). Keep documentation for inspections. Review national and local guidance for workplace exposure limits, ventilation, and emergency plans. Good practice is not only safer—it preserves your shop and community.
Troubleshooting and case studies (industrial and DIY)
Before looking at specific defects and real examples, it helps to understand how geometry, heat exposure, and quench choices interact. The next section walks through common problems, practical fixes, and short case studies that show what successful—and unsuccessful—treatments look like in both shop and DIY settings.
Common defects and fixes
A soft case usually points to too little soak time, too low temperature, or a weak carbon/nitrogen potential. Raise the temperature carefully, extend the soak, or improve the compound/atmosphere control. Surface cracks can come from overheating, excessive quench severity, or sharp corners acting as stress risers. Reduce peak heat, switch to oil from water, or break sharp edges before treatment. Distortion? Improve fixturing, choose a gentler quench, or balance heating so the part sees uniform exposure.
Geometry and fixturing
Uniform surface exposure is key. Avoid stacking parts too close. Use stop‑off paints or masks to keep faces or threads soft. Suspend parts so flow reaches all surfaces. For long shafts, support at several points to limit sag. For gears, position to avoid shadowing tooth flanks.
Case studies with metrics
- Gear: Gas‑carburized to 0.8–1.2 mm effective case depth, surface Rockwell hardness 60–62 HRC, oil quenched, low‑temperature temper for stability.
- Nitrided shaft: 0.3–0.5 mm nitrided case, minimal growth or warp, used in precision assembly.
- DIY latch: Torch carburized, thin case verified by file “skate,” oil quench, light oven temper to reduce brittleness.
Summary and actionable next steps
Before wrapping up, it helps to pull the major ideas together and turn them into clear next steps. The section below distills the core methods, key parameters, and a simple checklist you can use to plan, test, and refine your first case-hardening run with confidence.
80/20 recap of methods and parameters
Use carburizing on low-carbon steels when you want a deep, very hard surface. Use nitriding when you need low distortion and have a steel with the right alloy elements. Use carbonitriding for shallow cases, fast cycles, and small parts. Use induction or flame hardening when you only need local hardening on large or complex parts. Control your quench and add a temper to hit your target Rockwell hardness and case depth.
Implementation checklist
- Select method based on steel grade, shape, case depth, and distortion limits.
- Set temperature and soak time using test coupons.
- Choose a quench media and agitation level that meets hardness while limiting warp.
- Temper to reduce stress and set final hardness.
- Verify with hardness tests and case depth checks.
- Document every parameter for repeatability.
Plan your first run
Start with a scrap coupon of the same type of steel. Record temperature, time, and quench details. Cut and check hardness and case depth. Adjust time or temperature as needed. Once you hit the target on coupons, move to the real parts with confidence.
FAQs
Almost any steel can be “surface hardened” in some way, but not every grade responds to every method. Low-carbon steel responds well to carburizing. Many alloy steels respond well to nitriding. Austenitic stainless (like 304/316) cannot be hardened by quench and temper, but can be surface hardened by low‑temperature carburizing or nitriding methods. Tool steels often already have enough carbon for through hardening, but you can still induction harden surfaces if needed.
For small parts, a simple approach is the torch method: clean, heat to red, apply a carbon‑rich compound, hold hot for several minutes, reheat, then quench in oil and lightly temper. It’s a practical way to get a thin hardened surface at home. For larger or critical parts, use a furnace and controlled atmosphere for accuracy.
• Carburizing: about 800–1,050°C (1470–1920°F), often around 900–950°C for many jobs.
• Nitriding: commonly 480–620°C (900–1150°F); no quench.
• Carbonitriding: roughly 700–900°C (1290–1650°F).
• Induction/Flame: local heating the steel above the critical temperature for seconds to minutes, depending on depth.
Yes, but choose the method wisely. 4140 has enough carbon (~0.40%) to be through hardened by austenitize, quench, and temper. It also responds very well to induction hardening and to nitriding, which can give a hard wear layer with low distortion. Deep carburizing is less common because the base carbon is already moderate; if used, it needs careful control to avoid too high surface carbon.
• Carburizing followed by quench and temper (classic case hardening).
• Nitriding (no quench, low distortion).
• Induction hardening (localized heating and quench). Flame hardening is a close cousin.
Very low carbon steels cannot be “through hardened” by quench and temper, but they can be case hardened. Austenitic stainless steels cannot be hardened by quench and temper either, but can be surface hardened by special low‑temperature processes. Some very high‑alloy austenitic grades show poor diffusion response. Always check your steel spec.
• Possible distortion or cracks if the quench is too severe or shapes are thin and complex.
• Process time and cost for deep cases.
• Chemical hazards and disposal needs for certain methods.
• Limited machining after hardening; you usually finish-machine before heat treatment and only grind lightly after.
Typical industrial carburizing cases run from about 0.5 mm up to 2+ mm with long soaks. Nitriding cases are usually shallower, often about 0.1–0.7 mm. Induction hardening can go from about 0.5 mm to several millimeters depending on frequency and dwell.


 English
  German
  French
  Italian
  Spanish
  Polish
  Czech
Czech  Japanese