
Want a durable, colorful, and corrosion‑resistant finish on your aluminum parts at home? This guide walks you through exactly how to anodize aluminum safely and get consistent results. If you’ve been stuck on chemistry, current settings, or blotchy colors, you’ll find the verified steps, accurate numbers, and troubleshooting tips you need. You’ll see the exact order—clean, etch, desmut, anodize, rinse, dye, seal—plus how to size your power supply, set acid concentration, and pick the right anodizing dye. We also include quick calculators and practical rules like the “720 Rule” so you can target thickness and time with confidence.
We’ll start with a fast safety overview, then go deeper into setup, process control, dyeing, sealing, environmental handling, costs, and when to hire a pro. Whether you’re finishing a bike part, a camera bracket, or a small electronics shell, you can anodize aluminum at home with safe habits, correct numbers, and a simple, repeatable line.
Who this guide is for
This guide serves DIYers, makers, students, and engineers who want a reliable way to anodize aluminum at home or in a lab. If you’re new to the anodizing process, you’ll learn the basics quickly. If you’ve tried before and struggled, you’ll find answers to common issues like poor color take‑up, burnt edges, and uneven aluminum oxide growth.
What you’ll learn
You’ll see exactly what is needed to anodize, how to calculate current from part surface area, how to run safe baths, and how to get deep, even colors—especially black. You’ll learn why Type II (sulfuric acid) is best for home setups, how to use DI (distilled water) for mixing and rinsing, and how to seal the anodized layer for real wear resistance and corrosion resistance. You’ll also understand alloys, when “hardcoat” fits, and why steel is not a good candidate for this process.
At‑a‑glance: process overview
- Clean and degrease
- Etch with lye (sodium hydroxide)
- Desmut with dilute acid
- Anodize in a sulfuric acid bath (Type II)
- Rinse and neutralize
- Dye (optional)
- Seal in boiling DI water or nickel acetate
That’s the full lifecycle for a properly anodized part with strong color and a tight, protective oxide layer.
How to Anodize: Fast Answers + Safety
Before diving into the detailed steps of anodizing aluminum at home, it’s important to understand the key safety practices and quick answers that make the process both effective and safe. From selecting the right PPE to knowing which current settings prevent burning, this section gives a concise overview so you can approach anodizing confidently.
The 7 essential steps (in order)
- Clean/degrease
- Etch in sodium hydroxide (lye)
- Desmut in a dilute acid
- Anodize in a sulfuric acid bath (Type II)
- Rinse and lightly neutralize
- Dye (optional, 140°F/60°C)
- Seal (boiling DI water ~30 minutes, or nickel acetate)
Key specifications for home Type II sulfuric acid anodizing:
- Electrolyte: about 10–20% sulfuric acid by volume
- Current density: about 12 A/ft² (ASF) is the standard “go‑to”
- Alternative gentle settings: about 0.03 A/in² (≈4.3 ASF) or 0.02 A/in² (≈3 ASF) to reduce burning on small edges
- Time: 30–90 minutes for most parts and finishes
- Temperature: 68–72°F (20–22°C) for dye‑friendly pores
- Typical oxide thickness: about 5–25 microns (0.2–1.0 mil)
Safety checklist
- PPE: chemical splash goggles or face shield, respirator rated for acid gases if needed, acid‑resistant gloves, and apron
- Work in a well ventilated area
- Use a GFCI‑protected outlet, insulated clamps, and proper wire management
- Keep baking soda on hand to neutralize minor acid drips and a labeled neutralization bucket
- Label all containers; never mix acids and bases directly
- Store acids in secondary containment and away from incompatible chemicals
- “Add acid to water,” never water to acid
Quick wiring: anode vs cathode
The workpiece is the anode (positive, +). The cathode (negative, –) can be aluminum sheet or lead sheet placed along the tank wall. Connect the positive lead to the aluminum part with a clean, tight contact (aluminum or titanium wire). Connect the negative lead to the cathode plate. Hang the part so it does not touch the cathode or the tank. Check polarity before switching on the power supply. Avoid copper or brass in contact with the bath, since they contaminate and can ruin color.
1‑page quick‑start flow
- Prep parts → Clean → Etch 30–90 sec → Desmut 30–90 sec → Rinse
- Suspend in bath → Set amps by surface area → Hold 68–72°F → Run 30–90 min
- Rinse → Optional dye 10–30 min at ~140°F → Seal 30 min in boiling DI water → Dry
Safety callouts: goggles on, gloves on, ventilation on, “add acid to water,” check polarity.
Tools, Materials, and Bath Setup
Before you start the anodizing process, it’s essential to gather the right tools, materials, and set up your bath correctly. Proper equipment and a well-prepared setup not only make the process smoother but also ensure safety and consistent results. In this section, we’ll walk through the essential gear, chemical concentrations, and electrical connections needed to anodize aluminum at home effectively.
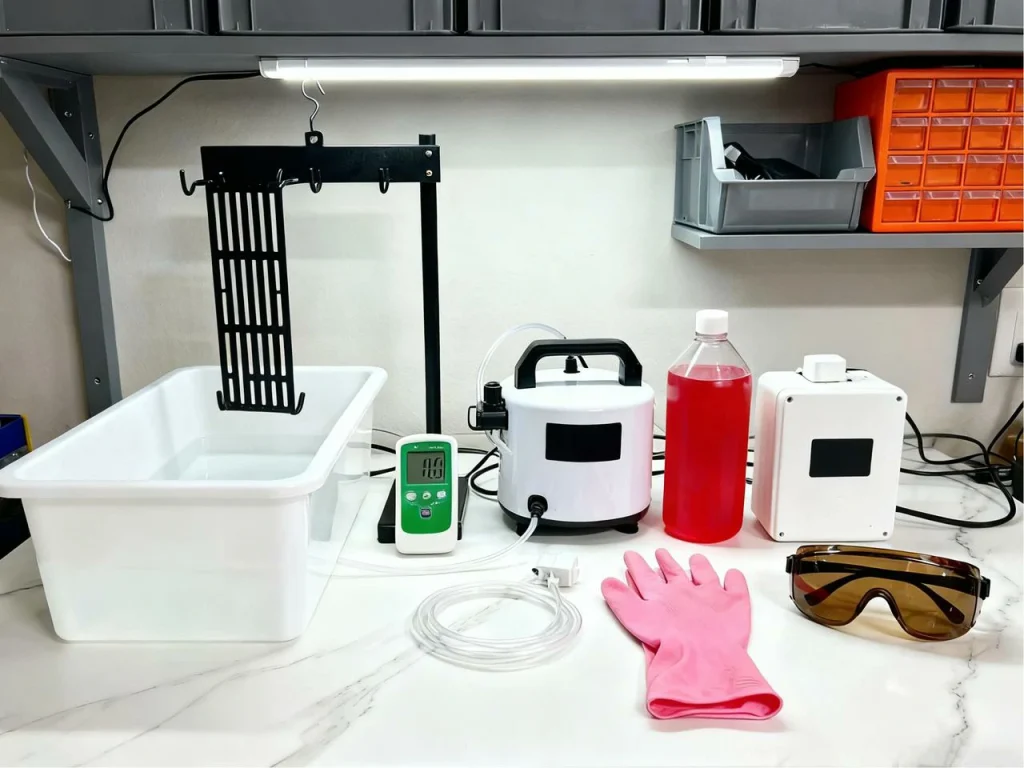
Equipment list and sourcing tips
You do not need a machine shop to get started. Most gear is simple:
- DC power supply with constant current mode. For small parts, a 0–30 V, 0–10 to 20 A unit is common. Larger parts need more current.
- Plastic tank (HDPE or PP) sized for your part, plus a larger water rinse bin
- Cathode plates (6061 aluminum or lead sheet). If using lead, follow hazardous handling rules.
- Racks/fixtures: aluminum or titanium wire. Titanium wire is popular because it holds shape and resists attack, but ensure a firm contact area on the part.
- Agitation: aquarium air pump or gentle circulation helps even growth
- Thermometer; small heater for the dye tank if needed
- Multimeter for current and voltage checks
- DI water for bath make‑up and rinsing
- PPE: goggles, respirator (when needed), acid gloves, apron, face shield for pouring acids
Chemicals and concentrations
- Electrolyte (Type II): Mix about 10–20% sulfuric acid by volume with DI water. “Battery acid” can be a source of sulfuric acid; confirm concentration and purity before use.
- Etch: sodium hydroxide (lye). A mild shop mix is often around 1–3 teaspoons per quart or 1–2 tablespoons per gallon of DI to start; adjust by test. Etch just long enough to remove shine.
- Desmut: a brief dip in dilute acid, commonly a lighter sulfuric solution than the main bath.
- Neutralizer: sodium bicarbonate (baking soda) in water to quench acid residue after rinses.
- Dyes: dedicated anodizing dye offers consistent black or colors. Clothing dyes can work but often fade and vary by batch.
Always test on scrap first.
Setup and electrical connections
Use a rigid bus bar over the tank to hold hangers. Keep dissimilar metals out of the solution, except the aluminum or lead cathode. Pre‑run your PSU with a dummy load to make sure it can hit your target current. Arrange the air stone or agitator so bubbles move past the part, not against it, to avoid streaks. Aim for even spacing between anode and cathode, often 2–4 inches for small tanks.
Sizing current from surface area:
- Find total surface area of the part (in² or ft²). Include inside faces if they touch the bath.
- Current (A) = current density × area
- For 12 ASF: Amps = 12 × (area in ft²). For inch²: Amps ≈ 0.083 × (area in²).
- For gentler settings: 0.03 A/in² or 0.02 A/in² on very small or thin‑edge parts.
Setup diagram + acid dilution calculator (text version)
- Tank layout: cathode plate along side wall (–), anode (your part) hanging center (+), air stone under the part, bus bar above with insulated supports.
- Polarity: positive to part, negative to cathode.
- Acid dilution calculator (by volume): Desired concentration (%) × total volume = volume of acid to add. Example: For 1 gallon at 15%: 0.15 × 128 fl oz ≈ 19.2 fl oz acid to 108.8 fl oz water. Always add acid to water, slowly, with PPE and ventilation, based on guidance from the CDC on handling sulfuric acid safely (CDC, 2025).
Step‑by‑Step: DIY Anodizing Process
With all preparations in place, it’s time to move into the hands-on part: the step‑by‑step DIY anodizing process. Following a clear sequence—from cleaning and etching to anodizing, dyeing, and sealing—ensures consistent, high-quality results on your aluminum parts.
Surface prep: clean, etch, desmut
Good prep is the difference between deep, even color and dull, splotchy results. Start with a full clean using degreaser. Rinse with DI water. Wear white cotton gloves when handling. If you can see a finger mark, the part is not clean yet. For precise aluminum parts like camera brackets, electronic enclosures, or structural components, professional CNC milling services can provide high-quality surfaces ready for anodizing
Etch the part in a mild lye bath to remove the polished skin and give a uniform texture. This may take 30–90 seconds for most aluminum alloys; watch closely. Rinse well. Then desmut in a dilute acid dip to remove dark residues or intermetallics that don’t etch. Rinse again in DI. From this point on, do not touch the part with bare hands.
Anodizing run: current density, timing, indicators
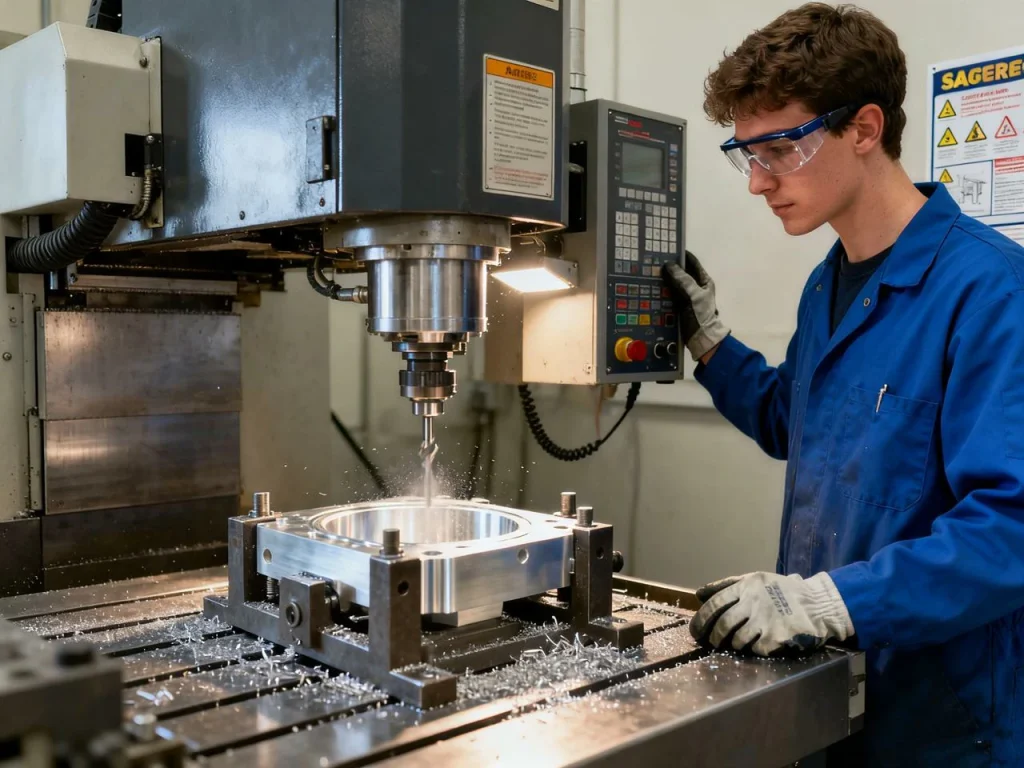
Lower the part into the sulfuric acid bath. Set your power supply to constant current based on area.
- Standard home setting: about 12 ASF for Type II gives predictable growth and dye‑friendly pores.
- Gentle settings: 0.03 A/in² (4.3 ASF) or even 0.02 A/in² (3 ASF) on thin or sharp‑edged parts to avoid burning. Increase time to compensate.
You will see fine bubbles at the anode (oxygen) and at the cathode (hydrogen). Hold bath temperature around 68–72°F (20–22°C) for sulfuric acid anodizing that takes dye well. If the bath warms up, pore structure changes and color can shift. Under constant current, the supply voltage will rise during the run. That is normal.
How long? Here the “720 Rule” helps.
- The “720 Rule” says it takes about 720 amp‑minutes per square foot to build 1 mil (0.001 in, ~25 µm) of oxide at ideal efficiency.
- Time (minutes) ≈ (Thickness in mils × 720) ÷ ASF. Example: For 0.6 mil at 12 ASF: time ≈ (0.6 × 720) ÷ 12 = 36 minutes (actual time often longer because efficiency is less than 100%).
For home Type II, 30–90 minutes covers most needs. If you aim for thicker oxide (closer to “hard anodized” ranges), you need lower bath temperature and different process control, which is beyond a basic home setup.
Edge effects: Sharp corners tend to “burn” first because current crowds there. Gentle current, good agitation, and rounded edges help.
Rinse, neutralize, and handle between stages
After anodizing, lift the part out and rinse in DI water. A quick dip in a light baking soda solution helps neutralize clinging acid. Rinse again. Keep everything clean between the anodize tank and the dye tank. Any acid dragged into dye will shorten dye life and cause color shifts.
Time‑current estimator (text version)
Inputs:
- Total surface area
- Target thickness
- Current density
Outputs:
- Amps: ASF × area(ft²)
- Time: (Thickness mils × 720) ÷ ASF (then add 10–30% to account for less than ideal efficiency)
Example:
- Area: 0.25 ft²; Target thickness: 0.5 mil; ASF: 12 Amps = 12 × 0.25 = 3 A Time ideal = (0.5 × 720) ÷ 12 = 30 min Practical time ≈ 35–45 min
Coloring, Finishes, and Sealing Methods
Once your aluminum part is properly anodized, the next step is achieving the desired color and finish while locking in durability. Understanding how to anodize aluminum black and other colors ensures even coverage and long-lasting results. This section covers best practices for dyeing, finishing, and sealing so your anodized surface not only looks great but also forms a protective oxide layer.
Dyeing best practices (color depth and consistency)
Use dedicated anodizing dyes if you want rich, repeatable colors like black, red, blue, or gold. Heat the dye bath to about 140°F (60°C). Immerse the part 10–30 minutes, moving it gently for even coverage. Make sure the dye tank is clean and filtered. If in doubt, test a small coupon from the same alloy first. Alloys matter: 6xxx series take dye well; 2xxx and 7xxx can shift darker or less even due to copper or zinc.
Sealing options and performance trade‑offs
Sealing closes the pores and locks in the dye. It also boosts corrosion resistance.
- Boiling DI water (~30 minutes): Simple, low cost, good corrosion protection.
- Nickel acetate seal (~10–15 minutes at ~170°F/77°C): Fast and often slightly better dye fastness and wear.
- Steam sealing (industrial): Controlled, fast, very effective, but not common at home.
Table: common seal choices
- Boiling DI water: corrosion resistance high; dye fastness good; time ~30 min
- Nickel acetate: corrosion resistance very high; dye fastness very good; time ~10–15 min
- Steam: corrosion resistance very high; dye fastness very good; time short; industrial gear
Appearance control (matte vs bright, grain, alloy)
Etch time drives matte finish: longer etch, more matte. Polishing before etch yields a brighter look. Alloy also matters. Castings can turn patchy or grey. 5xxx and 6xxx often give the cleanest, most even color. If your goal is a deep, uniform anodized surface, start with good base metal and consistent prep.
Science, Alloys, and Anodizing Types
To fully understand why anodized surfaces behave the way they do, it helps to look at the science behind aluminum anodizing. This section explores how the chemistry, alloy selection, and process type come together in effective aluminum anodizing.
How anodizing works (electrochemistry basics)
Anodizing is an electrochemical process that forms a controlled aluminum oxide film on the surface of aluminum. Under DC current in an acid bath, the aluminum is the anode. Oxygen forms at the surface, building a thin, hard, and porous aluminum oxide layer. Those pores can hold dye, then sealing converts the porous structure into a stable, protective finish.
Current density, acid strength, and temperature shape pore size and growth rate. Cooler baths and higher current can increase growth, but also increase the risk of burning. The sweet spot for home Type II is moderate current, steady temperature, and solid agitation.
Types I/II/III summarized (chromic, sulfuric, hardcoat)
- Type I (chromic acid anodizing): Thin coatings, good for precision parts; heavily regulated chemicals; not used in home setups.
- Type II (sulfuric acid anodizing): Standard decorative and protective anodizing; common at home; takes anodizing dye well; thickness about 0.2–1.0 mil.
- Type III (hardcoat anodizing): Thicker coatings for wear resistance and thermal stability; colder baths, tighter control, higher current; used in industrial lines for hard anodized parts.
Alloy compatibility and outcomes
Anodizing is ideal for most aluminum and many aluminum components. 5xxx and 6xxx alloys usually give clean, bright results. 2xxx and 7xxx contain copper or zinc, which can darken or reduce dye uniformity. Cast aluminum varies widely and may show pits. Always run test coupons if the alloy is unknown.
Can you anodize other metals? Titanium can be “anodized” using different electrolytes to produce vivid interference colors. Magnesium can be treated by plasma electrolytic oxidation (PEO). Steel cannot be anodized like aluminum; it forms rust, not a stable anodic film. For steel, look to black oxide, phosphate, or plating. If you searched “how do you anodize steel” or “how to anodize steel,” the short answer is: you don’t, at least not with sulfuric acid anodizing.
Troubleshooting and Pro Tips
Even with careful preparation and proper technique, issues can still arise during anodizing. This section provides practical troubleshooting advice and pro tips that help you fine-tune your process, avoid mistakes, and get consistently strong, durable anodized finishes on your aluminum parts.
Why is my anodized color blotchy or faded?
The most common cause is poor prep. Residual oil or finger marks block growth and dye. Temperature swings in the anodize bath or dye bath also shift color. Thin oxide (short time) reduces dye uptake. Old or contaminated dye gives weak shades. The fix is strict cleaning, stable bath temperature, enough time for thickness, and refreshed dye. Also make sure your rinse is clean; acid dragged into dye shortens dye life.
What voltage/current do I need at home?
Size your supply by current, not voltage. A good rule is 12 ASF for Type II. For small, sharp parts, 0.03 or 0.02 A/in² is gentle. Voltage will “float” where it needs to be, often 12–18 V in a typical sulfuric bath at home scale. Choose a supply with more current than your estimate so it stays in constant current mode. If your supply cannot hit the target amps, the oxide grows slowly and can be uneven.
Can I anodize aluminum without sulfuric acid?
You can use other acids, including citric or even vinegar (acetic acid), to form some oxide, but the film is usually thinner, softer, and inconsistent. If you care about durability and color consistency, stick with sulfuric acid solution for Type II. Citric or vinegar baths are good for exploring the science, not for parts that see wear.
Does anodizing work on all aluminum alloys?
Most, yes, but the finish can vary. High copper (2xxx) and high zinc (7xxx) alloys may turn darker or show slight “smut.” Castings can pit or blotch due to silicon and trapped gas. Run a test strip. If the job is cosmetic and critical, choose a known alloy like 6061.
Pro tips for better results
- Round edges and deburr. Sharp edges burn.
- Use fresh DI water for mixing, rinsing, and sealing.
- Keep an eye on temperature. A steady 68–72°F gives repeatable pores.
- Verify contact. A weak clamp or passivated wire kills current flow.
- Do not over‑etch. Short and even etch times give finer finishes.
Costs, Case Studies, and When to Hire a Pro
Understanding the costs, real-world examples, and when it makes sense to hire a professional is an essential part of planning your anodizing projects. This section walks you through typical expenses, case studies, and scenarios where outsourcing ensures consistent quality and compliance.
DIY cost breakdown vs pro service
You can anodize aluminum at home with a modest budget. A small bench anodizing setup with a plastic anodizing tank, basic power supply, PPE, chemicals, and a few gallons of DI water starts low, then your per‑part cost drops as volume goes up.
Typical starter costs (ranges vary by size):
- Power supply: small bench unit for a few amps to tens of amps
- Tanks and fixtures: plastic bins, aluminum/titanium wire, bus bars
- Chemicals: sulfuric acid, lye, dyes, baking soda
- PPE: goggles, gloves, apron, respirator cartridges
- DI water: start with at least 1 gallon of distilled water; larger setups use multiple gallons
Pro shops can be cost‑effective when you have many parts, tight tolerances, or special specs. If you need Type III hardcoat, thick wear surfaces, or certification to standards, a professional line is the safer bet.
How much does it cost to anodize? For DIY, after setup, your per‑part chemical and power cost is often a few dollars. Dyes and DI water add some cost. For professional services, pricing depends on size, color, quantity, and masking; small single parts can cost more per piece than a batch.
Real‑world case notes
Home users often report better results when they:
- Improve fixturing so current stays steady
- Lower current density for small or thin parts to prevent edge burn
- Stir or air‑agitate the bath for even growth
- Keep dye clean and at a steady 140°F, with test coupons to match color
In educational labs, simple Type II lines run safely with SOPs, logs, and clear labeling. Students learn to calculate amps from area, apply the 720 Rule for time, and document sealing time for repeatable corrosion performance.
When to outsource (tolerances, certifications, hardcoat)
If your part has strict size tolerances, requires hardcoat anodizing (Type III), needs masking patterns, or must comply with standards like MIL‑A‑8625 or ISO 7599, outsource to a qualified anodizer. Large aluminum components and larger parts with significant total surface area also push beyond a small bench setup’s current capacity.
ROI quick guide (text version)
Inputs:
- Equipment cost
- Parts per month
- Average per‑part shop quote
- Consumables per part
Outputs:
- Breakeven number of parts
- Months to breakeven at your run rate
If your breakeven is far out or parts are safety‑critical, a pro shop may be the right call.
Environmental, Waste, and Compliance
Properly handling chemicals, waste, and regulatory requirements is crucial for safe and responsible anodizing. From neutralizing spent acids to disposing of metal-bearing solutions and maintaining compliant storage, understanding environmental and compliance practices ensures your home or lab anodizing setup stays safe and eco-friendly.
Neutralization and disposal basics
Handle acids and metal‑bearing waste with care. For small hobby volumes, neutralize spent acids slowly with baking soda and DI water to reach near‑neutral pH (about 6–8). Note that neutralized liquid can still contain dissolved metals. Follow local rules for disposal or take waste to a household hazardous waste site. Never pour concentrated acid down a drain.
Ventilation, storage, and emergency response
Work with good airflow. Keep acids in labeled, compatible containers with secondary containment. Maintain a spill kit, PPE, and printed safety data. Post simple steps: contain, neutralize small spills if safe, and know who to call. Keep a clean bench so you never confuse acid and base containers.
Standards and references to cite
If your parts must meet a known spec, review the published standards. ISO 7599 covers decorative and protective anodizing. MIL‑A‑8625 defines Types I, II, and III and performance tests. For safe handling, use government guidance for chemical hygiene, PPE, and hazardous waste.
Step‑by‑step recap: how to anodize aluminum at home
- Prep: Clean fully, etch briefly in lye (e.g., 1–2 tbsp of lye to 1 gallon of water), desmut quickly in dilute acid
- Bath: Mix 10–20% sulfuric acid with DI water; keep ~68–72°F
- Wire: Part is anode (+); aluminum or lead cathode (–); use aluminum or titanium wire for hanging
- Current: Set about 12 ASF (or 0.03–0.02 A/in² for delicate parts)
- Time: Use the 720 Rule for thickness and plan 30–90 minutes for most Type II
- Rinse: DI water, quick neutralize in light baking soda and distilled water, rinse again
- Dye: Heat dye to ~140°F; dunk the parts 10–30 minutes; move gently
- Seal: Boiling DI water ~30 minutes or nickel acetate 10–15 minutes
- Finish: Rinse, dry, and handle gently until fully cooled and sealed

Practical examples
- Small camera plate (20 in²): At 12 ASF (0.083 A/in²), current ≈ 1.7 A. For ~0.5 mil, time ideal ≈ 30 minutes, plan 35–45 minutes. Dye 20 minutes at 140°F for deep black. Seal 30 minutes.
- Bike lever (45 in²): At 0.03 A/in², current ≈ 1.35 A. For a similar thickness, expect a longer run because current density is lower; color often looks smoother with fewer edge burns.
- Electronics cover (100 in²): At 12 ASF, current ≈ 8.3 A. Make sure your supply can hold that current and your agitation is steady. For cylindrical or shaft-type aluminum parts like bike axles or pins, CNC turning services can create precise, smooth surfaces ideal for anodizing.
Notes on metals you cannot anodize this way
- Steel cannot be anodized in the same way as aluminum. It rusts rather than forming a stable anodic ceramic. Use black oxide, phosphate, or plating instead.
- Copper and brass also do not form the same porous oxide structure for dye. They require other finishing methods.
- Titanium can be anodized, but with different electrolytes and voltage steps that create interference colors. That is a separate process.
Essential numbers and quick conversions
- 12 A/ft² (ASF) = 0.083 A/in²
- Gentle settings: 0.03 A/in² (4.3 ASF) and 0.02 A/in² (3 ASF)
- Dye bath temperature: about 140°F (60°C)
- Seal time: boiling DI water ~30 minutes
- Typical Type II thickness: 0.2–1.0 mil (5–25 µm)
FAQs
To learn how to anodize aluminum at home, you don’t need a fancy lab, but having the right setup is essential. You’ll start with clean aluminum parts—free of oil or fingerprints—because even tiny residues can ruin your finish. A sulfuric acid bath at 10–20% concentration and a controllable DC power supply sized to your part’s surface area are key. Distilled or deionized (DI) water is needed for rinsing, mixing baths, and sealing. Prep includes etching in lye and a brief desmut dip to remove residues and intermetallics. For colored finishes, dedicated anodizing dyes heated to ~140°F work best. Finally, seal with boiling DI water or nickel acetate to lock in the oxide layer. Safety gear, proper ventilation, and careful labeling are mandatory when handling acids and electricity.
The “7 20 Rule” you often hear in anodizing discussions actually refers to the 720 Rule, a handy guideline for estimating how long it takes to grow a desired oxide thickness on aluminum. Essentially, it states that to form 1 mil (0.001 inch, roughly 25 microns) of anodic oxide in a standard Type II sulfuric acid bath, you need about 720 amp‑minutes per square foot of surface area at a given current density. This lets you calculate run time: multiply 720 by the thickness you want in mils, then divide by the applied current density in amperes per square foot (ASF). In practice, efficiency is never perfect, so you usually add a small margin of extra time. The rule is especially helpful for DIY setups, letting you match your bath size and current supply to the aluminum part’s surface area. Following it ensures a consistent, dye‑friendly oxide layer without over‑anodizing, which could burn edges or create uneven finishes.
Anodizing is a process that involves a series of carefully timed steps to treat the surface of the part. First, clean your aluminum parts thoroughly to remove oils, grease, or fingerprints. Next, etch them in a mild lye solution to create a uniform matte texture, followed by a brief desmut dip in dilute acid to remove stubborn residues. Then comes the anodizing itself, where the aluminum is connected as the anode in a sulfuric acid bath under controlled current. After anodizing, rinse with DI water and optionally neutralize briefly with baking soda. For colored finishes, immerse the part in a dye bath at around 140°F, ensuring the dye fully penetrates the surface of the part. Finally, seal the pores by boiling in DI water or using a nickel acetate bath, locking in the protective oxide layer and color for durability, corrosion resistance, and a long-lasting finish.
Achieving a rich, deep black finish on aluminum at home is possible with careful Type II anodizing. First, prep your part by cleaning, etching, and desmutting to ensure a uniform surface. Next, submerge it in a sulfuric acid bath set at around 12 ASF and keep the temperature between 68–72°F. Run the anodizing long enough to build sufficient oxide thickness for the dye to take well. After rinsing thoroughly, place the part in a dedicated black anodizing dye bath heated to ~140°F for 10–30 minutes, gently agitating it for even color. Finish by sealing the pores in boiling DI water or nickel acetate, which locks in the black color and gives long-term corrosion resistance. This method avoids blotches and edge burns, delivering a professional-looking finish right at home.
Not all metals can be anodized. Anodizing is a great option for aluminum because it forms a durable, corrosion-resistant coating, but metals like steel, copper, and brass do not respond the same way. Steel will rust rather than forming a stable oxide layer, and copper or brass won’t develop the porous structure needed to hold dyes effectively. For these metals, other surface treatments—like black oxide, phosphate coatings, or plating—are required to improve the surface finish. On the other hand, anodizing aluminum creates a protective oxide layer that enhances both durability and color options, giving you a long-lasting, wear-resistant surface finish suitable for a wide range of applications. So, while aluminum is ideal for anodizing, it’s important to choose alternative methods for metals that cannot undergo this process.
The cost to anodize aluminum can vary depending on whether you’re doing it at home or using a professional service. For DIY enthusiasts, anodizing aluminum parts at home is relatively affordable once you’ve invested in the basic setup—think sulfuric acid, a DC power supply, DI water, and safety gear. Consumables per part are often just a few dollars, especially if you’re producing multiple pieces. On the other hand, professional shops charge based on size, color, quantity, and masking needs, so small single parts can cost more per piece than a larger batch. Remember, anodizing is something that not only protects the aluminum from corrosion but also improves wear resistance and allows you to add vibrant, long-lasting colors. Whether DIY or professional, the benefits often outweigh the costs when you consider the added durability and enhanced surface finish of your aluminum parts.
Several factors can ruin anodized aluminum if not handled carefully. Strong alkali cleaners, like concentrated lye, can strip or dull the protective coating. Scratches, dents, or poor surface preparation under the coating will compromise its integrity. Contamination dragged into the pores before sealing can lead to uneven color or weak spots. Overheating during the anodizing process can coarsen the pores and weaken the finish. Even after anodizing, exposure to harsh chemicals or UV light can fade dyes over time. To maintain long-lasting wear and corrosion resistance, always handle parts gently and avoid abrasive contact. For some maintenance or coloring steps, it’s essential to soak the parts properly in the dye or seal solution for the recommended time to ensure uniform coverage and full protection of the oxide layer.
Yes, you can technically form a thin oxide layer on aluminum using vinegar (acetic acid), but the results are very limited. The film created this way is soft, thin, and not very dye-friendly, so it won’t give you the durability, corrosion resistance, or rich colors that traditional anodizing provides. Vinegar anodizing is mainly useful for science experiments or demonstrations rather than functional parts. If your goal is to achieve a strong protective layer and long-lasting finishes, learning how to anodize with a proper sulfuric acid bath, controlled current, and sealing step is essential. Following the correct procedure ensures that the aluminum develops a robust oxide layer that can take dyes well, resist wear, and provide true corrosion protection, unlike the fragile layer from vinegar.

 English
  German
  French
  Italian
  Spanish
  Polish
  Czech
Czech  Japanese