How does electroplating work? In short, it uses an electrolytic cell, a metal‑ion solution, and DC current to deposit a thin, functional metal layer onto a conductive surface. If you’ve struggled with poor adhesion, uneven thickness, or picking the right metal for corrosion resistance or conductivity, this guide gives you the practical steps and the simple science that solve those problems. First, you’ll get a quick, accurate answer with the core reactions. Then we walk through surface preparation, process parameters (current density, pH, temperature), metals and applications, troubleshooting, safety and compliance, and alternatives. Finally, you’ll find tools, a calculator walkthrough, and a DIY checklist you can use today.
How does electroplating work? The quick answer and core reactions
Before diving into the details of cathodes, anodes, and reactions, it helps to understand what are electroplating basics. Simply put, electroplating is the technique of coating a conductive object with a thin metal layer using electric current, a process widely used in electronics, jewelry, and corrosion protection. The following sections break down the components, electrode reactions, and practical examples so you can see exactly how it works in practice.
30‑second answer: electrolytic cell, ion flow, thin‑film deposition
Electroplating is the process of using a DC electric current to move metal ions from a solution onto a cathode (the object you want to coat). The anode is a bar or plate of the source metal, or an inert anode that does not dissolve. The electrolyte is a metal‑ion solution (the plating bath). When current flows, oxidation happens at the anode and reduction happens at the cathode. The reduced ions become a thin layer of metal that bonds to the surface. That’s the whole electroplating process in one breath.
The four components you need (cathode, anode, electrolyte, DC supply)
Every working bath has four parts that must play nicely together:
- The cathode is your workpiece (the substrate). It must be clean, conductive, and well‑rinsed. Poor prep means poor adhesion.
- The anode supplies metal ions (a dissolving anode of the same metal) or simply completes the circuit (an inert anode such as graphite, with metal fed by solution makeup).
- The electrolyte (plating solution) holds the metal ions, buffers pH, and carries additives like brighteners and wetting agents to tune the finish.
- A controllable DC power supply sets the current density. Stable current density is critical for uniform thickness.
What happens at each electrode (with simple equations)
Electroplating is redox in action:
- At the anode (oxidation): Metal(s) → Metal^n+ (aq) + n e− Metal atoms lose electrons and become ions that enter solution.
- At the cathode (reduction): Metal^n+ (aq) + n e− → Metal(s) Positively charged ions gain electrons at the part and deposit as a solid metal coating.
Thickness ties directly to charge by Faraday’s law. The more amp‑hours you pass, the more metal you deposit onto the cathode, up to limits set by geometry, agitation, and bath chemistry.
Fast example: copper plating with copper sulfate
A classic copper electroplating setup uses a copper anode, a brass or steel cathode, and a copper sulfate solution with sulfuric acid. Turn on DC, and Cu^2+ ions move toward the part, get reduced, and form a tight, pink‑orange copper layer. Typical copper plating thickness ranges from about 0.5 to 150 micrometers (µm). If you push current too high, you risk “burning,” roughness, or poor adhesion, so keep current density in a sane range and ensure good agitation.
In short, if someone asks, “what does electroplating mean?” you can say: Electroplating is the process used to apply a thin layer of metal onto a conductive surface by passing direct current through an electrolyte solution.

Before and after the bath: surface prep and finishing
Great electroplating finishes start long before you flip the power supply. If the substrate is oily, oxidized, or passive, plating quality will suffer. A little care here boosts durability, corrosion resistance, and appearance.
Surface preparation: cleaning, degreasing, activation
Strong adhesion starts with a clean, active surface. A simple flow works for most metals:
- Solvent wipe or vapor degrease to remove oils and cutting fluids.
- Alkaline soak clean to remove remaining organic films.
- Rinse in deionized or clean water.
- Acid dip or activation (for steel, a quick hydrochloric or sulfuric acid dip; for nickel or stainless, a special activation step).
- Rinse again. Keep water quality high to avoid dragging salts into the bath.
The goal is simple: remove oxides and oils and create a surface that is ready to bond with the new metal layer. If you skip this, expect peeling or blisters.

Masking, racking, and part geometry
Good parts in means good parts out. Think about where current wants to flow. Edges and points get more current and build more thickness. Deep holes get less current and may be thin. Use:
- Proper racking to hold parts, keep spacing even, and ensure good electrical contact.
- Shields and robbers to tame edge build‑up.
- Smart orientation and agitation to improve solution exchange in recessed areas.
This improves “throwing power” (how well the bath plates into recesses) and reduces edge effects. If some surfaces must not plate, use stop‑off masking.
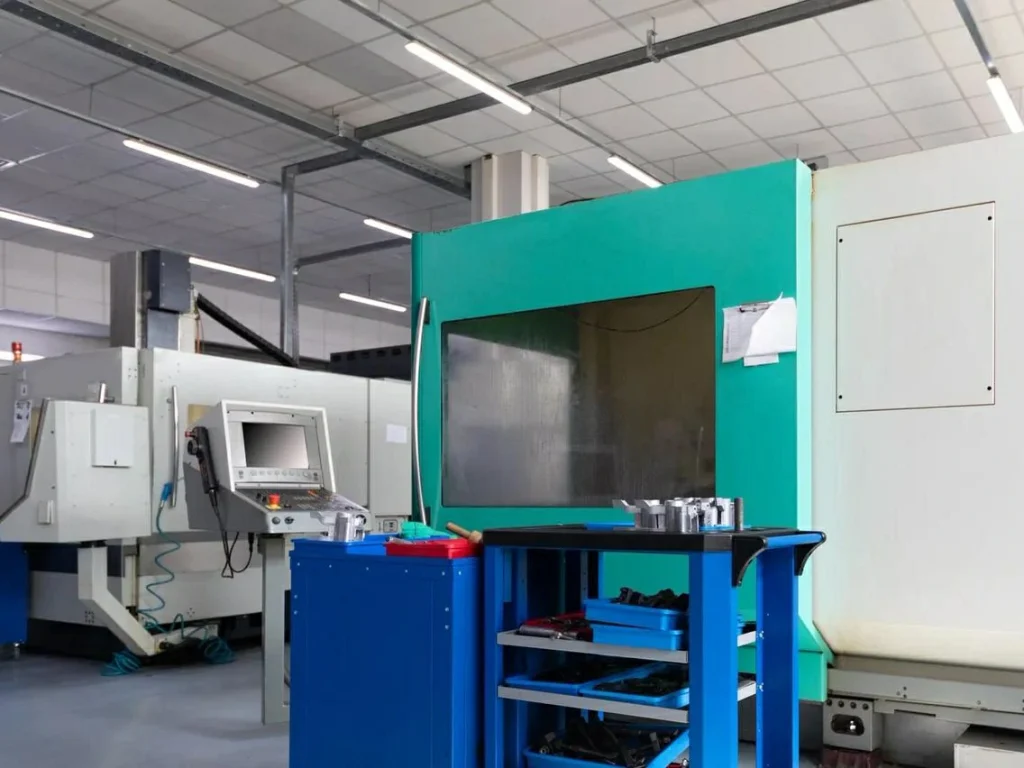
For precise metal parts ready for plating, our CNC turning and CNC milling services deliver high-quality surfaces and tight tolerances suitable for electroplating applications.
Post‑treatment: rinse, dry, polish, passivation/seal
Right after plating, protect that fresh surface:
- Rinse well to remove any retained acids or salts.
- Dry quickly to avoid water spots.
- Polish if a brighter finish is desired.
- Apply passivation or sealers when needed (for zinc on steel, a chromate or trivalent passivation boosts salt‑spray life; for nickel or silver, special anti‑tarnish treatments can help).
Basic QA checkpoints: adhesion and thickness
You don’t need a lab to run basic checks:
- Adhesion: Use quick checks aligned with ASTM B571 methods such as a simple tape pull or bend test on a sacrificial coupon. They won’t tell you everything, but they catch most prep issues.
- Thickness: Portable XRF is common in industry; hobbyists often use a micrometer (for thicker layers) or coulometric thickness meters. Good records help you connect settings to outcomes.
Dialing in the process: current density, time, and chemistry
Once your surface is ready, control the plating manufacturing process with a few key variables. Small changes in current density, pH, and temperature can turn a dull, stressed deposit into a bright, smooth one.
Faraday’s law and deposition rate (with a calculator)
To estimate thickness, use a simplified Faraday’s law for a single metal:
Thickness (µm) ≈ 0.329 × (η × I × t) ÷ (n × A × ρ)
Where:
- η is efficiency (0 to 1),
- I is current in amperes,
- t is time in minutes,
- n is the metal’s valence in the bath (e.g., 2 for Cu^2+ or Ni^2+),
- A is area in dm² (1 dm² = 100 cm²),
- ρ is density in g/cm³.
A quick example for copper plating: Say you have a 50 cm² area (0.5 dm²), run 2.0 A for 10 minutes, efficiency 95% (0.95), valence 2, density 8.96 g/cm³. Thickness ≈ 0.329 × (0.95 × 2.0 × 10) ÷ (2 × 0.5 × 8.96) ≈ 0.329 × 19 ÷ 8.96 ≈ 0.698 µm. If you need 10 µm, you would scale time or current accordingly (while staying within safe current density).
Common question: How long does electroplating take to reach a target thickness? Now you can estimate it. Start with a conservative current density, measure, and adjust.
Bath controls: pH, temperature, agitation, additives
- pH: Controls metal speciation and hydrogen evolution. For example, acid copper baths run strongly acidic; alkaline zinc baths run at higher pH. Keep pH in range for stable deposits.
- Temperature: Warmer baths plate faster and can change grain size. Too hot can cause roughness or add stress.
- Agitation: Gentle movement removes bubbles, improves ion transport, and reduces pitting. Air sparging or solution pumps both work, but don’t overdo air in baths that can oxidize easily.
- Additives: Brighteners, levelers, and wetting agents tune the finish. Too much or too little can cause dullness, streaks, or roughness. Follow tech data sheets and track additions.
Power supply and geometry: DC, waveform, spacing
A stable electroplating circuit matters. You can run constant current or constant voltage; constant current gives more predictable thickness. Pulse plating and periodic reverse can refine grain size or improve throwing power in some systems. Keep anode‑to‑cathode spacing reasonable and even. Closer spacing increases current density and can cause localized burning at edges.
Practical setpoints and guardrails
The ranges below are typical starting points. Always adjust to your exact chemistry and part geometry.
| Metal (bath) | pH (approx.) | Temp (°C) | Current density (A/dm²) | Typical thickness (µm) |
|---|---|---|---|---|
| Copper (acid sulfate) | 0.2–1.0 | 20–30 | 1–5 | 1–50 |
| Nickel (Watts) | 3.5–4.5 | 45–60 | 2–6 | 5–50 |
| Zinc (acid chloride) | 4.5–5.5 | 20–35 | 1–4 | 5–25 |
| Zinc (alkaline) | 12–14 | 20–35 | 0.5–3 | 5–25 |
| Chromium (trivalent decorative) | 3–4 | 35–45 | 1–3 | 0.1–1 |
| Hard chrome (hexavalent) | <1 | 40–60 | 10–60 | 5–300+ |
| Silver (cyanide or non‑cyanide) | 8–10 (varies) | 20–30 | 0.5–2 | 1–25 |
| Gold (cyanide or sulfite) | 3–10 (varies) | 20–60 | 0.1–1 | 0.5–5 |
These values are broad, so treat them as guardrails. Ramp current gently on complex parts. If the deposit turns dark or gassy, back off current or improve agitation.
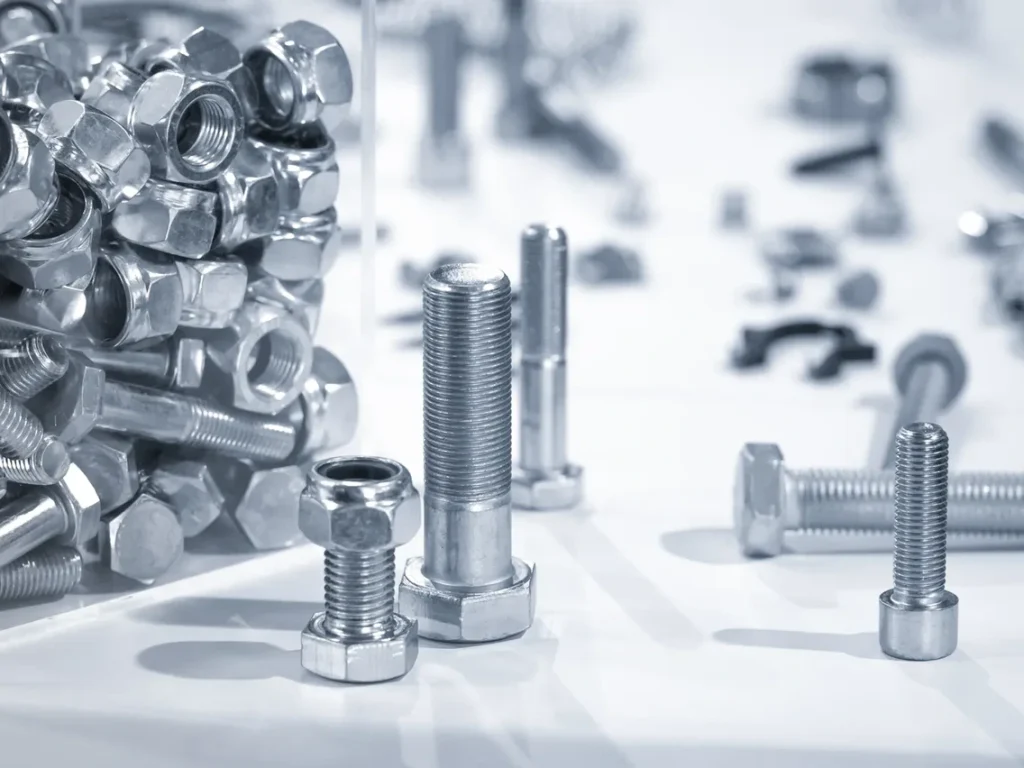
Metals, electrolytes, and best‑fit applications
Different electroplating metals solve different problems. Pick for function first (corrosion, wear, conductivity), then tune for cost and appearance.
Copper (acid sulfate) for conductivity and undercoats
Copper is a go‑to for building a conductive base, filling small defects, and improving electrical conductivity. It is also friendly for DIY. It bonds well to many metals and is often used under nickel or gold. Watch out for porosity on zinc die‑cast; use a strike layer first to avoid attack on the base metal.
Nickel and chromium for wear and corrosion resistance
Nickel plating comes in engineering and decorative grades. It provides strong corrosion resistance and moderate wear resistance, and it can level surfaces for a bright look. Chromium adds hardness and a blue‑white tone. Decorative chrome is thin, over nickel. Hard chrome is thick for hardness and wear resistance on tools and hydraulic rods. Trivalent chromium baths are used for decorative layers and as a safer alternative to hexavalent systems.
Zinc (acid/alkaline) for sacrificial protection on steel
Zinc protects steel by corroding first (sacrificial action). It’s cost‑effective and common in fasteners, brackets, and automotive parts. Add a passivation/seal to boost salt‑spray hours. Alkaline zinc offers better throwing power; acid zinc often gives faster rates and brighter deposits.
Gold and silver for high conductivity and tarnish control
Gold plating is often used on connectors and contacts because it resists corrosion and keeps low contact resistance. Thin gold (0.5–2 µm) balances reliability with cost. Silver plating also has great conductivity but can tarnish; anti‑tarnish topcoats help. Non‑cyanide options exist for both metals, though chemistry control is key.

Comparison at a glance:
| Metal | Common electrolyte | Properties you get | Typical thickness | Typical uses |
|---|---|---|---|---|
| Copper | Acid sulfate | Conductivity, leveling | 1–50 µm | Undercoats, electronics |
| Nickel | Watts (sulfate) | Corrosion and wear resistance, brightness | 5–50 µm | Decorative stacks, engineering |
| Chromium | Trivalent or hexavalent | High hardness, blue‑white finish | 0.1–300+ µm | Decorative trim, hard wear layers |
| Zinc | Acid or alkaline | Sacrificial protection for steel | 5–25 µm | Fasteners, brackets |
| Silver | Cyanide/non‑cyanide | High conductivity, solderability | 1–25 µm | RF parts, bus bars |
| Gold | Cyanide/sulfite | Low contact resistance, inertness | 0.5–5 µm | Connectors, electronics |
Real‑world applications, thicknesses, and quick numbers
Electroplating isn’t just a lab process—it’s a practical solution across industries. From electronics to aerospace, automotive, and jewelry, plated coatings provide both functional and aesthetic benefits of electroplating. The thickness, material choice, and process parameters are carefully tuned to meet performance needs, whether it’s ensuring reliable electrical contacts, resisting wear, or adding a lustrous finish. Below are some real-world applications, typical layer thicknesses, and quick numbers to keep in mind.
Electronics: gold on connectors and PCBs
Electrical components, such as contacts and edge fingers, need stable, low resistance over many mating cycles. Gold plating over a nickel barrier layer prevents diffusion and keeps a clean surface. Typical thickness ranges from about 0.5 to 2 µm, set by the number of mating cycles and environment.
Automotive and aerospace: nickel/chrome stacks and hard coatings
Decorative nickel/chrome stacks protect under road salt, UV, and abrasion. In hydraulic and landing gear parts, hard chrome or engineered nickel systems give serious wear resistance and rebuild tolerances. In aerospace wiring and sensors, silver or gold ensures conductivity under harsh conditions.
Jewelry, restoration, and prototyping (including 3D prints)
For a bright finish, gold or silver plating refreshes jewelry or restored hardware. Makers also plate 3D prints by first creating a conductive shell (graphite or a thin metal seed), then building a copper or nickel layer for both looks and function.
Numbers to know
- Typical plated layer range: about 0.5–150 µm for most jobs, with hard chrome and electroforming going much thicker when needed.
- Higher current density plates faster, but quality often drops if you go too far. Balance rate with finish and adhesion.
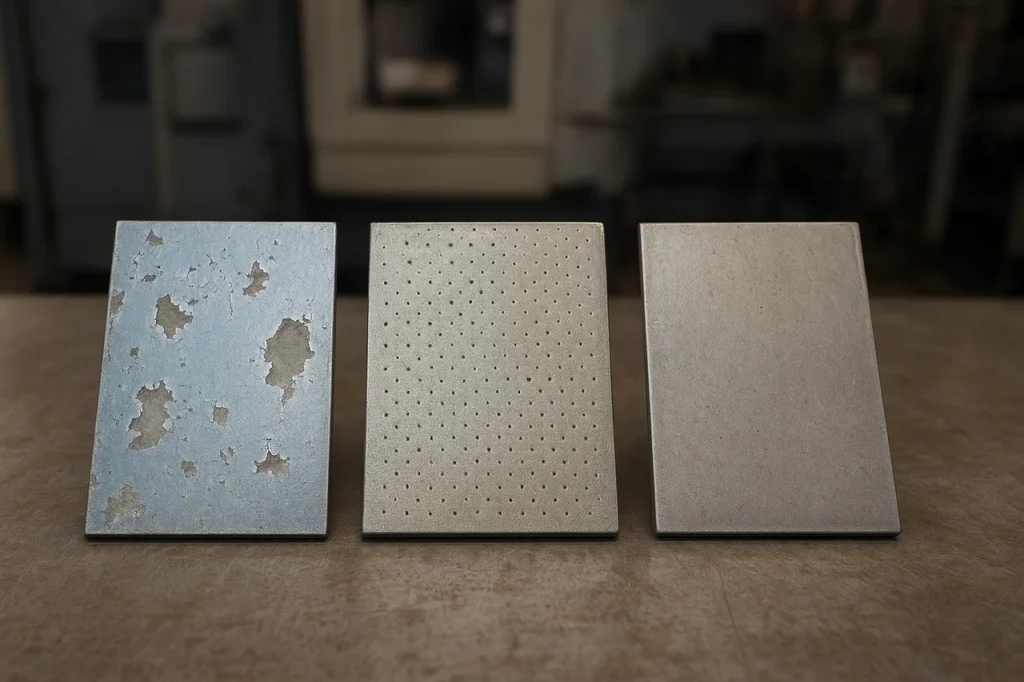
Troubleshooting: from peeling to pitting
Even a great setup can stumble. Here’s how to spot and fix common defects.
Uneven coverage and edge build‑up (throwing power)
If edges are thick and recesses are thin, current is crowding where geometry “focuses” the field. Try more distance between anode and part, add shields or robbers, and tweak agitation. Lowering current density can help current spread more evenly.
Peeling, blisters, poor adhesion
This often tracks back to surface prep. Oils, oxides, and passive films block bonding. Re‑clean and re‑activate the surface. For zinc die‑cast, aluminum, or high‑silicon alloys, include the right pre‑plate steps (such as a zincate for aluminum and a strike layer before the main coat). High internal stress can also cause lifting; add stress reducers or adjust additives.
Pitting, burning, and dull deposits
Tiny pits often come from trapped gas bubbles or particles. Improve wetting with a correct surfactant, increase agitation, and filter the bath. A dark, burned look points to too‑high current density or hot spots near anodes; reduce current or increase distance. If the deposit is dull, check additive levels, pH, and temperature, then confirm anode condition and solution cleanliness.
Why is my electroplating rough or dull—and how do I fix it?
Start with quick checks: pH, temperature, agitation, and additive levels. Confirm your current density is in range for the metal. Filter the bath, clean the anodes, refresh the electrolyte solution if contamination is suspected, and always re‑verify surface prep. If roughness appears after a change, roll back that change and retest on a test coupon.
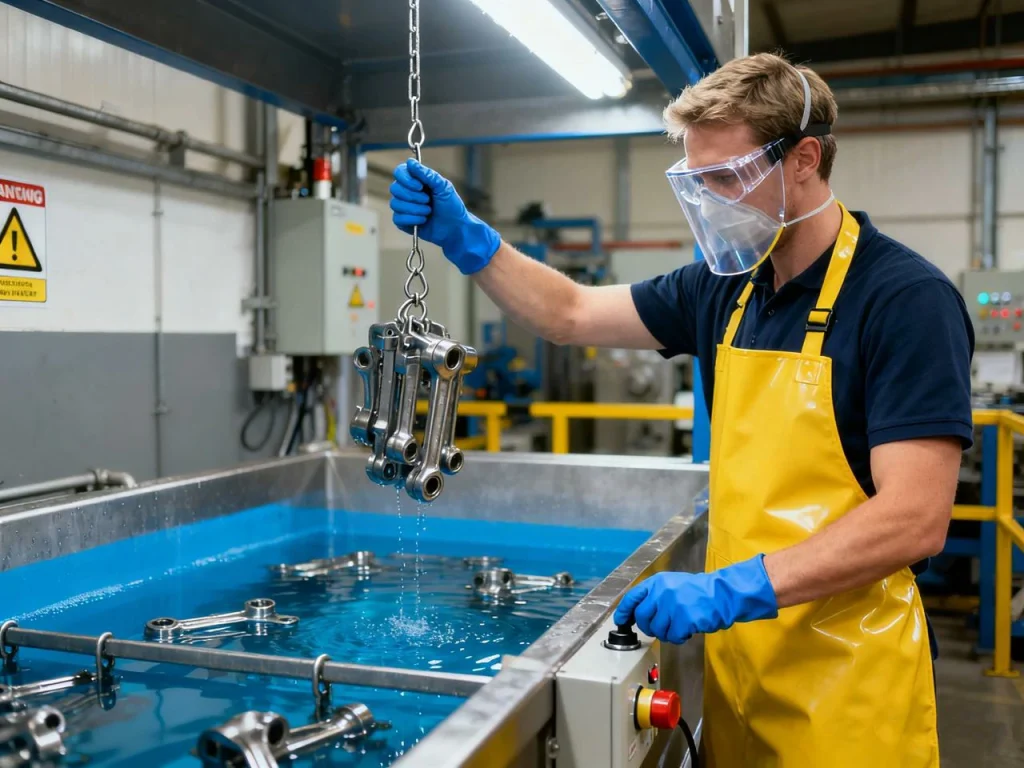
Safety, waste, and compliance (EPA, OSHA, REACH)
Electroplating can be done safely, but you must respect chemical hazards and local regulations. If you’re a hobbyist, think small and keep it well‑controlled. If you’re running a line, you need formal programs and permits.
Chemical hazards and PPE essentials
Many baths use strong acids or bases. Some use metals of concern (like nickel and chromium) or cyanide complexes for certain precious metals. Use the right PPE: chemical‑resistant gloves, splash goggles or a face shield, and aprons. For mists or aerosols, use local exhaust and follow exposure limits from occupational health authorities, who say OSHA sets strict exposure limits for hexavalent chromium. Always read and follow each chemical’s safety data sheet.
Ventilation, fume suppression, and spill response
Set up local exhaust ventilation at tanks. Mist suppressants and tank covers reduce exposure and emissions. Keep spill kits ready and know your neutralization steps for acids, bases, and cyanide systems. Train people on emergency actions and first aid for exposure.
Wastewater, sludge, and permits
Plating wastewater often needs treatment: neutralization, metal precipitation, and filtration. Some sites use ion exchange to recover metals. Many regions require permits, sampling, and recordkeeping. Sludges with heavy metals are regulated wastes and must be handled through approved channels, according to the EPA’s Metal Finishing Effluent Guidelines.
Greener choices and substitutions
You can reduce risk and simplify compliance by using trivalent chromium for decorative chrome, cyanide‑free gold/silver where performance allows, and closed‑loop counter‑flow rinses. Flow restrictors and conductivity‑controlled rinse systems can save water and reduce discharge.
For regulatory details, check your country or region’s law. In the United States, see metal finishing effluent guidelines and workplace exposure rules. In the EU, consult REACH restrictions and authorizations for certain substances.
Electroplating vs. alternatives: choosing the right finish
Sometimes electroplating is often used because it balances cost, throughput, and performance. In other cases, a different method fits better.
Electroless plating (autocatalytic) vs. electroplating
Electroless (like electroless nickel) uses a chemical reducer instead of a power supply. It deposits a uniform layer even on complex shapes and blind holes. It’s great when you need even thickness everywhere. But solutions are more sensitive, costs can be higher, and waste treatment is different. Electroplating can be faster and cheaper, with more choice of metals.
PVD/CVD coatings
Physical vapor deposition (PVD) and chemical vapor deposition (CVD) create very thin, hard films with strong adhesion on some substrates. They excel at wear resistance and color control with lower chemical waste at the point of use, but they need vacuum systems and capital equipment. Thickness is usually much thinner than plated layers, and coverage inside deep recesses may be limited.
Anodizing and conversion coatings
For aluminum, anodizing converts the surface to a protective oxide and can be dyed and sealed. Conversion coatings (like zirconium or phosphate systems) help paint adhesion and give some corrosion protection. These are different from electroplating because you’re not adding a new metal; you are transforming the surface.
Is electroplating better than PVD for wear and corrosion?
It depends. If you need thick, repairable layers or sacrificial protection on steel (like zinc), electroplating wins. If you want thin, very hard decorative colors on stainless or tooling, PVD can be a great pick. Think about your substrate, geometry, performance target, and budget.
Tools, calculators, DIY guide, and next steps
Getting started with electroplating at home or in a small lab can be simple if you follow a structured approach. With the right tools, a few calculators, and a clear step‑by‑step guide, you can plan, test, and refine your plating process safely. The following sections cover a practical DIY setup, plating steps for mild steel, ways to estimate deposition, quick quality checks, and an action plan for continuous improvement.
DIY setup checklist (home or lab)
For a simple bench setup, you need a small adjustable DC supply, a beaker or small tank, an anode of your chosen metal, a compatible electrolyte, a way to heat and stir (if needed), basic PPE, and a fume‑safe area. Keep a few test coupons to dial in your plating time and current before touching your good parts. If you are asking “how to electroplate?” or even “how to electrolate mild steel,” the same basics apply: clean, activate, set moderate current, and test on coupons.
Step‑by‑step for mild steel:
- Clean and degrease thoroughly.
- Acid activate (brief dip) and rinse.
- Add a thin strike layer if the main bath tends to attack steel (for example, a nickel strike).
- Move to the main bath (copper, nickel, zinc, etc.).
- Plate at a moderate current density, check often, and rinse well.
Deposition rate and amp‑hour calculator (how to use)
Use the Faraday example earlier to estimate thickness. To plan a job:
- Measure area (estimate total surface area or use a shape breakdown).
- Pick target thickness.
- Use density and valence for your metal (e.g., nickel: ρ ≈ 8.9 g/cm³, n = 2).
- Set a safe current density and compute total current (A = current density × area in dm²).
- Solve for time with your efficiency estimate.
This simple worksheet helps you predict how long the process works before you start, and it helps you document the amp‑hours used.
Quick quality checks for hobbyists
Check the surface after a light clean. If water sheets evenly, your part is clean; if it beads, it’s not. After plating, inspect for even color and brightness. Try a gentle tape test on a hidden area. If it fails, improve cleaning and activation, or add a strike.
Action plan and further reading
Start small. Validate on coupons. Change one thing at a time and record anode type, cathode area, electrolyte composition, current, time, pH, and temperature. Build your own standard operating procedure and a parameter logsheet. When you’re ready, explore standards such as adhesion tests and thickness methods so your results match industry practice.
FAQs
Electroplating works by using a DC electroplating circuit that has three main parts: an anode, a cathode, and an electrolyte solution. Basically, the anode is made of the metal you want to coat onto your part, and the part itself acts as the cathode. When the current flows, positively charged ions of the plating metal move through the electrolyte toward the cathode. When they reach the surface, they gain electrons and deposit as a thin, uniform metal coating. The longer you run the process, or the higher the total charge you pass, the thicker the plating layer gets—this relationship follows Faraday’s law. In practice, it’s like “painting with metal at the atomic level,” and careful control of current, temperature, and solution composition is key to get a smooth, defect-free layer.
While electroplating is super useful, it’s not without drawbacks. Some plating baths use hazardous chemicals, so you need proper ventilation and fume control to keep the air safe. Handling and disposing of waste can be tricky, because it often contains metals and acids that can’t just go down the drain. The metal deposits themselves aren’t always perfect—internal stress can build up, making the coating crack or peel over time. On certain metals like high-strength steel, hydrogen embrittlement can happen, meaning the metal can become brittle after plating, so extra baking steps are sometimes required to release the hydrogen. And if your part has a really complex shape, the plating can be uneven unless you carefully plan racking positions or use shields to direct the current. So, it’s a powerful process, but it requires planning and caution.
Yes, any metal plating can eventually wear off if the surface is subjected to abrasion or corrosion. It’s not magic; the coating is still just a thin layer of metal. That’s why you need to pick the right metal and thickness, depending on how the part will be used. Environment matters too—if the plated item is outdoors or exposed to chemicals, extra protection like post-treatments, seals, or topcoats can really help extend the lifespan. Think of electroplating like a shield: it’s protective, but not indestructible.
There’s no single chemical for all electroplating—different metals need different electrolyte solutions. For example, copper plating typically uses copper sulfate, while nickel plating often uses nickel sulfate, sometimes combined with chloride and boric acid. Zinc plating might use zinc chloride or alkaline zinc solutions, and precious metals like gold or silver have their own special complexes, which can be either cyanide-based or cyanide-free. The key is to match the chemistry to the metal you’re plating and to always stay within safety and regulatory limits, because some solutions can be toxic or corrosive.
The thickness of electroplating depends on the metal and the application. Common layers usually range from about 0.5 to 150 µm. Some specialized coatings, like hard chrome, can go even thicker, around 200–300 µm. In advanced cases, such as electroforming, you can even build up metal layers to millimeter thickness—but that’s a very specialized process used for things like molds or precise metal parts. So whether you’re doing decorative work or heavy-duty functional plating, you can adjust thickness by controlling current, time, and solution concentration.
Electroplating can be categorized by method or purpose. By method, the main types are:
1. Rack plating – parts are hung on racks, perfect for medium to large parts with controlled current flow.
2. Barrel plating – small parts tumble in a barrel, which is great for bulk plating but can have less precise thickness.
3. Brush plating – a localized process where you move a brush-like anode over the surface to plate just certain areas.
You can also classify by purpose: decorative, functional, or sacrificial coatings, depending on whether you want it to look good, resist wear/corrosion, or act as a protective “sacrificial” layer.
Not all metals are friendly with water-based electroplating baths. Highly reactive metals like sodium and potassium are basically impossible, because they react with water before they can plate. Many aluminum alloys also resist plating due to a tough oxide film on the surface. To plate aluminum, you usually need a special activation step and sometimes a strike layer to get the metal to stick. So, some metals just need too much extra chemistry to be practical for standard electroplating.