
Welding aluminum can be challenging due to its stubborn oxide layer, high thermal conductivity, and fast-freezing puddle. This makes types of aluminum welding methods—like TIG and MIG—important to consider. If you’re fighting porosity, burn-through, or smeared, gray beads, this guide gives clear answers you can use right now. You’ll learn TIG (GTAW) and MIG (GMAW) setups, how to choose the right welding process based on part thickness and requirements, step-by-step surface prep, exact settings by thickness, and practical techniques for clean, strong welds. You’ll also get safety tips, quick troubleshooting, and insights from auto and aerospace work. Start with the quick-start section for a fast win, then move into equipment, parameters, and quality control to master welding aluminum at any skill level.
What you’ll learn at a glance (settings, prep, process choice)
You’ll get a fast thickness-to-settings guide, the TIG vs MIG choice by part and skill, simple cleaning steps that prevent porosity, and starter parameters (amperage, voltage, wire feed, gas flow) that you can tune in minutes.
Who this guide serves (beginner to pro; fab, auto, aerospace, DIY)
This is for anyone who needs dependable aluminum welds—fabrication, automotive, aerospace, marine, and DIY. If you’re new, you’ll get simple steps and safe habits. If you’re experienced, you’ll find fine-tuning tips, fixture ideas, and QA checklists.
How to use this guide (quick-start first, then dive by topic)
Begin with the Quick Start to select the process, gas, and filler. Then jump to the section you need—equipment, prep, machine setup, troubleshooting, or applications.
Quick Start: The 5-Minute Setup for Aluminum Welding Technique
One-page settings—thickness → process, polarity, gas, filler
Use this as your first pick. Then run a test coupon to dial in.
- 0.040–1/8 in (1–3 mm): AC TIG, 100% argon; start with ER4043 filler; push technique on TIG torch; tighter heat control.
- ≥1/8 in (≥3 mm): MIG with spool gun or push-pull; 100% argon; ER5356 for higher strength or ER4043 for crack resistance and wetting.
- Use a push technique only with MIG to improve gas coverage and reduce porosity.
Table: Quick selection (starting points)
- 0.040–0.063 in: AC TIG, 55–90 A, 1/16–3/32 in tungsten, 15–20 CFH argon, ER4043 1/16 in filler.
- 1/16–1/8 in: AC TIG 90–160 A or MIG 0.030–0.035 in wire, 18–22 V (MIG), tune WFS; 100% argon 20–25 CFH; ER4043 or ER5356.
- 3/16–1/4 in: MIG 0.035–0.040 in wire, ~20–24 V (start point), higher WFS; preheat as needed; 100% argon or Ar/He blend.
- 1/4 in: MIG with push-pull recommended; consider Ar/He blend; preheat 200–300°F; multiple passes.

Step-by-step checklist (clean → fit → set → weld)
- Degrease with acetone or alcohol; remove all oil and moisture.
- Brush the joint with a dedicated stainless-steel brush along the grain; do not use it on steel.
- Set AC TIG balance to add enough cleaning (start ~65–75% EN).
- For MIG, hold a 10–15° push angle; keep a short stickout (about 1/2 in or less).
- Fit tight; clamp and support; use copper backing for thin edges.
- Make straight, overlapping passes; avoid wide weaves.
Safety fast-check (PPE, ventilation, fume extraction)
- Ozone and NOx can form—use local fume extraction or adequate ventilation.
- Wear full PPE: gloves, jacket, and a proper welding helmet.
- Keep a clean, dry work area; remove flammables; assign a fire watch on bigger jobs.
Welding fumes generated by aluminum welding are a common safety concern. Aluminum conducts heat rapidly, which leads to the formation of welding fumes. Ensure proper ventilation and fume extraction systems are in place to reduce exposure.
The Best Way to Weld Aluminum: TIG vs MIG for Different Requirements
Pros and cons by thickness, precision, and productivity
When deciding what is the best way to weld aluminum, the decision largely depends on the material thickness and the precision required. TIG welding (GTAW) is the ideal choice for thin aluminum, offering tight control and a clean weld appearance. It’s especially useful for small parts and precision joints where bead quality is crucial. However, TIG welding is slower and welding requires more skill, particularly in controlling the torch, maintaining consistent filler rhythm, and managing heat input.
On the other hand, MIG welding (GMAW) is the best way to weld aluminum for thicker sections where speed and productivity are key. Aluminum welding requires proper technique, and ALU MIG welding is faster and easier to master, making it great for welding frames, plates, and long seams. It does require correct wire feed speed (WFS) and voltage settings. Additionally, using a spool gun or push-pull gun prevents birdnesting of the soft aluminum wire, ensuring a smooth and reliable weld.
To ensure clean and strong welds, it’s essential to clean the aluminum thoroughly prior to welding. A stainless steel brush is recommended to remove the oxide layer. Shielded metal arc welding (SMAW) can also be used for aluminum, though it is generally not the preferred method due to the difficulty of controlling the heat input and the risk of contaminating the weld pool.
For TIG welding, using tungsten inert gas provides a clean, stable arc, making it perfect for precise, high-quality welds. Weld joints should be carefully prepared, with tight fit-ups to minimize distortion and improve weld integrity.
So, when choosing a welding method from MIG and TIG welding for your aluminum project, consider the material thickness, the speed of work, and the final finish quality. For thin, precise jobs, TIG welding is your go-to, while for larger, faster tasks, MIG welding excels.

Decision flowchart (part thickness, joint type, access, skill)
- Thin (<1/8 in), visible bead, tight corners, or delicate parts? Choose TIG.
- Thick (≥1/8 in), long seams, or large structures? Choose MIG.
- Limited access or out-of-position? Pick the process you handle best and adjust parameters; if MIG, consider lower voltage and faster travel to control buildup.
- Unsure or mixed parts? Tack with TIG, fill with MIG, then cap with TIG where appearance matters.
MIG spool gun vs push-pull systems; wire size and duty cycle
- Spool gun: Short wire path prevents birdnesting; quick to set up; slightly heavier at the torch.
- Push-pull: Motor in gun helps feed long distances from a standard spool; great for production.
- Wire sizes: 0.030–0.047 in aluminum wire covers most jobs; pick size by thickness and machine capacity.
- Match duty cycle to job length; long, heavy welds need higher duty cycle to avoid thermal shutoff.
Can you weld aluminum with a MIG welder?
Yes—use a spool gun or push-pull gun, 100% argon, and a push angle. Tune WFS and voltage on test coupons to avoid porosity and lack of fusion.
Equipment, Filler Metals, and Shielding Gas
Machines and torches: AC TIG features; MIG parameters that matter
For AC TIG, look for high-frequency start, AC balance and AC frequency control. These let you manage the oxide layer and puddle shape. A comfortable TIG torch with a gas lens helps shield the weld pool.
For MIG, inductance control aids puddle wetting and spatter control. Use a clean liner, U-groove drive rolls, and proper contact tips sized for soft aluminum wire. Keep the gun cable as straight as possible for smooth feeding.
Filler selection: ER4043 vs ER5356; alloy compatibility
Filler material selection is crucial for achieving strong and reliable aluminum welds, especially when using TIG and MIG welding processes. When comparing ER4043 vs ER5356, it’s important to consider aluminum filler compatibility with the base material.
- ER4043: Great wetting, easier feeding, and better crack resistance. Good for aluminum alloys like 6061 when post-weld anodizing is not required.
- ER5356: Higher as-welded strength, better for parts that see load or for anodizing color match on many alloys. Slightly stiffer wire feeds well in MIG.
- Avoid welding 2024 and 7075 when possible; they crack easily and often need special procedures. If you must, follow approved codes and strict procedures.
Shielding gas: 100% argon vs Ar/He for thicker sections
- Use 100% argon for most aluminum welding with TIG or MIG.
- For heavy plate or to increase travel speed on thick joints, consider argon/helium blends (helium increases heat input and penetration).
- Typical flow: 15–25 CFH for TIG, 20–30 CFH for MIG, adjusted for nozzle size and draft.
What gas do you use to weld aluminum?
In most cases: 100% argon. On thick plate or for faster travel on big fillets, an argon/helium mix helps. This is especially effective when using TIG welding, where the tungsten electrode plays a key role in maintaining a stable arc, compared to steel, which has different heat conductivity and requires different handling of the heat input and penetration.
Surface Prep & Fit-Up: Clean Metal or Failed Welds
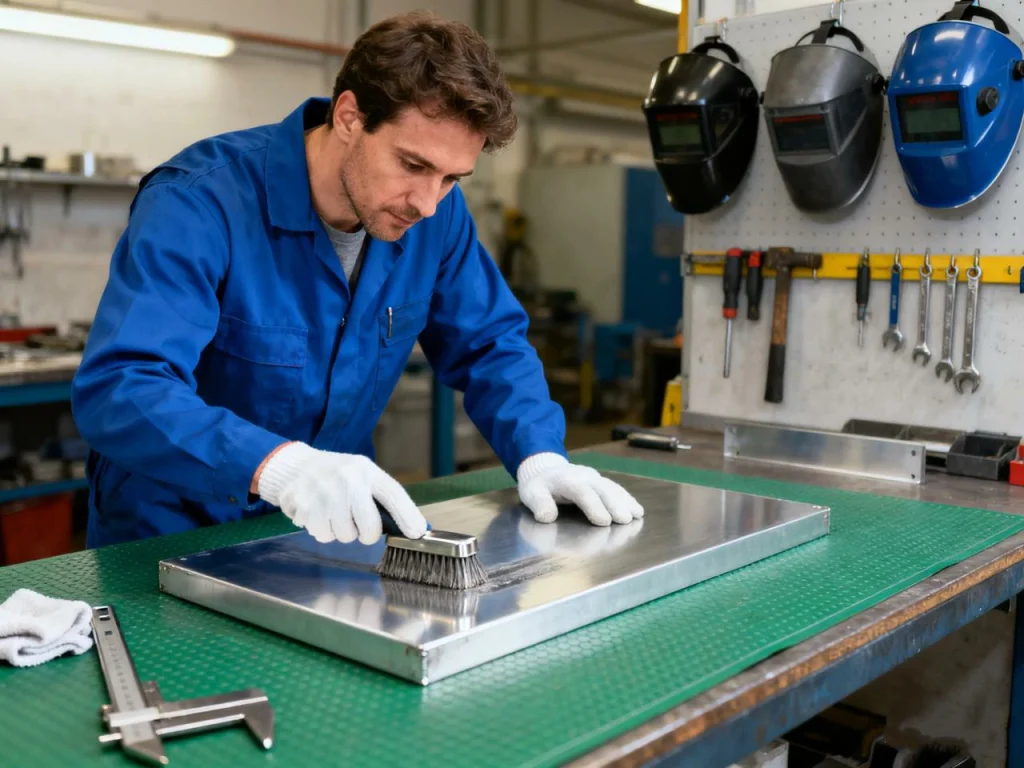
Oxide removal protocol (acetone + dedicated stainless brush)
The aluminum oxide layer melts at a much higher temperature than the base metal. Clean it well or the puddle won’t wet in.
- Degrease with acetone or alcohol until rags wipe clean.
- Brush the joint with a dedicated stainless-steel brush along the grain. Do not use that brush on steel.
- Weld soon after brushing. Avoid touching the area with bare hands.
Joint design & fixturing (gaps, backing, heat sinks)
Tight fit-up helps control heat and reduces porosity. Gaps increase spatter and burn-through on thin parts. Copper backing or heat sinks can pull heat away and support the edge. Use clamps and fixtures to prevent distortion and hold parts without forcing them.
Contamination pitfalls (oil, moisture, cross-contamination)
Set up an aluminum-only corner in your shop. Keep wire sealed and dry. Store filler rods in tubes. If the part is big, wipe the joint between passes, especially after brushing, grinding, or pausing.
Do you have to clean aluminum before welding?
Yes. The oxide layer is an electrical insulator and melts about three times hotter than the base aluminum. If you skip cleaning, you will get porosity, lack of fusion, and weak joints.
Machine Setup & Technique: Precise Heat Control
TIG settings: AC balance/frequency, amperage, pulse, filler rhythm
Control the cleaning action and puddle shape with AC balance. Starting around 65–75% electrode negative (EN) gives a good mix of penetration and oxide cleaning. Increase EN for penetration; decrease EN (more EP) for extra cleaning when you see a dull, dirty edge. AC frequency around 80–120 Hz tightens the arc and gives a narrower bead that’s easier to aim. For optimal precision and high-quality welds, ensure your aluminum workpieces, such as custom parts manufactured through CNC machining, have clean, smooth edges.
Set amperage high enough to get the puddle to form quickly, then modulate with a foot pedal or torch switch. On thin parts, a low-frequency pulse (for example, 1–2 Hz) helps you add filler in a steady rhythm while keeping the peak heat down.
Feed the filler rod into the front third of the puddle; keep a short arc length and steady torch angle. If the puddle looks grainy or slushy, check cleanliness and gas coverage.
MIG settings: voltage/WFS, 10–15° push angle, stickout, travel speed
Use a push technique—never drag—at a 10–15° angle to improve gas coverage. Hold a short stickout (about 3/8–1/2 in). Set voltage and WFS to get a smooth, spray-like sound with stable transfer. Avoid large weaves; lay straight, overlapping stringers for wider joints to prevent cold lap.
If you see soot or porosity, increase gas flow (within reason), reduce stickout, or adjust voltage/WFS. Keep the gun cable as straight as possible for smooth feed.
Heat management: preheat, hot start, crater fill
Thick sections may need preheat around 200–300°F to reduce start-up chill and prevent cold starts or lack of fusion. This is especially important because aluminum’s melting temperature is lower than that of steel, making it more prone to cold starts. A hot start helps puddle up quickly. Always fill the crater at the end to prevent end-crater cracks—use a crater-fill function or pause to backfill with filler while tapering current down.
What settings for 1/8″ (3 mm) 6061 aluminum?
- TIG: About 120–160 A AC, 3/32 in tungsten, 100% argon at 15–20 CFH, AC balance ~70% EN, frequency ~100 Hz. Use ER4043 or ER5356, 3/32 in filler.
- MIG: 0.035–0.040 in aluminum wire, 100% argon at 20–25 CFH. Start around the low 20s in volts and tune WFS on test coupons until you get stable spray transfer with good wetting.
Step-by-Step: A Simple First Aluminum Bead (MIG, 1/8 in plate)
- Prep: Cut two coupons, wipe with acetone, and brush both edges.
- Set machine: 100% argon at ~25 CFH, 0.035 in ER5356 wire, start around low 20s volts, tune WFS for smooth spray-like sound.
- Position: 10–15° push angle, short stickout.
- Weld: Make a single straight pass on a T-joint. If the bead crowns high and sits cold at toes, slightly increase voltage or slow the travel a touch. If it sags or soots, reduce voltage or tighten stickout and improve gas coverage.
- Inspect: Look for even toe fusion and a smooth surface. Break the piece to see penetration if possible.
Troubleshooting, Safety, and Quality Assurance
Porosity, burn-through, lack of fusion—root causes and fixes
- Porosity: Improve cleanliness, check gas coverage, shorten stickout, increase push angle. Check for drafts and leaks.
- Burn-through: Reduce heat, increase travel speed, tighten fit, or add a backing bar. On TIG, pulse and pedal help; on MIG, step down voltage slightly and keep moving.
- Lack of fusion: Increase heat input or clean better. On MIG, increase voltage or reduce travel speed slightly; ensure you’re not weaving wide.
End-crater cracks & distortion—techniques and machine features
Use crater fill or a manual backfill with filler while tapering down current at the end. To limit distortion, fixture firmly, spread heat with staggered welds, and sequence passes so heat balances across the part. Shorter beads often control pull better than one long pass.
Safety essentials: fumes (ozone/NOx), PPE, ventilation
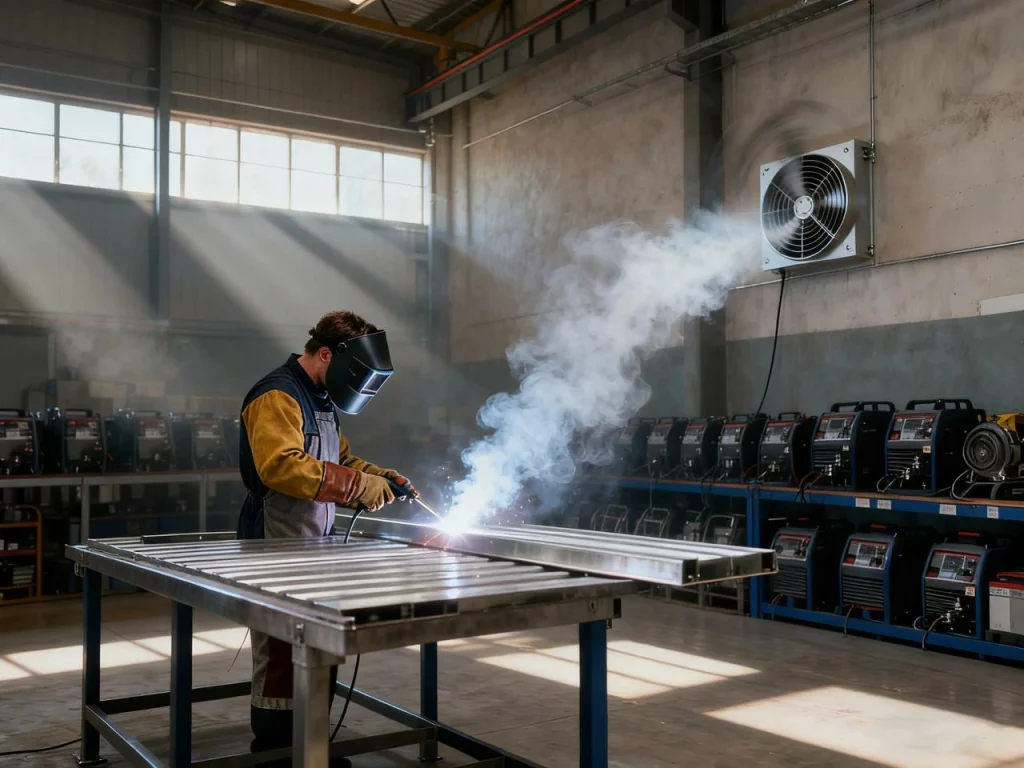
Aluminum welding can generate ozone and nitrogen oxides, especially with high-intensity arcs. According to the National Institute for Occupational Safety and Health (NIOSH), welding fumes can pose significant health risks, and proper ventilation and protective equipment should always be used to minimize exposure. Use local exhaust ventilation, keep your head out of the fume plume, and follow exposure guidance. Wear gloves, long sleeves, and eye/face protection at all times. Do not weld in enclosed spaces without air monitoring and a safe plan.
Advanced Tips: Alloys, Joints, and Process Upgrades
Alloy-specific guidance (6061-T6, 5083, 2024/7075 caveats)
6061-T6 is common and weldable; expect some loss of T6 strength in the heat-affected zone. 5083 and other non-heat-treatable marine grades weld well and hold strength better near the weld. Avoid welding 2024 and 7075 unless procedure-qualified; they crack and often need special filler and post-weld heat treatment plans.
Joint types and best practices (lap, fillet, butt)
For butt joints, use a slight bevel as thickness grows and keep a tight root opening. For lap joints, focus the arc on the thicker piece and wash onto the thinner one. For fillets, keep the torch centered at the root and use small stringers. Backing bars (copper or aluminum) help on thin edges. Plan a weld sequence to balance heat and reduce pull.
Machine features that help (AC balance, pulse, hot start, crater fill)
- AC balance manages oxide and puddle shape.
- Pulse reduces heat on thin parts and helps with filler rhythm.
- Hot start forms the puddle cleanly at the beginning.
- Crater fill prevents end cracks. These features make welding aluminum easier to learn and more repeatable.
Key Concepts and Common Questions (woven through this guide)
What type of welding is used for aluminum? The main types are TIG (gas tungsten arc welding) and MIG (gas metal arc welding). TIG is ideal for thin, precise work. MIG is best for thick parts and long runs. In industry, you may also see laser beam welding, electron beam welding, and friction stir welding for special cases.
Can you weld aluminum with a regular welder? Yes—if your welder supports the right process. You need AC TIG capability for TIG, or MIG with a spool gun or push-pull setup, plus 100% argon. A basic flux-core-only machine is not suitable.
What is the trick to welding aluminum? The “trick” is not a trick. It’s a system: clean metal, correct gas, the right polarity, a push angle, and proper heat input. Control your travel speed, and don’t weave wide. For TIG, set AC balance for enough cleaning and keep a steady filler rhythm.
Is it difficult to weld aluminum? Aluminum can be challenging because it conducts heat fast, the oxide layer fights you, and the puddle freezes quickly. With clean prep, the right settings, and practice on test coupons, it becomes predictable.
What type of welding is best for aluminum? The best type depends on thickness and requirements. TIG is best for thin material and high-quality appearance. MIG is best for thicker parts and productivity. For critical aerospace or high-volume production, specialized processes (like laser or friction stir) may be selected.
Practical Notes on Other Processes and Terms
- “How to weld aluminium with torch”: Many people mean a TIG torch, which is great for aluminum on AC with argon. Oxy-fuel “torch welding” of aluminum is possible with special flux, but it often yields lower-quality joints and is not advised for structural parts.
- Stick welding (SMAW) of aluminum exists with special electrodes but is rarely used due to poor control, high porosity risk, and low weld quality compared to TIG/MIG.
- Flux-cored arc welding for aluminum is uncommon. Most aluminum jobs use solid wire with inert gas shielding.
- Cast aluminum varies widely in cleanliness and silicon content; ER4043 often wets and cracks less in cast repairs. Preheat and long, gentle tacks help.
- For laser beam welding and electron beam welding (beam welding), clean joints and precise fit-up are essential; these are advanced, high-investment methods used in production.
Applications, Case Studies, and Trends
Automotive & aerospace: robotic MIG, lightweighting results
In automotive bodies and frames, aluminum reduces weight and resists corrosion. Replacing steel parts with aluminum can cut component weight by up to about 50% on a one-to-one volume basis. Long seams on panels and frames often use robotic MIG, tuned for repeatable heat input and weld speed. In aerospace, TIG is favored for thin sections and when bead shape and low defect rates are critical.
For components with tight tolerances, complex geometries, or high surface finish requirements that cannot be achieved by welding alone, CNC machining of aluminum alloy parts can be an excellent supplement. U-Need specializes in precision aluminum alloy CNC parts and their surface finish, and can help you perfectly combine machined parts with guided welds to achieve the best structural and cosmetic quality.
Shop efficiency vs quality: passes, speed, and rework
Multiple straight passes often beat a wide weave for speed and quality. Clean prep reduces rework, and modern inverters with AC controls improve arc stability on thin aluminum. Keep a small, consistent root opening and avoid forcing parts to fit; forced fit-ups spring back and warp.
Real-world failures & community insights
Most failed aluminum welds trace back to surface contamination or poor gas coverage. Many beginners struggle with the fast-freeze puddle—adding filler too late makes undercut and lack of fusion. Spool guns improve feed consistency and reduce downtime. Simple habits—cleaning, correct angle, and test coupons—pay off fast.

Final Tips for Consistent Results
- Always run a test coupon to tune voltage/WFS (MIG) or amps/balance/frequency (TIG).
- Keep consumables clean: liners, tips, cups, and gas lenses.
- Use a push technique on aluminum. Drag increases porosity.
- When in doubt, clean again. Most aluminum problems are prep problems.
- Log your settings by thickness and alloy so the next job starts faster.
FAQs
Yes, it’s possible to weld aluminum with stick welding (SMAW), but it’s not ideal. Stick welding on aluminum can be tricky because aluminum is much softer and more prone to contamination than steel. Special electrodes, like those designed for aluminum, are required, but even then, it’s hard to control the weld pool, and you often end up with a messy, inconsistent bead. The process also tends to produce more spatter and porosity compared to TIG or MIG welding, which are much better suited for aluminum.
TIG (Tungsten Inert Gas) and MIG (Metal Inert Gas) are the preferred methods for welding aluminum. TIG offers better control, cleaner welds, and is great for precision work, while MIG is faster and works better for thicker materials. So, while you can weld aluminum with stick, it’s usually better to use the right equipment for cleaner, stronger results.
Welding aluminum at home requires a few key pieces of equipment and materials to get the best results. The most common methods are TIG and MIG welding. For TIG welding, you’ll need a welder with AC (alternating current) capabilities and 100% argon gas for shielding. MIG welding can also be a good choice, especially with a spool gun, which makes feeding the soft aluminum wire easier. You’ll still use argon gas for MIG as well.
In addition to the welder, preparation is crucial. Make sure to have a dedicated stainless-steel brush to clean off the oxide layer from the aluminum, as this can prevent good bead formation. Acetone is also necessary for degreasing the surface, removing any oils or contaminants. Lastly, use the right filler rod, such as ER4043 or ER5356, depending on the aluminum alloy. With these tools and supplies, you’ll be set for successful aluminum welding at home.
Porosity in aluminum welds is typically caused by contamination or inadequate gas coverage. Aluminum is particularly sensitive to moisture, oils, and dirt, which can introduce air pockets into the weld pool, leading to porosity. To prevent this, always start by thoroughly cleaning the aluminum with acetone to remove any oils or contaminants. After cleaning, use a dedicated stainless-steel brush to remove the oxide layer, as it can prevent the filler material from bonding properly.
Next, make sure you’re using the correct technique: push the puddle (especially with MIG welding) to improve gas coverage and minimize air entrapment. It’s also important to maintain a short stickout to prevent excessive exposure to the air. Finally, check your work area for drafts or leaks that can disturb the shielding gas, as poor gas coverage can lead to porosity. Fixing these issues will help you achieve cleaner, stronger welds.
The choice between ER4043 and ER5356 largely depends on the specific needs of your project. ER4043 is a popular filler for aluminum because it has excellent wetting properties, making it easier to feed and it resists cracking well. It’s a good option for aluminum alloys like 6061, especially when post-weld anodizing isn’t required. However, if you need stronger welds, ER5356 is the better choice. It’s more durable and offers higher as-welded strength, making it ideal for parts that will bear loads or need to match anodized colors. For projects involving aluminum alloys that need better corrosion resistance, ER5356 is preferred.
For 6061 aluminum, both fillers are viable, but if you’re looking for strength and load-bearing properties, go with ER5356. If you’re after a smooth finish and crack resistance, ER4043 is the better choice. Always consider the alloy and the end-use of the part when making your decision.
Adding helium to your shielding gas mix can be highly beneficial when welding thick aluminum sections. Helium increases the heat input, which in turn improves penetration and allows for faster travel speeds. This makes it particularly useful for heavy-duty welds, where you need to maintain strong, deep welds without excessive heat build-up. However, for thinner aluminum pieces, 100% argon is usually the better choice. Argon provides a stable, controlled arc and is excellent for preventing issues like burn-through or distortion in more delicate materials. So, if you’re working with thicker aluminum or need to speed up the process, argon/helium mixes are definitely worth considering. For lighter jobs, stick with 100% argon for the best results.

 English
  German
  French
  Italian
  Spanish
  Polish
  Czech
Czech  Japanese