Heat treatment for CNC parts is usually not a “nice to have.” It is a design and manufacturing choice that changes risk, cost, lead time, and inspection needs. If the part must resist wear, carry high load without yielding, or survive repeated stress cycles, heat treatment can be the difference between a working design and an early failure. If the part is mostly a fixture bracket or a cover, heat treatment may only add distortion risk and extra steps with no payback.
This guide stays focused on feasibility. It explains when heat treatment tends to help, when it tends to create scrap, how to place it in the CNC旋盤加工 そして CNCフライス加工 workflow, and how to specify it without leaving room for interpretation.
Do you need heat treatment? Key decision criteria
Heat treatment for CNC parts is a critical manufacturing process that determines a part’s durability—whether a CNC machined part resists wear, bears high loads, or fails early depends on choosing the right heat treatment. It’s not just about hardening steel; it’s about matching the heat treatment method to the part’s function.
What are the benefits of heat treating CNC machined parts? (strength, hardness, wear)
Heat treatment alters the metal’s internal structure by controlled heating and cooling. For CNC machined parts, the practical reasons to apply heat treatment are usually tied to one of these needs:
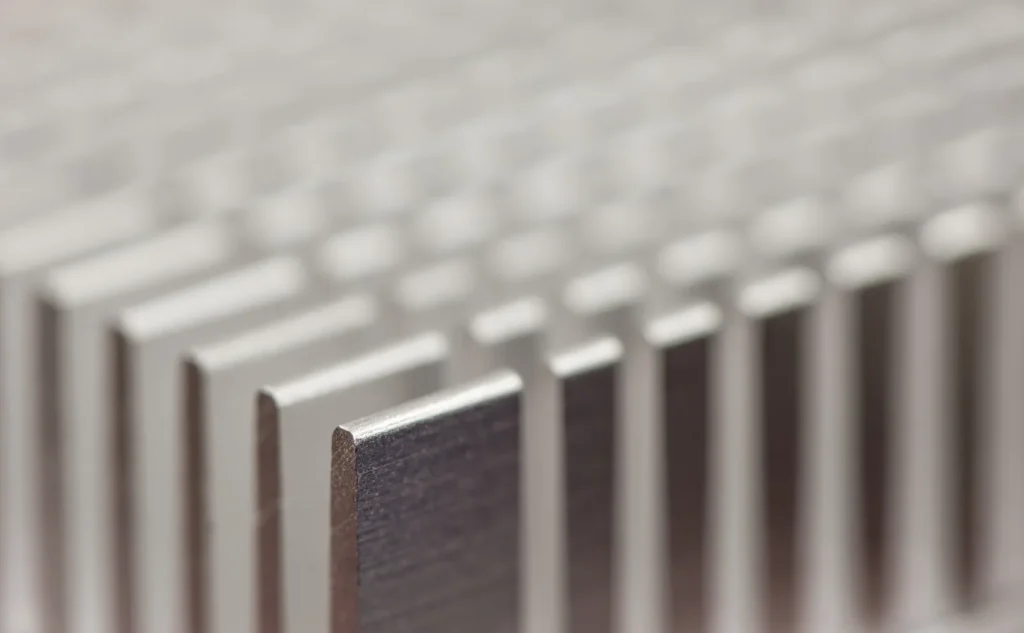
- Higher hardness (surface or through-hardness) Hardness is a proxy for resistance to indentation and often correlates with wear resistance. When parts slide, roll, or contact under load (gear teeth, cam surfaces, pins, bushings), hardness is often the limiting factor.
- Higher strength (yield/tensile) in the bulk material If the part is load-bearing and sized close to allowable stress, strengthening the base material can avoid a redesign. This is where alloy steel heat treatment is commonly used.
- Better wear life without changing the whole part Selective processes (like induction hardening) can harden only the working surface, keeping threads and precision features in a machinable or tougher condition.
A key point for buyers: heat treatment is not only about “making it harder.” Many failures come from parts that are hard but too brittle, or parts that are strong but distorted out of tolerance. The benefit is real, but it depends on choosing a method that matches the failure mode.
When heat treatment adds risk: distortion, over-hardening, under-hardening, lead time
Heat treating CNC machined parts adds several risks that matter most when geometry and tolerances are tight:
Distortion and warping Heating and cooling can release residual stresses from machining and from the original material. Quenching (rapid cooling) adds thermal gradients that can bend thin sections, pull bores out-of-round, or change flatness.
Over-hardening (brittleness) and under-hardening (insufficient properties) Hardening and quenching can produce a very hard structure that cracks or chips in service if it is not tempered correctly. On the other side, an insufficient cycle, poor load arrangement, or wrong quench can leave the part softer than the drawing callout.
Extra lead time and batching effects Heat treatment is often run in batches. That can add queue time even if the furnace cycle itself is not long. It can also create part-to-part variation if mixed loads or inconsistent fixturing are used.
If the part is high precision, you should assume heat treatment will move some dimensions unless the process plan is designed to manage it.
Quick decision table: part function (gears/shafts/brackets) vs. typical treatment (table)
The table below is not a rule set. It is a “what is common” view that helps you sanity-check whether heat treatment is likely to be part of the solution.
| Part function / failure driver | 通常重要なこと | Typical heat treatment direction (most common in practice) |
|---|---|---|
| Gears (tooth wear, pitting, scuffing) | High surface hardness on teeth, controlled distortion | Selective induction hardening of teeth; or full harden + temper when geometry allows |
| Shafts (torsion, bending, bearing seats) | Strength and toughness, stable bearing fits | Harden + quench + temper; sequence often includes finish machining after heat |
| Pins / rollers (contact wear) | Surface wear resistance, core toughness | Hardening + tempering; selective hardening if only one zone needs wear resistance |
| Brackets / covers (mainly static load) | Stiffness and basic strength | Often no hardening; heat treatment only if a strength target drives it |
| Precision housings (bores, flatness critical) | 寸法安定性 | Vacuum heat treating is often chosen to reduce scaling and support consistency; finish machining after heat is common |
When is heat treatment necessary for CNC parts?
Heat treatment is usually necessary when the part’s function depends on hardness, wear resistance, or high strength that the base material condition cannot meet. It is also used when only certain regions must be hard (for example, gear teeth). If the part is lightly loaded and does not see sliding contact, heat treatment may add distortion risk without improving performance.
Heat-treatment timing in the CNC workflow (before, during, after machining)
The timing of heat treatment in CNC machining directly impacts part precision and scrap rates. Whether you heat treat before, during, or after machining depends on balancing distortion control, machinability, and the heat treatment process’s goals.

Best-practice sequencing: rough machine → heat treat → finish machine to manage distortion
A common and practical sequence for tight-tolerance steel parts is:
- Rough machine: remove most material, leaving planned stock on critical features.
- Heat treat: harden + quench + temper (or other selected cycle).
- Finish machine: bring bores, faces, and fits to final size after the part has moved.
This approach accepts that heat treatment may distort the part, then uses finish machining to restore accuracy. It also reduces the chance that final surfaces are damaged by scaling or handling.
A simple way to think about it: rough machining “creates” stress and exposes asymmetric geometry; heat treatment “releases” stress and adds thermal gradients; finish machining “repairs” geometry after it stabilizes.
Heat treated before machining vs. after machining
There is no universal rule on whether to heat treat before or after CNC machining. The decision is usually shaped by two competing realities:
Heat treated before machining (machine the part in the hardened condition)
- Helps when you want final dimensions cut after the material is already in its final condition.
- Can reduce the need to predict distortion.
- Makes machining harder (tool wear, lower removal rates, and more risk of surface damage).
Heat treat after machining (machine soft, then harden)
- Helps when machinability is the top concern and geometry is complex.
- Can be lower risk for tool breakage and cycle time during machining.
- Increases the chance that the part distorts out of tolerance after heat.
For many steel CNC parts, the mixed approach (rough → heat treat → finish) is used because it balances these trade-offs.
How much stock to leave for post-heat finishing
How much stock to leave is not a single number that fits all parts. It depends on geometry, alloy, and the heat treatment method. What you can do, even early in design, is plan stock logically so you have a path back to tolerance.
Tolerance planning checklist (for post-heat finishing):
- Identify which features must be final after heat treat (bearing bores, seal fits, gear datums).
- Avoid finishing thin walls or long slender features before quenching if they are likely to move.
- Leave machining allowance on critical datums so you can re-establish alignment after heat.
- Plan inspection datums that still exist after rough machining, so post-heat rework is possible.
- Document the intended sequence on the drawing or router notes so the supplier does not guess.
This is less about picking a magic stock value and more about not painting yourself into a corner where any movement causes scrap.
Should you heat treat before or after CNC machining?
If tight tolerances matter, a common approach is rough machining first, then heat treat, then finish machining. If machining is difficult in the hardened condition, doing all machining after heat can drive tooling risk and cost. If distortion risk is high, doing final machining after heat is often the safer path, even though it adds steps.
Core heat treatment processes for machined parts (what each does)
Understanding common heat treatment processes is essential for CNC machined parts. From annealing machined parts to hardening and tempering, each heat treatment method serves a unique purpose in enhancing metal parts’ properties.
Annealing for machinability: typical 550–950°C with ~1-hour hold
Annealing is typically used to soften steel and improve machinability. In CNC workflows, annealing is often considered when the incoming stock is too hard or inconsistent to machine predictably, or when you need to reset the microstructure before a later hardening step.
The key idea: annealing involves heating the metal and then cooling it in a controlled way so the structure becomes easier to cut and less stressed.
Typical annealing parameter range (general guidance):
| 項目 | Typical range (given) |
|---|---|
| 温度 | 550–950°C |
| Hold time | ~1 hour (typical) |
| Primary goal for CNC parts | Improve machinability; reduce hardness; reduce internal stress |
These values are broad on purpose. Actual cycles depend on the steel grade and section thickness, and they are often controlled by standards or internal specifications.
Normalizing for structure: 800–900°C + air cooling
Normalizing is used to homogenize the structure of steel. It is often chosen when the goal is a more uniform grain structure and more predictable response to later hardening. For parts made from certain steels, normalizing can also help reduce variability between heats of material.
Normalizing generally means heating to a high temperature and then cooling in air.
Typical normalizing parameter range (general guidance):
| 項目 | Typical range (given) |
|---|---|
| 温度 | 800–900°C |
| Cooling method | Air cooling |
| Primary goal for CNC parts | More uniform structure; improved consistency before later steps |
For CNC parts, “consistency” can matter as much as absolute strength. If a batch varies in hardness after hardening, it can break tools in finish machining or fail acceptance tests.
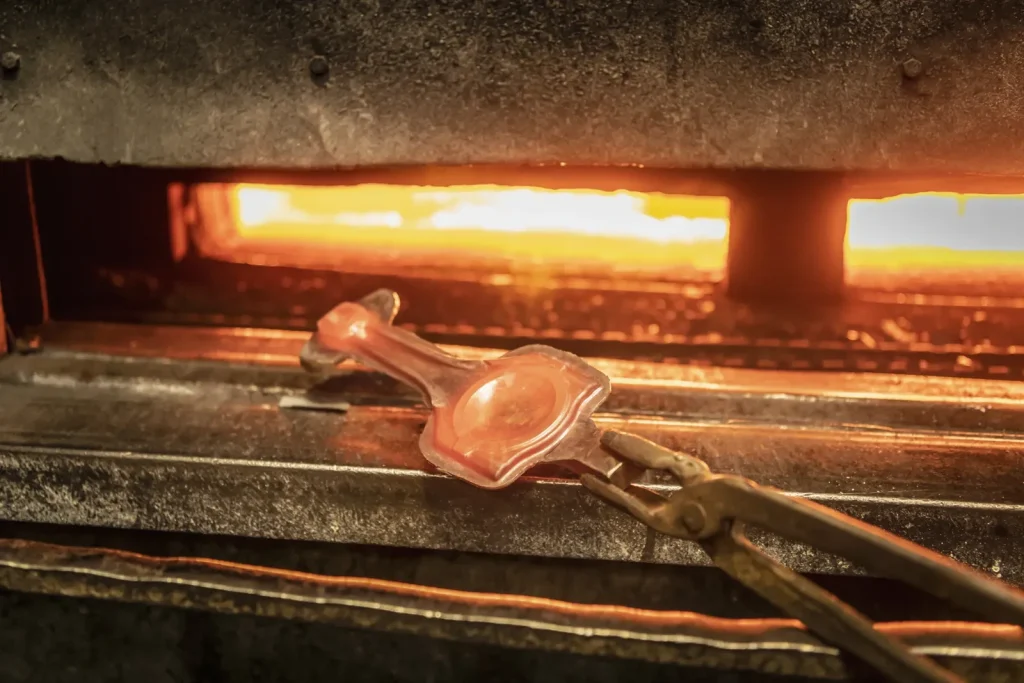
Hardening + quenching: 800–850°C then water/oil cooling
Hardening (followed by quenching) is the step most people associate with heat treatment. In simple terms, the metal is heated to austenitizing temperature, then rapidly cooled so a harder structure forms.
Given the temperature range for steel hardening: 800–850°C, then rapid cooling in water or oil.
Process diagram (conceptual):
| ステップ | プロセス | 詳細 |
|---|---|---|
| 1 | Heat to 800–850°C | Austenitize |
| 2 | Hold | Time depends on section/alloy; not specified here |
| 3 | Quench (rapid cooling) | – Water quench: fastest cooling, higher crack/distortion risk- Oil quench: slower than water, often lower risk |
| 4 | As-quenched condition | Very hard, often brittle |
| 5 | Tempering | Next step to restore toughness |
Key risks (engineering-relevant):
- Cracking risk rises with faster quenching and sharp section changes.
- Distortion risk rises with uneven section thickness, asymmetric geometry, and uneven cooling.
- Under-hardening can occur if temperature, soak, or quench severity is not correct for the alloy.
- Over-hardening is not only “too hard.” It can mean a brittle condition that fails in impact or fatigue.
Quenching and stress relief often get discussed together because machining can leave stress in the part, and quenching adds more stress through thermal gradients. If you do not plan for that interaction, you can end up chasing dimensional movement.
Tempering for toughness: 150–200°C low, 550–650°C high; avoid 250–400°C embrittlement zone
Tempering is typically done after hardening + quenching. It reduces brittleness and adjusts the hardness/toughness balance. Tempering is not optional if the part must survive shock, bending, or cyclic loads.
Given tempering ranges:
- Low temper: 150–200°C
- High temper: 550–650°C
- Avoid temper embrittlement zone for carbon/alloy steels: 250–400°C (480–750°F)
The “embrittlement zone” matters because certain steels can show reduced toughness when tempered in that range. It does not mean every steel will fail, but it is a known risk region that should be considered when selecting a tempering target.
Tempering range chart (conceptual):
| Tempering temperature band | What it is often used for | Notes / risk |
|---|---|---|
| 150–200°C (low) | Keep hardness high | Toughness may remain limited |
| 250–400°C | Sometimes selected for mid hardness | Avoid when temper embrittlement is a concern |
| 550–650°C (high) | Increase toughness and stability | Hardness drops more, but durability can improve |
Material suitability: which CNC alloys respond best
Not all CNC materials respond equally to heat treatment—steel parts offer the biggest property gains, while hardening stainless steel and aluminum parts requires careful consideration of alloy and temper for effective heat treatment.
Steel (most common): where heat treating delivers the biggest property gains
Steel is the most common set of alloys for heat treatment in CNC parts because the property change can be large and because many steel grades are designed to respond to controlled heating and cooling.
From a feasibility standpoint, steel is also where you have the widest set of process options: anneal for machinability, normalize for structure, harden + quench for hardness/strength, temper for toughness, and localized hardening methods such as induction.
Steel suitability selector (high-level):
| Steel part need | Heat treatment direction that often fits | Why it fits CNC reality |
|---|---|---|
| Steel part need | Heat treatment direction that often fits | Why it fits CNC reality |
| Improve machinability before heavy removal | アニーリング | Helps cutting stability and tool life |
| Make properties more consistent batch-to-batch | ノーマライゼーション | More uniform starting structure |
| Increase hardness/strength significantly | Hardening + quenching + tempering | Strong property change possible |
| Harden only where needed | Selective induction hardening | Protects threads and tight datums |
Even when the material is “heat treatable,” the part geometry can still be a hard stop. Thin walls, long slender shafts, and asymmetric pockets are the common distortion triggers.
4340 alloy spotlight: up to 260,000 psi tensile after heat treatment (benchmark callout + caveat)
4340 alloy steel is often discussed for high strength applications. One industry-reported benchmark is up to 260,000 psi tensile strength after heat treatment.
Caveat that matters: this is a single-source benchmark and should be treated as a target that depends on exact condition, section size, and process control. For engineering decisions, you should confirm property requirements using an authoritative material dataset or specification tied to the exact heat treatment condition.
Where 4340 becomes a practical CNC decision tool is in material substitution discussions. If the design is drifting toward premium alloys for strength, a heat treated alloy steel may meet the strength need at lower material cost, if corrosion resistance and weight are not the primary drivers.
Stainless and aluminum alloys: treatable in some cases, complex in practice (limitations checklist)
Stainless steels and aluminum alloys can be heat treated in some cases, but the decision is less forgiving than with common carbon/alloy steels.
Limitations checklist (what tends to complicate CNC parts):
- Stainless steel heat treatment varies widely by stainless family. “Hardening stainless steel” is not one process; some grades respond well while others do not respond in the same way.
- Aluminum heat treatment depends strongly on alloy and temper. Some alloys are heat treatable, while pure aluminum is not.
- Distortion risk still applies, and thin CNC features can move even if the temperature is lower than steel hardening cycles.
- If the part is machined again after heat, surface condition matters. Some methods leave surfaces cleaner than others, which affects finishing and inspection.
For aluminum parts, buyers also ask about stress relief. The practical reason is that machining can introduce residual stress, and later thermal exposure can allow that stress to relax and change part shape. Even when “hardening” is not the goal, thermal steps can be used to manage stability, but the exact method must match the alloy and temper system being used.
Can aluminum CNC parts be heat treated?
Some aluminum alloys can be heat treated, but it depends on the alloy and the starting temper. Pure aluminum does not respond the same way. For CNC parts, treatability is only one piece; dimensional stability and the need for later machining often drive whether it is worth doing.
Process selection for localized needs: vacuum vs. selective hardening
Selecting the right heat treatment method for CNC parts means choosing between full-part and localized processes. Vacuum heat treatment and selective induction hardening each offer unique benefits for precision, distortion control, and case hardening.
Vacuum heat treating for CNC parts: why it’s chosen (distortion control, consistency, clean surface)
Vacuum heat treating is often chosen for CNC machined parts when the buyer cares about three practical outcomes:
- Distortion control: while vacuum does not eliminate movement, it is commonly selected when the goal is better dimensional control compared to more aggressive environments.
- Consistency: controlled atmosphere and cycle control can improve repeatability across lots.
- Clean surface: vacuum processing can reduce surface contamination and scaling, which can matter when parts must go back to a machine tool for finishing without extra cleaning steps.
This is less about “premium heat treating” and more about lowering downstream risk. If you are planning finish machining after heat, a clean surface helps both workholding and measurement.
Selective induction hardening: targeting gear teeth without impacting threads/tolerances
Induction hardening uses an electromagnetic field to heat a localized region quickly, followed by rapid cooling. The core idea for CNC parts is selective property change: harden the surface that wears, avoid changing the rest of the part.
This is common for features like gear teeth, where you want surface hardness for wear, but you do not want to risk pulling threads, bores, or alignment datums out of tolerance across the entire part.
Application diagram (conceptual):
| Part / Step | 説明 |
|---|---|
| Gear body / hub | Remains in tougher, machinable condition |
| Induction heating | Induction coil targets only the tooth zone |
| Gear teeth | Form a localized hardened layer |
Selective methods can also reduce the need for large post-heat stock removal on non-critical regions because you are not hardening everything.
Choosing full-part vs selective treatment: cost/precision trade-off matrix
Selective treatment is not always cheaper. Setup and validation can be non-trivial. Full-part hardening may still be the simplest path if the part can tolerate movement and if the whole cross-section must carry load.
| 決定要因 | Full-part hardening + temper | Selective induction hardening |
|---|---|---|
| Wear limited to one region | May be excessive | Often a good fit |
| Tight tolerances on other features | Higher risk of movement everywhere | Helps protect non-target features |
| Need through-hardness for structural load | Better fit | May not meet bulk strength need |
| Post-heat machining required | Often required on key datums | May be reduced outside hardened zone |
| Process validation effort | Known, standardized cycles | Can require careful targeting and checks |
What is induction hardening and when should you use it?
Induction hardening is a selective heat treatment that heats a targeted area using electromagnetic induction, then cools it to create a hardened surface. It is often used when only a working surface needs high wear resistance, such as gear teeth, while nearby threads or tight-tolerance fits should not be affected. It can reduce whole-part distortion risk compared with heating and quenching the full component.
Distortion, warping, and tolerance control (how to prevent scrap)
Distortion and warping are common risks of heat treatment for CNC parts, driven by residual stress, uneven cooling, and geometry. Proper fixturing, cooling media selection, and inspection help prevent scrap and maintain tolerance.
Root causes of distortion during heat treat: geometry, residual stress, uneven cooling (cause–effect table)
Distortion is not random. It usually comes from a few repeatable causes that interact:
| Root cause | What it looks like on parts | Why it happens |
|---|---|---|
| Asymmetric geometry (thin wall next to thick boss) | Bending, twisting, bowing | Different regions heat and cool at different rates |
| Residual stress from machining | Flatness changes, bore movement after heat | Stress relaxes when heated; part “finds” a new shape |
| Uneven cooling during quench | Out-of-round bores, angular shift | Thermal gradients create uneven contraction |
| Sharp transitions and corners | Cracks or local distortion | Stress concentration plus fast cooling |
The practical takeaway: if a part is already hard to hold flat during machining, it will often be hard to keep straight during quenching.
Fixturing and tight-tolerance furnaces: when they’re essential (checklist)
Fixturing and controlled furnaces become less optional as the part gets thinner, longer, or more tolerance-sensitive.
When fixturing and tighter furnace control tends to be essential:
- Long slender shafts where straightness is a functional requirement.
- Thin plates or brackets where flatness matters and pockets remove stiffness.
- Parts with critical coaxiality or true position between features that will be finished after heat.
- Loads that must be repeatable lot-to-lot (aerospace-style expectations, even if the application is not aerospace).
Even with good fixturing, you should assume some movement and plan machining allowances and inspection accordingly.
Cooling media trade-offs: water vs oil vs air (risk matrix; alloy-dependent uncertainty noted)
Quench medium selection is one of the biggest drivers of cracking and distortion risk. The choice is alloy-dependent, and the best option is not universal. The inputs here provide qualitative guidance rather than quantified cooling curves, so the table below is framed as risk trade-offs, not as performance promises.
| 備考 Cooling method | Relative cooling severity | Distortion/crack risk trend | 備考 |
|---|---|---|---|
| 水 | 最速 | Highest risk | Can raise cracking risk on some geometries |
| オイル | Slower than water | Lower than water (often) | Common compromise for many steels |
| 空気 | Slowest | Lowest of the three | Often used where lower stress is needed |
Because different alloys respond differently, this matrix should be treated as a starting point for discussion with the heat treater, not as a specification by itself.
Inspection plan after heat treatment: hardness checks + dimensional verification
If you do not verify hardness and dimensions after heat treatment, you do not know what you received. The inspection plan is part of feasibility because it drives cost and can expose issues early enough to rework.
ワークフロー図(概念図):
| ステップ | 説明 |
|---|---|
| Receive heat-treated parts | Receive parts after heat treatment |
| Visual check | Check for obvious warp, cracks, surface condition |
| Hardness verification | Verify hardness per drawing target |
| Dimensional verification | – Critical datums- Bores / fits- Flatness / straightness as needed |
| 決定 | – OK → proceed to finish machining / assembly- Not OK → evaluate rework (finish machine, straighten, or scrap) |
Hardness checks confirm the heat treatment result. Dimensional checks confirm whether your planned machining allowance and sequencing are sufficient. For CNC machined parts, both are needed because a part can be “hard enough” and still unusable if key features moved.
How to specify heat treatment on CNC drawings and POs (avoid ambiguity)
Clear specification of heat treatment for CNC parts on drawings and POs avoids disputes and scrap. It should include the heat treatment process, hardness targets, sequence notes, and details for selective or hardening stainless steel processes.
What to call out: process name, condition, hardness targets, and sequence notes (spec template)
Ambiguous heat treatment callouts are a common cause of disputes and scrap. A workable callout usually includes: the process, the final condition, a measurable target (hardness), and notes on sequencing if finishing is required after heat.
Specification template (edit to match your internal standard system):
- Heat treatment process: (Anneal / Normalize / Harden + Quench + Temper / Vacuum heat treat / Induction harden)
- Material and condition: (state alloy and starting condition if controlled)
- Hardness target: (state hardness requirement as a range or minimum/maximum per drawing)
- Sequence note: “Rough machine → heat treat → finish machine critical features” (if this is required)
- Localized treatment definition (if selective): identify surfaces/regions to be hardened and regions to be protected
Even if your organization uses detailed standards, adding a plain-language sequence note helps prevent the supplier from choosing a different order that changes distortion behavior.
Certification and supplier vetting: what to request and red flags (audit checklist)
For CNC parts, heat treatment quality is often supplier-dependent. Vetting is not only for regulated industries; it is also how you reduce lot-to-lot variation.
Audit checklist (what to request / confirm):
- Certification package that includes the actual cycle used and hardness results for the lot.
- Clear identification of material and lot traceability.
- Evidence that measuring equipment used for hardness checks is controlled and calibrated.
- A clear path for handling nonconforming results (reheat, retemper, scrap criteria).
Red flags:
- Hardness results missing, or reported without linking to the lot.
- Vague statements like “heat treated per standard” with no standard specified.
- No indication of how selective hardening boundaries are controlled (for induction cases).
Lot size and batching strategy: reducing variation across parts (control plan table)
Batching affects consistency. Mixed loads can heat and cool differently, and part placement can change results. A simple control plan helps when you need repeatable CNC finishing behavior.
| Control lever | What you control | Why it reduces variation |
|---|---|---|
| Lot definition | Keep like parts together | Reduces cycle differences from mixed mass/geometry |
| サンプリング計画 | Define how many hardness checks per lot | Detects drift early |
| Fixturing rules | Same orientation and supports | Reduces movement changes between loads |
| Post-heat routing | Same inspection order | Avoids missing movement before finishing |
How do you specify heat treatment for CNC parts?
Specify the process (for example, harden + quench + temper), the required final condition, and a measurable hardness target. If finishing after heat is required to manage distortion, add a clear sequence note so the supplier does not guess. For selective processes like induction hardening, define which surfaces must be hardened and which features must be protected.

Cost, lead time, and ROI: making the business case
The business case for heat treatment for CNC parts depends on cost, lead time, and ROI. Heat treatment adds a lot fee but can save money via material substitution, extended service life, and reduced scrap for CNC machined parts.
Typical pricing structure: lot fee $175–$300 and what drives total cost
Heat treatment cost is often quoted as a lot fee, with pricing influenced by part size, material, and special controls. A typical lot fee range given in the inputs is $175–$300. That number alone does not define your total cost, because secondary effects can dominate (scrap risk, rework machining, inspection time).
Cost driver breakdown (conceptual):
| コスト要素 | What drives it | Why CNC buyers feel it |
|---|---|---|
| Lot fee (given: $175–$300) | Batch setup and furnace time | Dominates small quantity orders |
| Added machining | Finish machining after heat | Often required to restore tolerances |
| スクラップと手戻りのリスク | Distortion, cracking, wrong hardness | Can outweigh the lot fee quickly |
| 検査 | Hardness + dimensional verification | Required to confirm acceptance |
| Logistics time | Queue time / batching | Affects schedule even if cycle time is short |
What is the cost of vacuum heat treatment? The inputs provide the lot-fee range ($175–$300) as a typical structure, but they do not provide a separate verified vacuum-specific price. In practice, vacuum is selected for distortion control and clean surface, so the cost decision should include the expected reduction in rework and cleaning steps, not only the furnace quote.
Material substitution ROI: 4340 vs titanium with $2–$5/lb savings
One of the clearest ROI arguments for heat treatment is material substitution. The inputs include an example comparison: using heat treated 4340 alloy steel in place of titanium can save $2–$5 per pound in material cost, while still reaching high strength targets (with the earlier tensile benchmark caveat).
A simple ROI calculator concept for early feasibility:
- Estimate part weight (lb).
- Multiply by $2–$5/lb potential savings (range, not a promise).
- Subtract added costs: heat treatment lot fee, added inspection, added finishing.
- Add risk allowance if distortion could drive scrap.
This style of estimate works best when the part is heavy enough that material cost is a major fraction of total cost.
Throughput impact: added processing time vs performance gains
Heat treatment adds schedule steps and usually inserts waiting time because it is batch-processed. That matters even when the furnace cycle itself is not long.
Gantt-style timeline (conceptual):
| Week | プロセスステップ |
|---|---|
| Week 1 | CNC rough machining |
| Week 2 | Heat treat queue + processing |
| Week 3 | Finish machining + inspection |
In one provided case study, the total program time was 2.5 weeks with 5 days attributed to heat treatment. Your numbers will vary, but the structure is common: heat treat is often not the longest step, yet it can be the step that sets the pace.
Reference types for validation: industry cost reports + academic property data
For a defensible business case, treat cost and properties as two separate validation tasks:
- Use credible cost inputs (quotes, internal history, and industry cost reports) to bound the lot fee, rework, and inspection effort.
- Use authoritative property data (handbooks and academic sources) to confirm that the selected alloy and heat treatment condition can meet the design targets.
Real-world case studies and practical takeaways
Real-world case studies show how heat treatment for CNC parts solves common challenges—from vacuum heat treating 4340 aerospace parts to induction hardening gear teeth, each demonstrates the value of the right heat treatment method.
Case study: Aerospace 4340 part + vacuum heat treat (2.5 weeks total; 5 days heat treat; cost savings)
Context: A high-strength aerospace part was initially pointed toward a premium alloy due to strength targets. What was done: The part was CNC machined from 4340 alloy steel, then vacuum heat treated. Outcome: The program met the strength requirement within a total of 2.5 weeks, with 5 days for the heat treatment step, and reported cost savings compared to titanium-based direction. Why it matters: This shows the practical path: use heat treatable steel plus a controlled process (vacuum) when surface condition and distortion control matter, and when weight/corrosion constraints do not force a premium alloy.
This is not proof that 4340 always replaces titanium. It is an example of a substitution pattern that can be feasible when the design drivers are primarily mechanical properties and cost.
Case study: Induction hardening gear teeth to extend life without tolerance loss
Context: Gears needed higher surface wear resistance at the teeth, but other features (such as threads or alignment-critical sections) could not tolerate whole-part movement or hardness changes. What was done: Selective induction hardening targeted the gear teeth after CNC machining. Outcome: The hardened teeth extended service life while avoiding changes to non-targeted tolerances. Why it matters: This is the classic case hardening vs tempering decision in practice. If you only need a hard “case” (surface zone), selective hardening can avoid the penalty of changing the whole part and then chasing tolerances everywhere.
This is also a good example of why “case hardening for steel parts” is often a geometry management tool, not only a wear tool.
Case study: Rough machine → quench → temper sequence to balance wear resistance and shock absorption
Context: Steel components became too brittle after initial hardening, and distortion risk was creating scrap when final features were machined before heat treatment. What was done: The process was set as rough machining first, followed by quench hardening (with water/oil as appropriate), then tempering to tune toughness. Final machining was reserved for after heat treatment. Outcome: Parts achieved wear resistance with improved ability to absorb shock loads, while reducing scrap tied to post-heat movement of finished surfaces. Why it matters: This shows why tempering is not a minor “cleanup” step. It is the step that often decides whether a hardened CNC part survives real loads.
Final checklist: choosing heat treatment for cnc parts (one-page downloadable decision framework)
Use this as a one-page internal decision framework when you are deciding whether heat treatment for CNC machined parts is feasible and how to control risk:
Function and failure mode
- Is the dominant risk wear, yield/overload, fatigue, or impact brittleness?
- Do you need bulk strength, surface hardness, or both?
Material suitability
- Is the chosen alloy steel designed to respond to anneal/normalize/harden/temper?
- If stainless or aluminum: is the specific alloy/temper heat treatable, and is the goal hardness, stress relief, or stability?
Process selection
- Full-part harden + quench + temper vs selective induction hardening: which matches the failure mode?
- Is vacuum heat treatment needed for surface condition and consistency?
Workflow timing
- Can you rough machine, then heat treat, then finish machine critical features?
- Are datums and stock allowance planned so distortion can be corrected?
Distortion control
- Does geometry have thin-to-thick transitions, long slender sections, or large pockets?
- Is fixturing needed, and is the quench medium risk acceptable?
Specification and inspection
- Are process, condition, hardness targets, and sequence notes clearly defined on the drawing/PO?
- Is the post-heat inspection plan defined (hardness + dimensions) before parts go to final finishing?
Business case
- Does the added lot fee (typical structure: $175–$300) plus inspection and finishing make sense versus performance gain?
- If considering substitution (example: 4340 vs titanium), does the $2–$5/lb material delta justify heat treat and risk controls?
よくあるご質問
When it comes to CNC machining, the appropriate heat treatment sequence is often rough machining before heat treat and finish machining after heat treat, as this method helps manage distortion and improve cnc-machined parts without excessive difficulty. Heat treatment helps balance machinability and performance, and different heat treatments suit different part structures. Heat treating before machining can reduce distortion uncertainty but makes the machining process harder, so the best choice depends on part geometry, tolerance sensitivity, and whether post-heat finishing is planned. Heat treatment matters greatly for final quality and stability.
Heat treatment may cause part warping, which typically comes from residual stress within the metal, uneven section thickness, and uneven cooling during quenching. Planning the workflow as rough machine → heat treat → finish machine and using proper fixturing and inspection can greatly lower scrap risk. Machined metal is sensitive to rapid heating and cooling, so controlling the process ensures parts can handle dimensional changes safely.
Case hardening is a primary heat treatment that makes the surface region of steel parts hard while keeping the core tougher, and it often involves heating the material to modify the metal matrix locally. Heat treatment transforms cnc components by strengthening working surfaces without losing toughness. For cnc-machined metal parts, selective induction hardening is widely used to make metal wear-resistant on critical surfaces. It is often chosen to protect threads and tight-tolerance features from full-part hardness change and distortion, especially for tool steel parts.
To maintain tolerances after hardening, you should assume some dimensional movement and plan ahead by leaving extra stock on critical features, performing finish machining after heat treatment, and verifying dimensions before final assembly. Treatment is typically supported by fixturing to control distortion for thin, long, or asymmetric complex parts. Combining dimensional checks with hardness verification ensures you get the best results from the entire process. Remember that heat treatment alters structure, so planning prevents scrap.
Stress relief is needed for aluminum because machining can leave strong residual stress in aluminum parts, and later thermal exposure may allow this stress to relax and change the part shape. Heating the material to a controlled temperature and then slowly cooling helps stabilize internal structure. Cnc machined parts need stability to avoid distortion, so this step is essential for parts used in precision assemblies.
Vacuum heat treatment is a group of heat treatment processes that delivers clean surfaces and tight distortion control, and its cost usually follows a standard lot-based pricing structure similar to common heat treatments. Heat treatment plays a key role in reliability for components parts like gears, shafts, and mold inserts. This heat treatment offers excellent consistency for high-precision components, and while it may add cost, it reduce