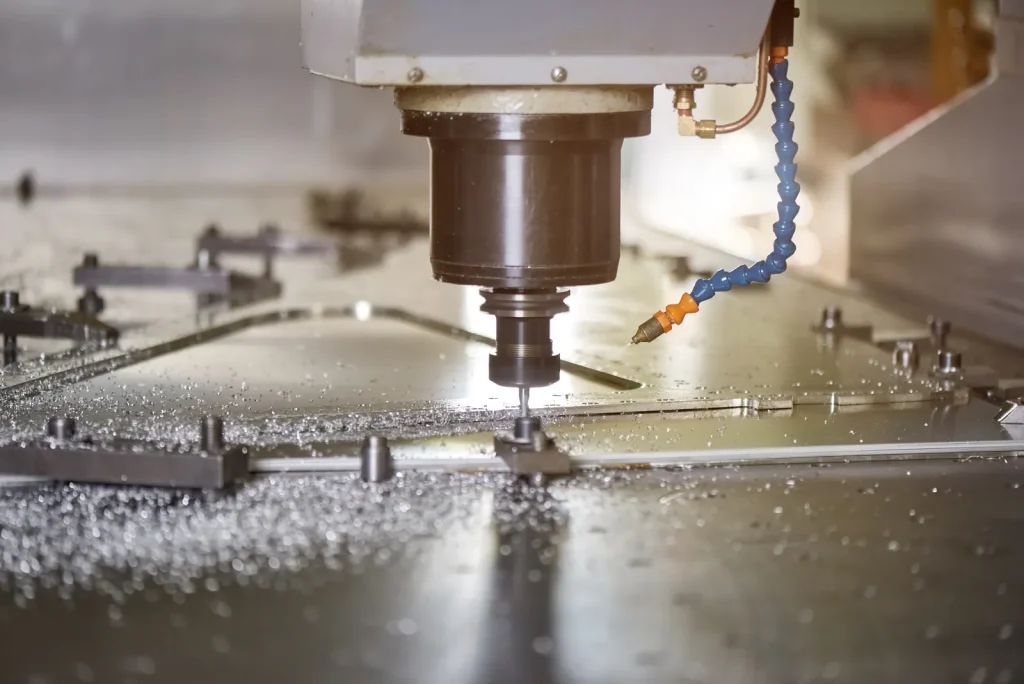
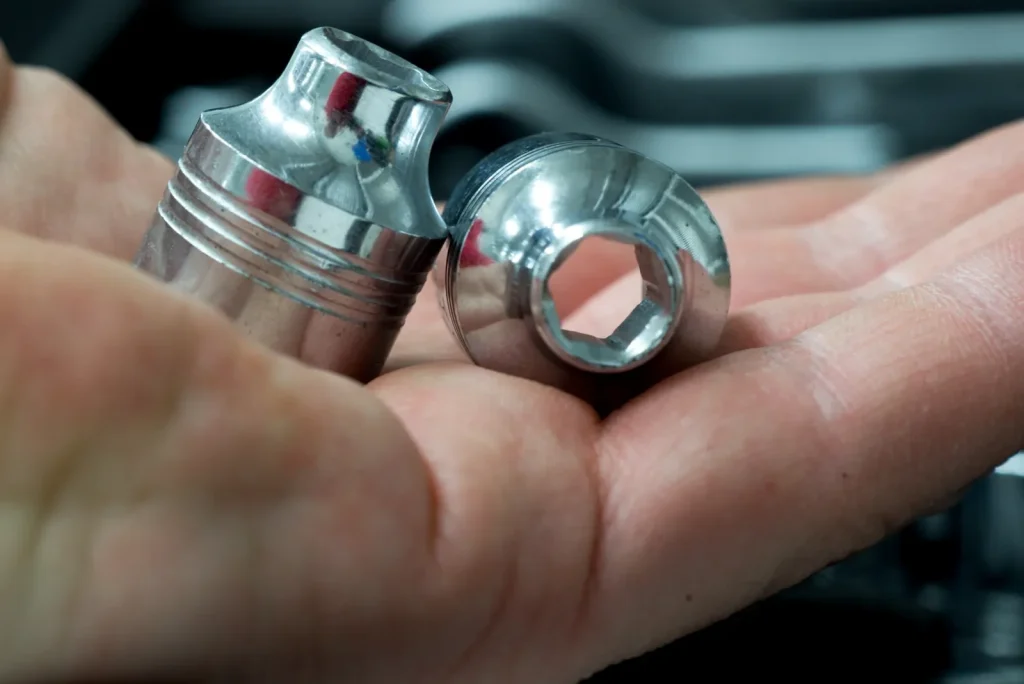
Design for machining sits in the gap between “a CAD model that looks right” and “a part for cnc machining a CNC machine can produce repeatably.” If that gap is large, you pay for it in extra setups, long cycle times, tool breakage risk, and inspection effort. If the gap is small, you usually see faster quoting, fewer design loops, and more stable quality in prototypes and production machine parts.
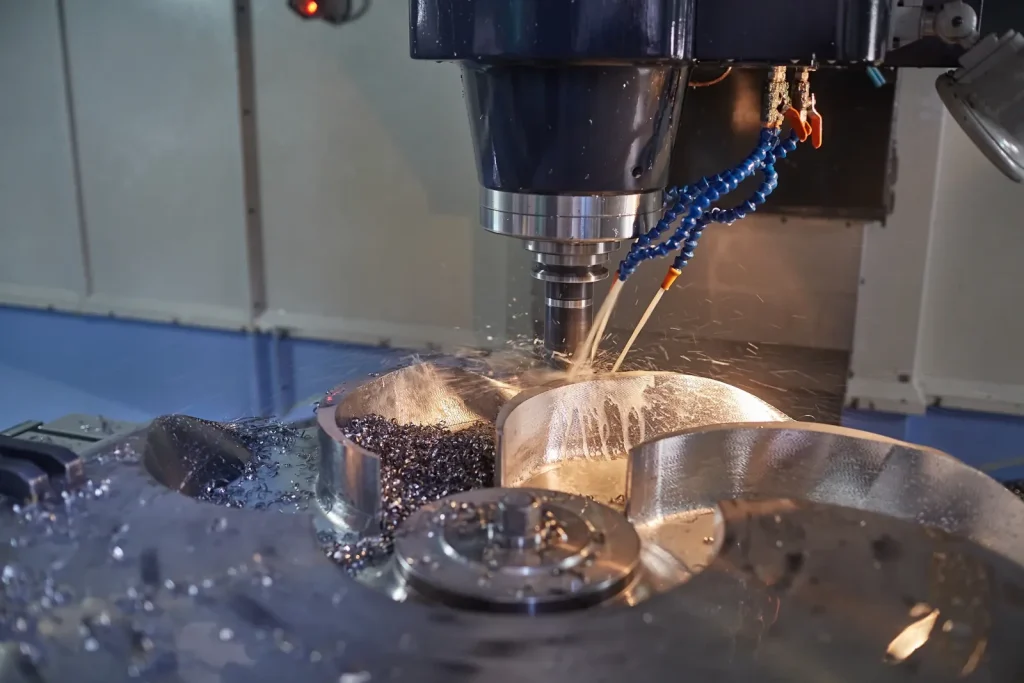
Many machining problems are not “hard” in a theoretical way. They are hard because a cnc cutting tools must physically reach a surface, remove heat and chips, and do it without bending or vibrating. The design controls how easy that is.
What “design for machining” means in practice (DFM + CNC constraints)
In practice, design for machining is design for manufacturability (DFM) with CNC constraints in mind. It means you shape geometry so that standard cnc cutting tools can reach it, fixtures can hold it, and the cnc part can be measured without heroic methods.
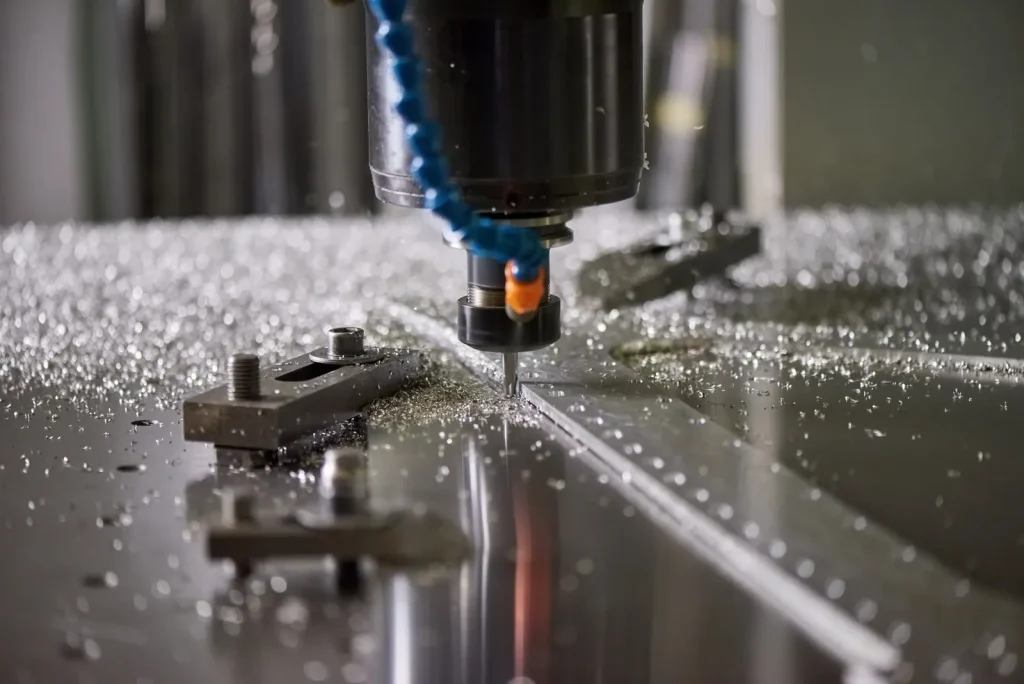
cnc machining is a subtractive manufacturing process. Material is removed by tools that have real diameters, flute lengths, corner radii, and limits on stiffness. CAM software can generate many toolpaths, but it cannot change tool physics. When a CAD model fights tool physics, you see the same symptoms:
- extra setups because features face too many directions
- long-reach tools that chatter and wear quickly
- tiny internal corners that force small tools and slow feeds
- deep pockets that trap chips and heat
- tight tolerances on non-functional geometry that force extra passes and inspection
A useful way to think about it is this: the CAD model defines the surfaces you want, but cnc process is governed by the volumes a tool can sweep while staying stable.
Where cost really comes from: setups, tool reach, cycle time, scrap (chart: cost drivers)
Machining cost is often explained as “machine time + material.” Engineers usually find that too simple. Two parts with the same material volume can differ a lot in cost because the expensive part drives more setups, more tool changes, and more risk.
Below is a practical cost-driver chart. It is not a price model. It is a map of where engineering choices tend to create time and variability.
Chart: common CNC machining cost drivers (qualitative)
| Factor de coste | What in the design causes it | What it turns into on the shop floor |
|---|---|---|
| Recuento de configuraciones | Features on many faces; hard-to-fixture shapes | More re-clamping, more datums to manage, more alignment error risk |
| Tool reach & slender tools | Deep cavities, tall walls, unreachable corners | Tool breakage risk, chatter, slow feeds, extra finishing passes |
| Duración del ciclo | Small tools, tiny stepovers, high finish specs everywhere | Long roughing/finishing, more tool changes |
| Scrap/ rework risk | Tight tolerances across multiple setups; thin features | Parts drifting out of spec after re-clamp; deformation during machining |
| Carga de la inspección | Very tight tolerance/finish callouts | More measurements, more fixturing for metrology, slower release |
When design for CNC machining goes wrong, it is often because the cost drivers stack. For example: a deep pocket (reach) with sharp internal corners (tiny tool) placed on a side face (extra setup) with a tight positional tolerance (inspection + scrap risk).
Evidence-backed performance targets to design around (±2–10 μm, Ra 0.2–1.6 μm, typical speeds/feeds) (reference: industry/technical reports)
Evidence-backed performance targets to design around (positional & surface finish, process/context-dependent)
Many teams start DfM discussions with “Can you hold ±X?” A better starting point is: “What targets are typical for my scenario, and what design choices make them realistic?”
For most RFQs, state functional tolerances first; treat micron-level positional tolerances as a specialized precision requirement that often needs single-setup control + temperature control + defined inspection method.
Typical fresado cnc default expectation (shop-dependent):Positional accuracy for standard cnc machined parts (Al/steel, medium size) – ±10–50 μm; Surface finish – Ra 1.6–6.3 μm.
Precision-case examples (explicit process controls required):Positional accuracy – ±2–10 μm; Surface finish – Ra 0.2–1.6 μm.
These precision ranges depend on machine condition, tool selection, single-setup machining, and thermal control — they are not universal defaults, and the cited numeric ranges are single-source/unverified in industry inputs.
Why does my CAD design keep getting redesigned for machinability?
Because the first CAD model is usually built around function and packaging, not around tool access and setups. CAM programming then exposes where the tool cannot reach, where a standard tool will not fit, or where a second (or third) setup is needed just to hit one feature direction.
A common pattern is that the redesign is not changing the function. It is changing how surfaces are formed: adding fillets so bigger tools can cut, changing hole depth for cnc so tools stay stiff, and regrouping features so they can be machined from fewer orientations.
Geometry rules that prevent slow machining and tool failures
Geometry is where design for machining pays off fastest, because small shape changes can unlock larger tools and simpler toolpaths. The theme is to avoid shapes that force long, thin tools or force the programmer into many rest-machining steps.
Holes & threads manufacturability constraints
Hole and thread design directly impacts tool breakage risk and cycle time — below are typical practices for cnc rule-of-thumb guidelines (shop-dependent, no guarantees):
- Drill depth-to-diameter ratio:Standard twist drill ≤3×D; Deep-hole drill (special cycle) ≤10×D (chip control required for ratios >5×D).
- Minimum practical drill diameters:Aluminum ≥0.5 mm, Steel ≥0.8 mm, Titanium ≥1.0 mm. For diameters smaller than these, switch to EDM/laser or redesign the feature (e.g., use a slot instead of a small hole).
- Thread design guidance:Specify thread class/spec (e.g., M6x1 6H) and functional intent (load-bearing vs cosmetic). For small-diameter threads (≤M8), limit thread depth to ≤3×D — deep small threads increase tap breakage risk. If full thread depth is not required, explicitly state partial thread tolerance.
- Spotface/counterbore access:Ensure spotface/counterbore depth does not exceed the tool’s effective flute length; avoid narrow access to spotface features that force long-reach tools. Key tip:For deep tapped holes, consider a through-hole + nut/insert instead of a blind tapped hole to reduce machining risk.
Minimum wall thickness & minimum feature size
Thin walls and micro-features are primary machining risk items due to deflection during cutting and fixturing. Below are typical minimum values (shop-dependent, adjust for part size/process):
| Material Family | Minimum Wall Thickness | Minimum Web Thickness |
|---|---|---|
| Aluminio | ≥1.0 mm | ≥1.5 mm |
| Acero | ≥1.5 mm | ≥2.0 mm |
| Titanio | ≥2.0 mm | ≥2.5 mm |
| Thin floors under pockets:Avoid floor thickness < 2× the minimum wall thickness for the same material; if required, leave 0.2–0.5 mm support stock for final finishing and remove via secondary operations. | ||
| Flag all thin features in RFQs and confirm process feasibility with your supplier — consider adding sacrificial ribs/tabs to improve fixturing stability. |
Internal corners & fillets: larger radii, standard tooling alignment, better finishes (diagram: tool radius vs corner fillet)
Internal corners are a classic CNC design problem. A milling cutter is round. It cannot make a sharp inside corner without leaving a radius. If the CAD model demands a near-sharp corner, the only option is a very small tool, and that tool will be less stiff and slower.
Internal corner radius tips that tend to help:
- Use larger fillets where function allows.
- Match fillets to common cutter radii so the programmer can pick standard tools.
- Remember that a larger fillet can also reduce stress concentration in the finished part, which often aligns with mechanical design intent.
Diagram: tool radius vs. corner fillet (conceptual)
In the top view of the pocket corner:
A) If the fillet is smaller than the tool radius, the tool cannot fit:
- The corner has a sharp angle (the fillet is too tight), which doesn’t allow the tool to pass through properly.
B) If the fillet is equal to or greater than the tool radius, the tool fits, and fewer passes are needed:
- The corner has a more rounded angle, allowing the tool to fit comfortably and complete the job with fewer passes.
If you take one action first to improve a CNC machining design, increasing non-critical internal fillets is often the cleanest. It reduces programming time, machining time, and tool wear risk in one move.
Pockets/cavities: depth limits (≤3× tool diameter; ≤4× width) + fillet guidance (≥1/3 cavity depth) (table: pocket rules + source notes) (reference: technical guides/standards)
Technical guides commonly recommend rules like:
- Cavity depth ≤ 3× tool diameter to limit deflection
- Pocket depth ≤ 4× pocket width as a practical ceiling in many designs
- Internal fillet in cavities:Use the largest internal radius that does not interfere with function; prefer radii that allow standard end mills. If depth is large, prioritize a radius that allows a larger tool (and reduces rest-machining).
| Tipo de función | Rule of thumb | Why it helps | Source notes |
|---|---|---|---|
| Pocket/cavity depth vs tool diameter | Depth ≤ 3× tool diameter | Limits tool bending and chatter | Common DfM heuristic; varies by tool and material |
| Pocket depth vs pocket width | Depth ≤ 4× width | Avoids “slot-like” deep milling with poor chip flow | Common DfM heuristic; varies by tool and material |
| Fillet size in deep cavities | Largest functional radius (standard end mill fit) | Lets you use larger tools or more stable paths | Optional DfM heuristic; use function as final check |
Tool access & feature orientation: align to principal directions (X/Y/Z) to reduce reach and vibration
Tool access is less about whether a surface exists in CAD, and more about whether a tool can approach it in a stable direction.
A simple DfM rule that holds up well: align features to principal machine axes (X/Y/Z) when possible. When features are skewed, angled, or tucked behind walls, the programmer may need longer tools or a tilted setup. Both can reduce stiffness.
Watch for designs where a deep feature also requires side access. That combination pushes tool stick-out and often forces a smaller diameter tool than you expected. The result is slower machining time and a higher chance of chatter marks.
If you are choosing between two feature orientations with the same function, pick the one that:
- allows the shortest tool stick-out
- avoids machining “down inside” narrow channels
- keeps critical surfaces facing the same setup direction
Tight corners are killing my budget—what should I change first?
Change non-critical internal corner radii first. Tight corners force small tools, and small tools drive long cycle time because they need more passes and lower feeds. If you open the radius so a larger standard tool fits, you often reduce toolpath complexity and improve finish at the same time.
If the corner is function-critical (for example, it locates a mating square feature), consider changing the assembly concept rather than forcing machining to create a near-sharp internal corner. In many CNC-milled parts, “square-in-square” fits are better handled with reliefs, inserts, or redesigned interfaces, since the cutter must leave a radius.
Setup strategy: minimize rework, variability, and lead time
Setup strategy is where many “feasible” parts turn into expensive parts. Every setup is a re-definition of datums in the physical world. More setups increase variation and increase the chance that tolerance stack-ups become hard to control.
Group features by 3 principal axes; target ≤3–4 setups (checklist: setup-count reducer)
A common target in DfM guidance is to group features so they can be reached from three principal directions and to keep setup count to 3–4 setups or fewer when possible. This is not a strict limit. It is a practical point where variability and scheduling tend to climb.
Checklist: setup-count reducer (use during CAD layout)
| Consulte | En qué fijarse | What to change if it fails |
|---|---|---|
| Feature direction count | Do features point in many angles? | Rotate or redesign features to align to X/Y/Z where possible |
| “One feature, one face” | Is there a single hole/slot on an odd face? | Move it, mirror it, or redesign the interface so it can be machined in an existing setup |
| Datum consistency | Do critical features reference different faces? | Choose one primary datum scheme and keep critical geometry in that scheme |
| Workholding stability | Are there thin walls or small pads for clamping? | Add machinable tabs, increase stock, or redesign to allow stable fixturing |
| Finish-sensitive surfaces | Are high-finish areas spread across many orientations? | Concentrate them to reduce handling and re-clamp effects |
This is also where turning vs milling matters. Parts designed for CNC turning benefit from symmetry around a rotation axis. When you add off-axis flats, holes, or threads, you may move from simple turning into live tooling or multi-axis work. That can still be right, but it should be a deliberate choice.
When 5-axis wins: complex cavities/threads in one setup vs 3-axis simplicity trade-off (decision matrix table)
Multi-axis machining can reduce setups because the tool can approach surfaces from many angles in one clamping. Reports and case examples also show 4–5 axis machining used for complex internal cavities or threads in a single setup.
5-axis cnc machining can reduce setups because the tool can approach surfaces from many angles in one clamping, making it ideal for complex parts with deep cavities or angled features. At the same time, 3-axis is often preferred for simpler cnc machined parts due to easier planning.
Decision matrix: 3-axis vs 5-axis from a DfM viewpoint
| Pregunta | If “yes,” it pushes toward 5-axis | If “no,” 3-axis may be enough |
|---|---|---|
| Many feature directions beyond X/Y/Z? | Fewer setups by tilting tool/part | Keep features aligned and use 2–3 setups |
| Deep cavities with side features? | Access without long tools | Redesign pockets to reduce depth/reach |
| Tight positional relationships across faces? | One setup can reduce re-clamp error | Accept more tolerance budget or redesign datum scheme |
| Complex threads/features needing angled access? | Single-setup machining may be feasible | Use standard thread orientations where possible |
The main point is not that 5-axis is “better.” The point is that it can remove setup-driven risk for certain geometries, while adding its own planning and verification needs.
Case study: Multi-setup reduction via feature regrouping or 5-axis (before/after diagram)
Context: A prismatic part had features scattered across many faces. It required more than four repositions. Each reposition risked small shifts in location, and inspection had to follow each critical face.
Change: The geometry was regrouped so that most critical features faced three principal directions. In another variant, the same part was re-planned for a single multi-axis setup so angled surfaces could be reached without re-clamping.
Outcome: Fewer setups reduced variability and simplified the control plan. The main savings came from fewer re-clamps and less alignment work, not from faster cutting.
Before/after diagram (conceptual)
Before:
The part has many faces that require separate setups. For example, there are faces A, B, C, D (angled), and E (back), which results in more than 5 setups.
After:
The features are regrouped into principal directions (Top, Side, and Bottom), which reduces the setups to 3. Alternatively, with multi-axis machining, all critical geometry can be accessed in one clamp, resulting in just 1 setup.
How many CNC setups is too many?
A common DfM target is 3–4 setups for prismatic machine parts. Beyond that, you usually see more variability from re-clamping. If more setups are needed, regroup features, change datums, or use 5-axis cnc from reliable cnc machining services.
Tolerances & surface finish: specifying what you need (not what hurts)
Tolerance and finish are functional requirements, but they are also manufacturing constraints. When they are tighter than needed, they force slower passes, more tool wear, and more inspection. When they are not tight enough, assemblies may not work.
The goal in design for machining is not “loose tolerances.” It is controlled tolerances, applied only where they control fit, performance, or safety.
Drawing control & GD&T guidance (ASME Y14.5)
ASME Y14.5 Reference:This section provides conceptual GD&T guidance aligned with ASME Y14.5 principles — it is not a compliance certification. For formal drawing control, consult the full ASME Y14.5 standard and your manufacturing supplier.
Defining clear geometric controls and datums is critical to reducing machining variability — your datum scheme must align with how the part will be fixtured and measured. Below is a mapping of common feature types to preferred GD&T controls:
| Tipo de función | Preferred GD&T Control | Key Design Note |
|---|---|---|
| Posición del patrón de agujeros | Position (MMC/LMC where applicable) | Use a common datum frame for the entire pattern; machine in a single setup |
| Sealing faces | Flatness + Surface Profile | Avoid tight flatness across large thin surfaces (deflection risk) |
| Turned critical diameters | Runout (total) + Size | Align datum to the part’s rotation axis (CNC turning) |
| Slot location | Position + Parallelism | Reference slot to primary part datums (not secondary features) |
| Datum design rule:If the feature relationship must survive re-clamping, consider controlling it in one setup or allocate more tolerance budget to account for re-clamp alignment error. |
Practical tolerance bands (positional ±2–10 μm) and when they’re realistic (reference: metrology/standards bodies)
Technical reports often cite ±2–10 μm positional capability ranges for precision machining, depending on part size, features, and inspection. These numbers can be realistic in controlled cases, but they are not “free.”
Tighter positional tolerances are more realistic when:
- critical features are machined in the same setup
- tool reach is short and tool deflection is low
- thermal effects are controlled (especially on long cycle times)
- inspection method and datum scheme match the design intent
They become harder when the part needs many setups, when thin walls deflect under cutting forces, or when deep features force slender tools.
If you are using GD&T, be strict about datum selection and feature control frames. If you are not, you can still apply the same logic: tie tolerances to how the part will be located and measured.
Surface finish targets (Ra 0.2–1.6 μm): cost/throughput implications (chart: finish vs time/cost)
Surface finish is often specified without a plan for how it will be produced. A common finish range cited in machining capability summaries is Ra 0.2–1.6 μm. Within that band, the process can shift from standard finishing passes to slower, more sensitive toolpaths.
Chart: finish target vs machining time and cost (qualitative)
| Surface finish target (Ra) | Typical machining implication | Risk if applied broadly |
|---|---|---|
| ~1.6 μm | Often reachable with standard finishing on many materials | Low, if feature access is good |
| ~0.8 μm | May need smaller stepovers, sharper tools, or better rigidity | Medium, cycle time can rise |
| ~0.2–0.4 μm | Can require very stable setups and careful toolpaths | High, time and inspection effort can rise fast |
A practical DfM move is to specify fine finish only on functional areas (seals, bearing fits, optical or flow-critical zones). Leave the rest at a finish that matches the machining process.
Over-tolerancing risks: tool wear, extra passes, inspection burden (trade-off framework)
Over-tolerancing shows up as “death by a thousand constraints.” Each tight callout adds at least one of these:
- extra finishing passes at low material removal rates
- tool wear sensitivity that shifts dimensions over time
- more frequent tool changes
- more inspection steps and longer inspection time
- tighter setup control that may require dedicated fixtures
Trade-off framework (use before releasing drawings)
Ask three questions for each tight tolerance or fine finish:
- Does this control a fit, safety function, or performance metric?
- Can the assembly tolerate a wider band if another feature is controlled instead (datum change)?
- Will this feature be machined in the same setup as its mating references?
If you cannot answer these clearly, the tolerance may be doing administrative work instead of engineering work.
What tolerances should I specify for CNC machining?
Start with what the part must do in the assembly. Specify tight tolerances only on the features that control fit, motion, sealing, or alignment. Capability ranges like ±2–10 μm positional are often discussed for precision work, but they are most realistic when setups are minimized and tool reach is short. If many faces must align tightly, consider redesigning the datum scheme or reducing setup count before tightening tolerances.
Material-driven design decisions (Al, steel, titanium & hard alloys)
Material choice is a critical DfM decision because it directly influences cutting forces, heat dissipation, chip formation, and tool wear. The same geometry can be easily machined in aluminum, manageable in steel, and high-risk in titanium if it forces long tool engagement and traps heat. Understanding design and material relationships is essential to create parts that balance performance and manufacturability.
Titanium/Inconel heat & chip control: design levers (radii ≥3 mm; coolant strategy) (diagram: heat/tool stress drivers)
Hard-to-machine alloys such as titanium and high-temperature alloys are often limited by heat buildup and tool stress. Industry case examples highlight simple design practices that keep tool load stable:
- Larger internal radii (≥ 3 mm) where possible
- Coolant strategy planning early (including high-pressure coolant cited at ≥ 70 bar in one reported example)
- Avoiding deep, narrow cavities that trap heat and chips
Diagram: heat and tool stress drivers (conceptual
Higher tool stress and heat are caused by factors like a deep, narrow pocket, small corner radii, long tool stick-out, and poor chip evacuation.
To improve the situation, the following design adjustments can be made:
- Increase corner radii (≥3 mm where possible)
- Improve access to coolant and chip flow
- Reduce extreme depth-to-width ratios
These adjustments are not just about speed—they determine whether tools can maintain size and surface finish without constant intervention, directly supporting good design for cnc-machined parts.
Pick machinable alloys and recyclable options where possible (table: design considerations by alloy family) (reference: industry/materials reports)
Choosing a machinable alloy is one of the most effective ways to improve your cnc efficiency and reduce risk. When functional requirements permit, selecting a more machinable grade lowers tool wear sensitivity and simplifies finishing operations. This is a key point in any comprehensive guide to design parts for cnc machining.
Separately, some sustainability reports and trend summaries claim that recycled materials can reduce CO₂ by 30–40% (single-source, not independently verified in the provided inputs). If sustainability targets matter in your program, material choice is one of the few levers you can set at design time.
Table: design considerations by alloy family (DfM focus)
| Familia de aleaciones | What tends to drive machining risk | Design considerations that help |
|---|---|---|
| Aluminio | Can allow fast cutting; thin walls may deflect | Keep walls supported during machining; avoid unnecessary micro-features |
| Acero | Higher cutting forces than aluminum | Increase radii to allow stiffer tools; avoid deep narrow pockets |
| Titanium & hard alloys | Heat, tool wear, chip control | Larger radii (example guidance: ≥3 mm), improve tool access, plan for coolant and chip evacuation |
This table connects material selection to geometry choices that impact tool rigidity and heat management, forming the foundation of part design for manufacturability.
Surface integrity & tool rigidity: why larger radii enable more rigid tools and better finishes
Surface integrity refers to the final surface condition after machining, including roughness and damage from heat or tearing. Forcing small tools due to tiny radii reduces rigidity, increasing vibration that harms finish and dimensional control. This is why larger radii appear repeatedly in cnc design guidelines and cnc machining guide resources.
A radius that accommodates larger tools improves finish with fewer passes and reduces the risk of tool marks that would increase machining time. This simple change is a cornerstone of best practices for cnc machining.
Sustainability signals tied to material choice (recycled materials CO₂ reduction ranges noted; validate via official/industry sources) (reference: government/industry sustainability reports)
If you track sustainability, treat the numeric claims in trend reports as a starting hypothesis, not as a final metric. Inputs provided include claims such as:
- recycled materials can reduce CO₂ by ~30–40%
- energy-efficient machines can save ~20% power
- MQL/dry machining can reduce coolant use by ~90%
These are single-source figures in the provided inputs and may be optimistic in some settings. Still, they point to design-relevant actions: reduce material waste by designing simpler machining volumes, pick recyclable options when function allows, and design features that can be machined with less coolant reliance.
Sustainability & Digitalization Numeric References:All cited performance ranges for sustainability (e.g., material/energy/coolant reduction) and digitalization adoption are from single-source industry trend summaries and have not been independently verified. Always request baseline vs revised process data from your manufacturing supplier to validate feasibility for your specific part design. MQL/dry machining, recycled material use, and digital twin simulation may not be feasible for deep narrow pockets or complex micro-features.
CAD-to-CAM workflow that reduces iteration
Many redesign cycles happen because the CAD package hides manufacturing intent. A machinist or programmer then has to guess: which faces are critical, what finish matters, what datum scheme you assumed, and even what material is intended.
Design for machining includes improving the information flow, not just the geometry.

CAD deliverables that speed quoting and programming (STEP/metadata expectations; tolerance/finish callouts) (checklist: CAD handoff)
A clean CAD handoff minimizes ambiguity and speeds up the cnc machining process. For parts for the cnc, neutral 3D file formats are essential for reliable geometry exchange.
Checklist: CAD handoff for CNC machining (DfM-ready)
| Artículo | Cómo es “bueno | What goes wrong if missing |
|---|---|---|
| 3D model format | STEP provided for solid geometry exchange | Missing faces, broken imports, extra cleanup time |
| Material callout | Material clearly named in notes/metadata | Wrong tooling assumptions, wrong cycle time estimate |
| Tolerance notes | Critical tolerances identified; datum intent clear | Over-quoting risk or late redesign to meet tolerance |
| Acabado superficial | Finish targets limited to functional areas | Unplanned extra finishing or blanket slow machining |
| Feature intent notes | Threads, sealing faces, bearing fits labeled | Programmer guesses intent and may choose wrong process |
STEP vs IGES
Within many workflows, STEP is preferred for solid models because it tends to preserve solid geometry better for CAM. IGES is often used for surfaces, but can increase ambiguity for solid machining. The key is consistency: send one primary geometry file and keep the drawing callouts aligned to that model.
Rich metadata for AI-assisted CAM (material, tolerances, finishes) to generate efficient toolpaths (diagram: CAD→CAM data flow) (reference: industry/technical reports)
Inputs provided describe a trend toward AI-assisted CAM and richer CAD metadata. The engineering point is not the “AI” label. It is that toolpath efficiency depends on correct constraints.
If the CAM system knows the material, tolerance class, and finish targets per face, it can bias tool selection and toolpath type earlier. If it does not, it may default to conservative paths and leave time on the table.
Diagram: CAD → CAM data flow (conceptual)
The process begins with the CAD solid (STEP file), which includes:
- Face tags for finish targets
- Feature tags for critical areas like threads and holes
- Part metadata such as material and tolerance class
This leads to the CAM strategy selection, which involves:
- Choosing appropriate tool diameters
- Deciding the allocation between roughing and finishing operations
- Determining stepovers based on surface finish (Ra) targets
Next, the simulation and verification phase ensures the strategy works as planned.
Finally, this culminates in the CNC program and setup plan for production.
Even without automation, this is how humans work. They infer missing metadata by asking questions. Rich metadata just reduces guessing.
Digital twins/simulation for early DFM collaboration (adoption benchmarks noted; validate) (reference: academic/industry reports)
Provided inputs include adoption benchmarks claimed for 2025: digital twins at ~40%, IoT connectivity at ~60%, and cloud CAM at ~55% (single-source, not independently verified here). Regardless of the exact percentages, simulation and digital verification matter for a DfM reason: they expose issues early.
For machining, simulation can help spot:
- tool reaches problems and collisions
- areas where long tools will be needed
- features that require extra setups
- tool engagement patterns that could cause chatter
This is most valuable when used early, while geometry is still flexible.
What file format and notes should I send for CNC machining (STEP vs IGES)?
Send a solid-model format that preserves watertight geometry, which is often STEP in CNC machining workflows. Include notes that remove ambiguity: material, critical tolerances, and which faces need specific surface finish. If threads are present, label thread type and which features are functional versus cosmetic. If you must send IGES, confirm whether the recipient expects surfaces or solids, since IGES can increase translation cleanup.
Advanced capabilities: multi-axis, screw machining, and hybrid manufacturing
Advanced machining methods expand cnc machining capabilities, but they require updated design guidelines. Understanding types of cnc machining helps you select the right process for your part.
4–5 axis machining for complex geometries (internal cavities/threads) in a single setup (pros/cons table)
Multi-axis machining is often used to reduce setups and access hard-to-reach geometry. Inputs provided highlight 4–5 axis use for complex internal cavities and threads in a single setup.
Pros/cons table: multi-axis machining from a DfM lens
| Aspecto | Potential benefit | Contrapartidas que hay que prever |
|---|---|---|
| Recuento de configuraciones | Fewer re-clamps, better positional consistency | More complex programming and verification |
| Tool reach | Better approach angles, shorter tools | Fixturing and collision checking become critical |
| Acceso a las funciones | Threads/cavities on angled faces possible | Inspection access may still be challenging |
| Part design freedom | More orientations possible | Still limited by tool diameter and chip evacuation |
If your part only needs prismatic milling, multi-axis may add complexity without benefit. If the part needs many angled features that must relate tightly, it can be a good fit.
Case study: Complex screw threads/fasteners via 4–5 axis CNC screw machining (single-setup outcome)
Context: Precision fasteners needed intricate thread and head geometry. Traditional approaches forced compromises or required multiple operations.
Change: A 4–5 axis screw machining approach was used so geometry could be produced in a single setup.
Outcome: The single-setup path made it feasible to hold complex geometry relationships without repeated re-clamping. Production time was reduced compared with multi-operation routing, and the design no longer had to be simplified to match older tooling limits.
The DfM lesson is that threading design rules are not only about thread callouts. They are also about how many orientations and operations the thread features force. If threads sit on awkward faces, you may be designing in extra setups.
Hybrid additive + CNC: near-net shaping then precision finishing for internals (±10–20 μm tolerance claim noted; validate) (reference: academic/industry reports)
Hybrid manufacturing combines additive near-net shaping with CNC finishing. In the provided inputs, hybrid additive + CNC is reported to achieve ±10–20 μm tolerances for complex internals such as lattices (single-source claim, not independently verified here).
From a design-for-machining viewpoint, hybrid becomes interesting when:
- internal channels or lattices are needed and cannot be cut with tools
- outer datums and mating faces still need machined accuracy and finish
- Weight or material waste matters
The DfM risk is that hybrid does not remove machining constraints. It moves them. You still need tool access to finish key surfaces, and you still need a setup strategy that references stable datums.
Case study: Aerospace brackets via hybrid machining (lightweight internals + precision outer surfaces)
Context: A bracket needed lightweight internal features and precise outer faces for assembly.
Change: Near-net shaping created the internal structure. CNC finishing then produced the outer surfaces and critical interfaces.
Outcome: The approach reduced material waste and met tight internal/outer geometry needs, with reported tolerance outcomes in the ±10–20 μm range for complex internals (single-source claim).
The DfM takeaway is to separate surfaces into two groups early: surfaces you can “grow” near-net, and surfaces you must “cut” with stable tool access and inspection paths.
Sustainable machining choices you can design for
Sustainability in machining is often discussed as shop practice, but several levers are set by design. Designs that need fewer cnc machine setups, larger tools, and shorter cycle time tend to use less energy and produce less scrap. Following a solid cnc design guide helps you balance sustainability, cost, and quality from the start.
Design simplification to cut energy/time (cycle-time reduction via non-critical radii simplification up to 15% claim noted; validate) (reference: industry/technical reports)
Simplifying geometry is one of the most effective advanced design practices to lower cycle time and waste. A small radius forces small tools, which increases toolpath length and reduces feed, directly leading to higher machining costs.
Design simplification usually means:
- increase internal corner radii where function allows
- reduce the number of unique tiny features
- avoid deep narrow pockets that require rest machining
Even if the exact percentage varies, the direction is consistent: simpler geometry tends to reduce machining time and scrap risk.
MQL/dry machining as a design constraint (coolant reduction claims noted; validate) (reference: government/industry sustainability reports)
Minimum quantity lubrication (MQL) and dry machining aim to reduce coolant use. From a design standpoint, low-coolant strategies work best with strong design practices for cnc machining that prioritize chip flow and tool stability.
From a design standpoint, the constraint is that low-coolant strategies need:
- good tool access so chips can evacuate
- geometry that avoids chip packing
- radii and tool engagement that keep cutting stable without heavy cooling
If your design forces deep cavities with poor evacuation, low-coolant machining becomes harder, and you may lose the sustainability benefit.
Design features that support low-coolant strategies (tool access, chip evacuation, radii)
Low-coolant-friendly design aligns with classic DFM and key design considerations for cnc:
- Provide line-of-sight access to deep features so chips can exit.
- Avoid narrow slots that trap chips.
- Use larger radii so larger, stiffer tools can run with stable engagement.
- Reduce setup count, so parts spend less time in handling and rework loops.
These stable machining features also improve performance for cnc milled parts, torneado cnc process components, and parts made on a cnc lathe.
KPI dashboard suggestion (chart): coolant use, power, cycle time, scrap rate (reference: industry reports)
If you want sustainability to be measurable, you need a small set of KPIs tied to design changes. A simple dashboard can connect DfM actions (radii, setups, access) to outcomes (time, scrap, coolant).
Chart: suggested machining sustainability KPI dashboard
| KPI | Unit | Why it links to design for machining |
|---|---|---|
| Coolant use | L or % baseline | Deep pockets and poor access often increase coolant demand |
| Potencia | kWh or % baseline | Longer cycle time and heavy cuts drive energy use |
| Duración del ciclo | min/part | Sensitive to tool size, radii, setup strategy |
| Scrap rate | % | Sensitive to setup count, tolerance stacking, thin-wall deflection |
Use these as trend indicators across revisions. Treat single-run numbers carefully, since tool wear and material lot can shift results.
DFM checklist + decision tools (apply before you send RFQ)
The fastest DfM wins are usually available before the RFQ, while geometry is still flexible. A short checklist helps you catch the repeat offenders: tight corners, deep pockets, too many setups, and tight callouts on non-critical faces.
RFQ Feasibility Risk Flags (Self-Qualification Before Sending)
Use this quick check to identify high-risk designs that may require redesign, multi-axis machining, or special processes — if your design has 3+ of the following features, expect additional engineering/process planning:
- Deep narrow pockets (depth-to-width >4× or depth-to-tool-diameter >3×)
- Tight internal corners (non-standard small radii forcing micro-tools)
- Thin walls/web (below material family minimums, no sacrificial ribs)
- Tight positional tolerances (±2–10 μm) across multiple part faces
- Hard alloys (titanium/Inconel) with complex geometry
- Required setup count >4 (prismatic parts, no multi-axis strategy planned) Key RFQ tip:For high-risk designs, request a detailed process plan from your supplier (not just a quote) — include tool selection, setup strategy, and inspection method to avoid late redesign loops.
One-page design-for-machining checklist (geometry, setups, tolerances, materials, CAD handoff)
One-page checklist (DfM for CNC machining design)
| Categoría | Consulte | Pass criteria (practical) |
|---|---|---|
| Geometría | Internal corners | Fillets increased where function allows; avoid near-sharp corners |
| Geometría | Pockets/cavities | Depth ratios checked (example guidance: ≤3× tool dia, ≤4× width) |
| Geometría | Acceso a las herramientas | Critical faces reachable with short, stiff tools |
| Configuraciones | Feature directions | Features grouped by X/Y/Z where possible |
| Configuraciones | Recuento de configuraciones | Target ≤3–4 setups unless multi-axis strategy is planned |
| Tolerancias | Positional needs | Tight tolerances only on functional features; consider ±2–10 μm as a precision band that may require setup control |
| Acabado | Acabado superficial | Use Ra 0.2–1.6 μm targets only where needed; avoid blanket fine finishes |
| Materiales | Riesgo de mecanizado | Hard alloys flagged early; radii and access adjusted (example: ≥3 mm radii in some titanium guidance) |
| CAD handoff | File + notes | STEP + material + tolerance/finish callouts + thread notes |
This checklist is meant to trigger questions early. It does not replace process planning.
Interactive tool idea: “Setup Count & Tool Reach Estimator” (inputs: feature directions, pocket depth/width, tolerance class)
A simple estimator can catch many DfM issues with minimal input:
Setup Count & Tool Reach Estimator (concept concept)
Entradas:
- number of feature directions (X, Y, Z, plus angled directions)
- deepest pocket depth and pocket width (or tool diameter planned)
- tolerance class (example buckets: standard, precision band like ±2–10 μm)
Salidas:
- estimated setup count range (based on feature directions)
- reach risk flag (if depth ratios exceed guidance)
- tolerance risk flag (if tight tolerances span multiple directions/setups)
Even a rough estimator helps buyers and engineers ask better RFQ questions.
Case study: Internal radius simplification to cut cycle time and improve finish (up to 15% noted; validate) (before/after table)
Context: A part had tight internal corners in several pockets. CAM required small tools, many passes, and careful finishing to hit finish targets.
Change: Non-critical internal radii were increased so larger tools could be used.
Outcome: A reported result was cycle time reduction up to 15% and improved finish stability (single-source claim). The mechanism is straightforward: larger tools remove material faster and chatter less.
Before/after table (conceptual)
| Artículo | Antes de | En |
|---|---|---|
| Internal corner radius | Very small (forced small cutter) | Increased where non-critical |
| Herramientas | Small diameter, low rigidity | Larger diameter, higher rigidity |
| Toolpath | Many rest-finishing passes | Fewer passes, simpler strategy |
| Resultado | Long cycle time, finish risk | Shorter cycle time, more stable finish |
This is a good example of why “pretty CAD” can be expensive CAD. Small aesthetic radii can dominate machining time.
Quick summary: best-practice defaults (radii, cavity depth, setups, tolerance/finish targets) (reference: standards/technical guides)
Best-practice defaults are starting points, not rules. Still, teams work faster when they share a baseline. Based on the provided technical guidance ranges:
- Prefer larger internal radii where function allows standard tooling fits.
- For pockets/cavities, check depth ratios early (example guidance: depth ≤ 3× tool diameter and depth ≤ 4× width).
- Plan features around principal axes and aim for ≤3–4 setups, unless multi-axis is selected to reduce setups.
- Treat ±2–10 μm positional as a precision band that often needs setup discipline and short tool reach.
- Use Ra 0.2–1.6 μm finish targets selectively, since finer finishes tend to cost time.
Design for machining works best when these defaults are discussed before drawings are “done,” because the cheapest changes are usually radii, access, and feature orientation.
A useful decision logic is: first control setups and tool rigidity, then apply tight tolerances and finishes only where function requires them. If the design needs deep features, tight corners, and many directions at once, consider whether multi-axis or hybrid methods are part of the intent, and design the datums and inspection access to match.
Preguntas frecuentes
When designing for CNC machining, it’s important to keep features aligned to the principal directions—X, Y, and Z. This minimizes the need for multiple setups and ensures better access for standard CNC machining tools. Use internal fillets that match common CNC threading tools to ensure that tools fit and move smoothly. Avoid designing deep, narrow pockets that require long, slender tools, as these can lead to tool deflection and vibration. Additionally, try to group features on fewer faces to reduce setup time and improve efficiency. Lastly, apply tight tolerances and fine finishes only to the functional surfaces of the part, as this reduces unnecessary machining time for non-critical areas. This approach helps optimize your part design, ensuring quicker prototypes and smoother production of parts with complex geometries.
Design for Manufacturability (DFM) is crucial because it bridges the gap between a CAD model’s idealistic vision and what the machining process can actually produce. By considering design considerations for CNC machining early on, DFM reduces the need for extra setups, custom tooling, and rework loops. It also minimizes the burden of inspection by placing tight tolerances only where they are absolutely necessary. Ultimately, this reduces both the production time and costs, helping engineers and manufacturers optimize part design to ensure production parts are made accurately and efficiently. In addition, DFM is particularly important when working with multi-axis CNC machines, as it ensures that parts are produced in a way that maximizes the capabilities of advanced machinery like 5-axis CNC machining.
The maximum depth of a CNC hole varies depending on the machine and material being used. However, deeper holes increase the risk of tool deflection and chip control issues, often requiring special drilling cycles. When dealing with CNC threading or milling operations, reach limits for tools behave similarly to pocket depth limits, meaning that deep features should be flagged early in the design phase to avoid potential machining challenges. For plastic parts or softer materials, you might achieve greater depths, but for metals or hard alloys, depth should be carefully considered to prevent tool wear and increase machining time. It’s always best to optimize file formats for CNC machining early to ensure that your machine can handle the depths required by the design.
To minimize the risk of tool breakage during CNC machining, avoid designing features that require very small or long-reach tools, such as tight internal corners and deep narrow cavities. If your part has intricate features, multi-axis CNC machines like 5-axis CNC machining can provide better access to hard-to-reach areas without requiring long, slender tools. Another way to improve tool longevity is by increasing internal radii, allowing for the use of larger, stiffer tools. Additionally, ensuring that chip flow and coolant access are optimized will help prevent clogging and heat buildup. Finally, minimizing the number of setups and re-clamping points is essential, as each additional setup increases the likelihood of errors and tool overload, which can lead to breakage. In short, great design and manufacturing considerations will ensure a smooth machining process and production parts that last.
There isn’t a one-size-fits-all answer for the ideal radius of internal corners, but in most cases, larger radii are preferable. They allow for the use of larger, stiffer tools, which in turn leads to more stable machining and fewer tool changes. If you can align your corner fillets with standard CNC threading tools and other common tools, you’ll significantly reduce cycle time and improve the surface finish. For harder materials, such as metals, some guidelines recommend internal radii ≥3 mm, but this can vary based on the material and the specific machining process. By optimizing the internal corner radius, you can not only avoid potential tool issues but also ensure smoother 5-axis CNC machining operations. This is especially true for parts with complex geometries, where maintaining tool access is key to successful CNC machining.
The key to preventing tool breakage with design is to reduce unnecessary stress on your tools. First, avoid tiny internal corners—use larger fillets that fit standard tools, so you don’t have to use small, fragile ones. Also, control pocket and hole depths: don’t make them too deep relative to their width or tool diameter, as long-reach tools vibrate and break easily. Ensure good tool access to avoid chip buildup, which traps heat and damages tools. For features like threads, use proper cnc threading tools and limit thread depth for small diameters. Finally, avoid thin walls that deflect during cutting, as this puts extra strain on tools. These simple design tweaks keep tools stable, reduce wear, and prevent breakage without sacrificing part function.